Lacava 4500G User Manual
Page 4
LACAVA LLC
®
Page 4 of 7
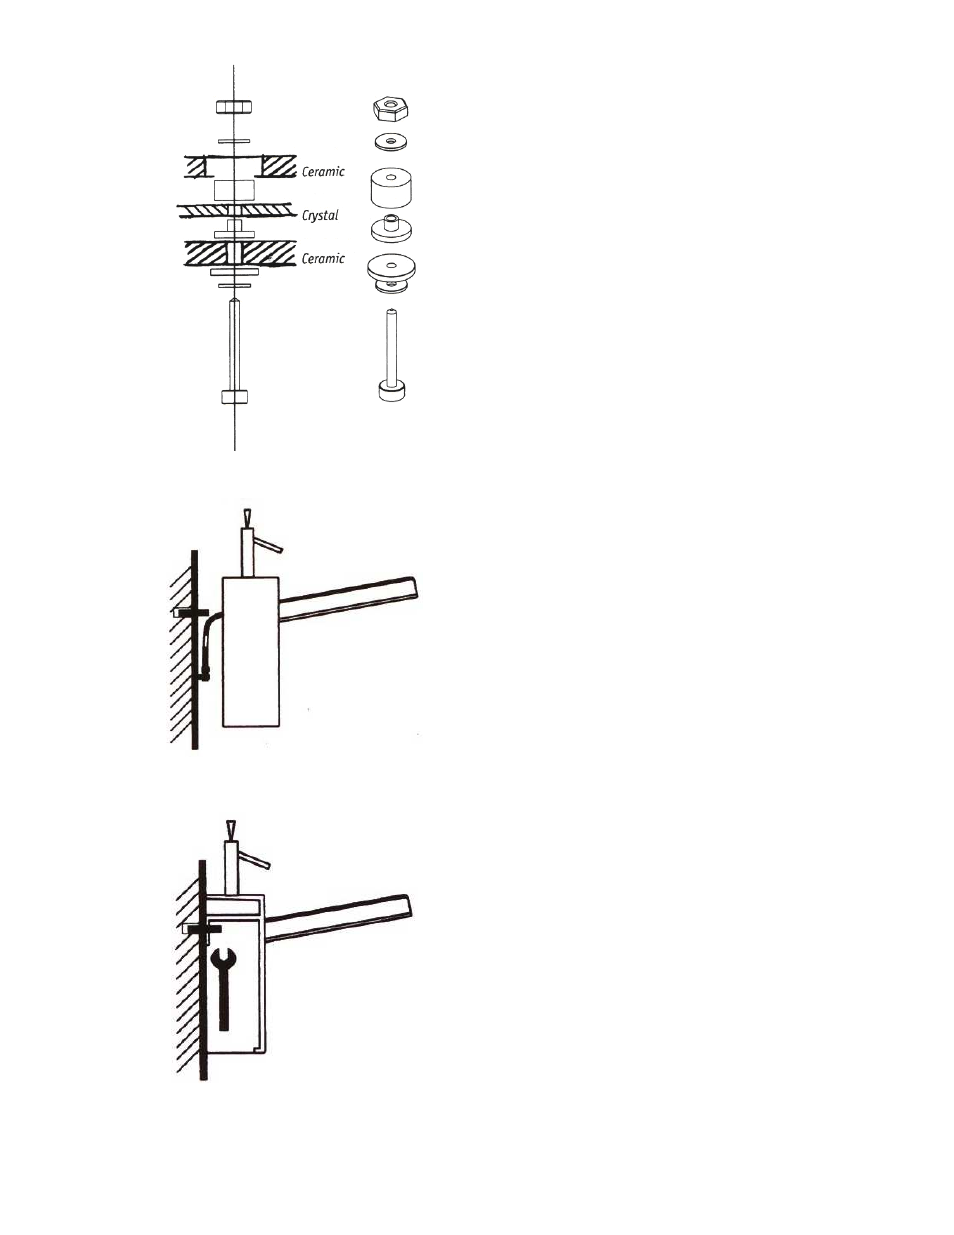
10. Install the glass mounting
hardware in the order shown in
the diagram to the left. From the
bottom: metal washer, plastic
washer, lower ceramic mounting
hole, plastic washer with insert
facing upwards through glass,
glass mounting hole, thick plastic
washer, upper ceramic mounting
hole, metal washer, then locking
nut The mounting bolt should go
through both layers of porcelain
and the glass (three total
mounting holes).
11. Tighten the locking nut so that
the glass is fully secure. Note: Do
not over tighten, as this may
cause damage to the porcelain.
12. Repeat steps 10-11 for second
mounting hole.
13. Install the faucet assembly onto
the sink and connect the supply
lines to the water supply.
14. Place the sink onto the mounting
bolts, making sure that the sink is
positioned properly and
completely level.
15. Place the plastic sleeve onto the
mounting bolt first in order to
protect the porcelain. Then slide
on the metal washer followed by
the locking nut. Tighten the nut
so that the sink is secure against
the wall.
16. Again make sure that the sink is
level and then repeat step 14 for
the second mounting bolt.