Concrete finishing – Legrand VA Trenchduct Flush Floor Feeder System User Manual
Page 4
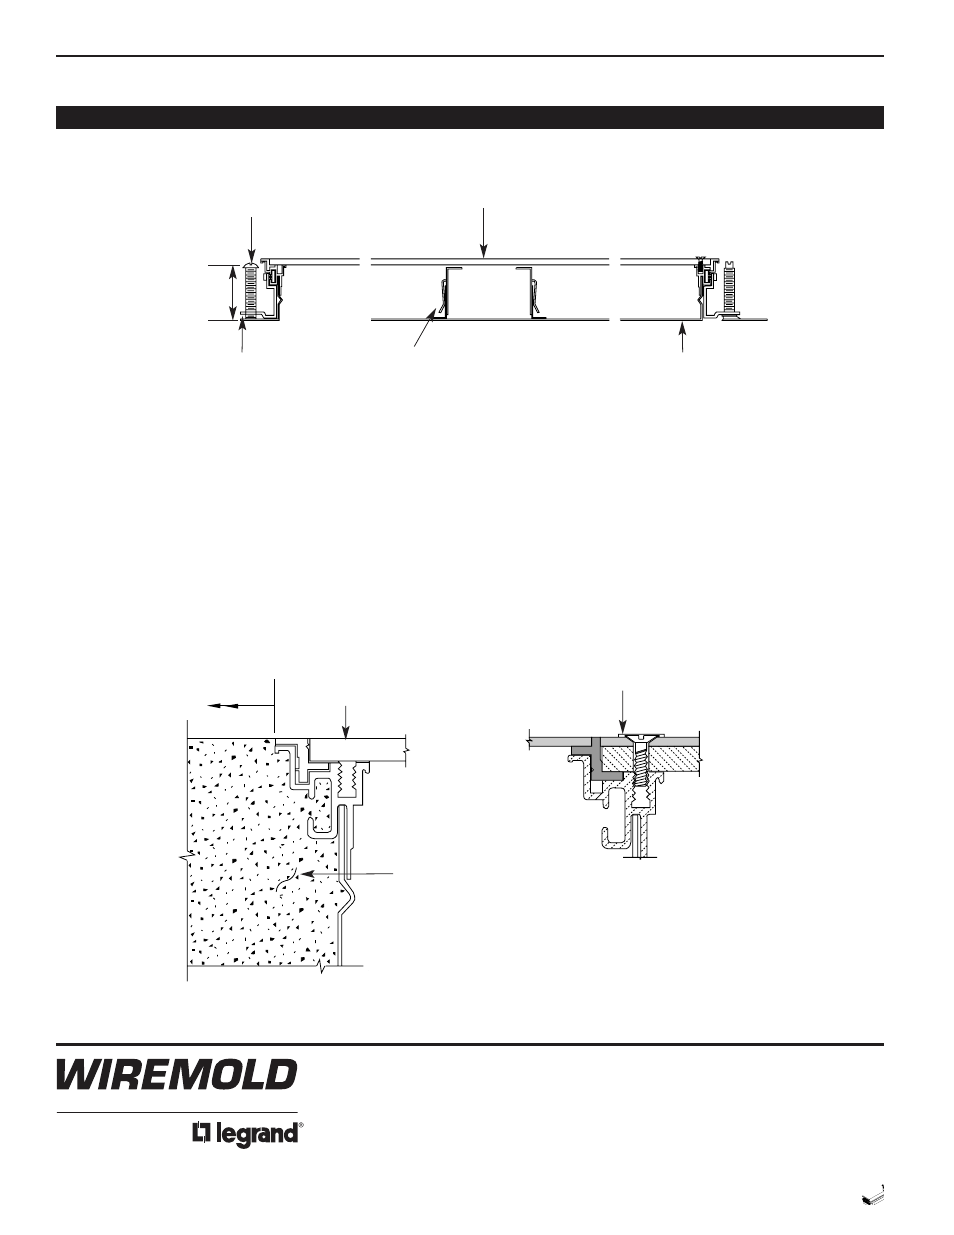
Concrete Finishing:
BOTTOMLESS AND FULL BOTTOM VA TRENCH
Figure 1 – Section Thru Trench
Figure 2 – Concrete Finish
Step 3
Depth of Pour
Void Closures as Required –
(Shipped Separately)
Compartments as Required –
(Shipped Separately)
Bottom Required for
Power Cables
Cover Plate as Required
Leveling Screw (Only use when
Adjustments to Screed is Required
and after Trench is Fastened ).
Figure 3 – Tile Finish
Escutcheon
Steps 5 and 6
Step 4
Top of Trenchduct
© Copyright 2006 Wiremold / Legrand All Rights Reserved
Wiremold / Legrand
U.S. and International:
60 Woodlawn Street • West Hartford, CT 06110
1-800-621-0049 • FAX 860-232-2062 • Outside U.S.: 860-233-6251
Canada:
570 Applewood Crescent • Vaughan, Ontario L4K 4B4
1-800-723-5175 • FAX 905-738-9721
IY0072 R2 0406
1. Trench installer shall set top of trenchduct level with concrete screed line. Concrete installer must maintain top of finished
floor level with top of trenchduct.
2. Make all height adjustments prior to concrete pour. If ponding or other problems are encountered before or during the
concrete pour, re-adjustment shall be made as determined by the general contractor in order to maintain a level floor.
3. See Section 6a for Concrete Placement.
4. Concrete installer to hand trowel concrete level with top of trenchduct a minimum of 18" [457mm] along both sides
of trenchduct.
5. If floor is to have 1/8" [3.2mm] thick tile, tile installer shall remove and prepare covers to receive tile. After tile is installed,
drill and countersink covers to fit hold-down screw escutcheons.
6. Just prior to replacing tiled covers, remove trim and install as shown in Figure 3. Interchange outside mitered trim on flat
ells with inside mitered trim. Replace covers and complete balance of floor tile installations.