Installation caution – Legrand CS Series 360° PIR User Manual
Page 4
Visit our website at www.passandseymour.com
INSTALLATION
CAUTION
TURN POWER OFF AT CIRCUIT BREAKER BEFORE INSTALLING SENSOR
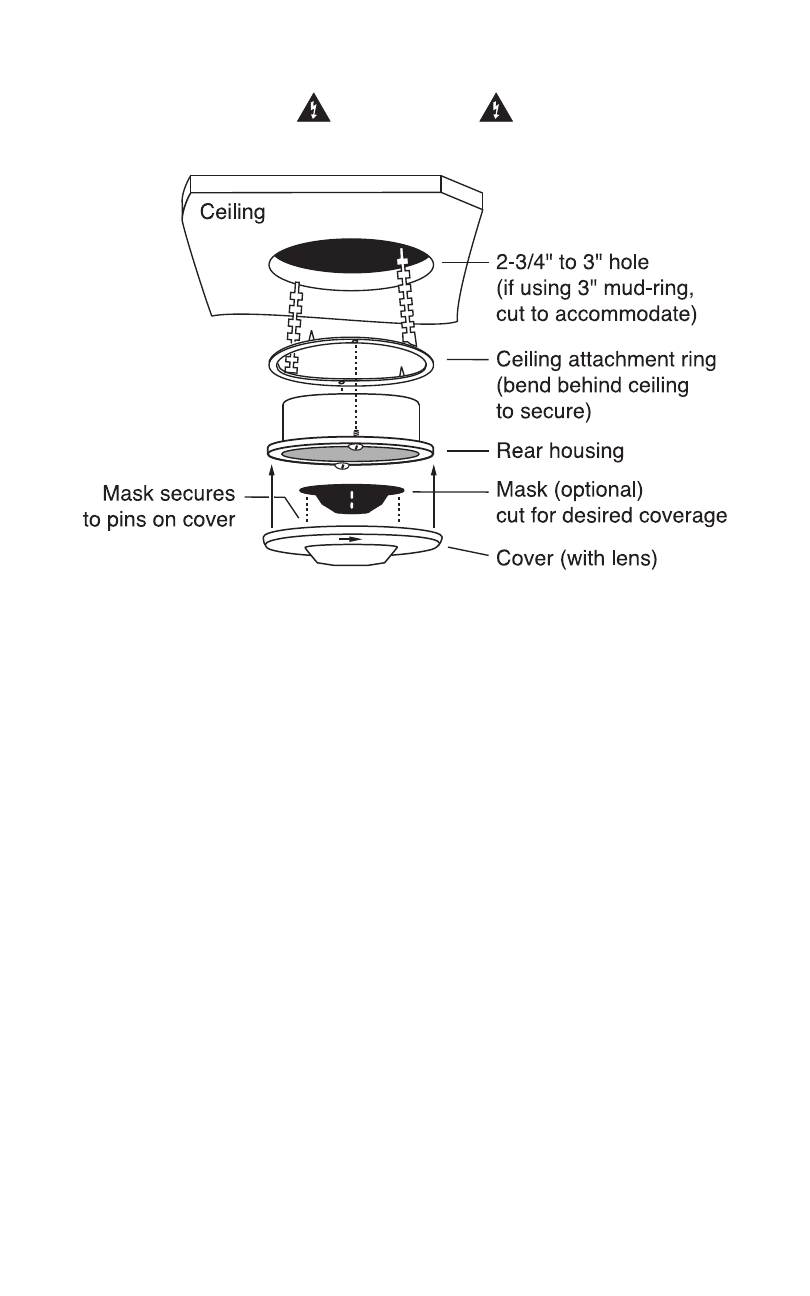
A 4-S junction box can be used with a 3" mud-ring when local building codes
mandate that low voltage connections be contained in a junction box.
Otherwise a 3" mud-ring or the provided ceiling attachment ring can be used.
IMPORTANT: If the lens will be masked, the junction box or mud-ring may
need to be positioned so that the mask is oriented properly when the sensor
is installed (see Masking).
Cut a hole in the ceiling tile—if using a:
• Ceiling attachment ring (provided)—cut about 2-3/4" to 3" in diameter.
• 3" mud-ring—cut the hole to accommodate.
To assemble the sensor:
1. If using the ceiling attachment ring, bend the securing straps up so the
sensor housing can be inserted, and attach it to the sensor with the
provided screws.
2. Attach the mask, if using, into the lens recess and onto the securing pins
of the cover.
3. Attach the cover to the rear housing—align tabs on inside of cover to
notches on outside perimeter of rear housing, place cover on sensor, and
twist clockwise to lock.
4. Insert the assembled sensor into the ceiling hole, and if using the mask,
turn the sensor so that the unmasked part of the lens is toward and
centered on the area to be covered.
5. Bend the ceiling attachment ring straps behind the hole to secure (or
attach sensor to mud-ring with screws).