Installation – Legrand CSU Series 32 kHz User Manual
Page 4
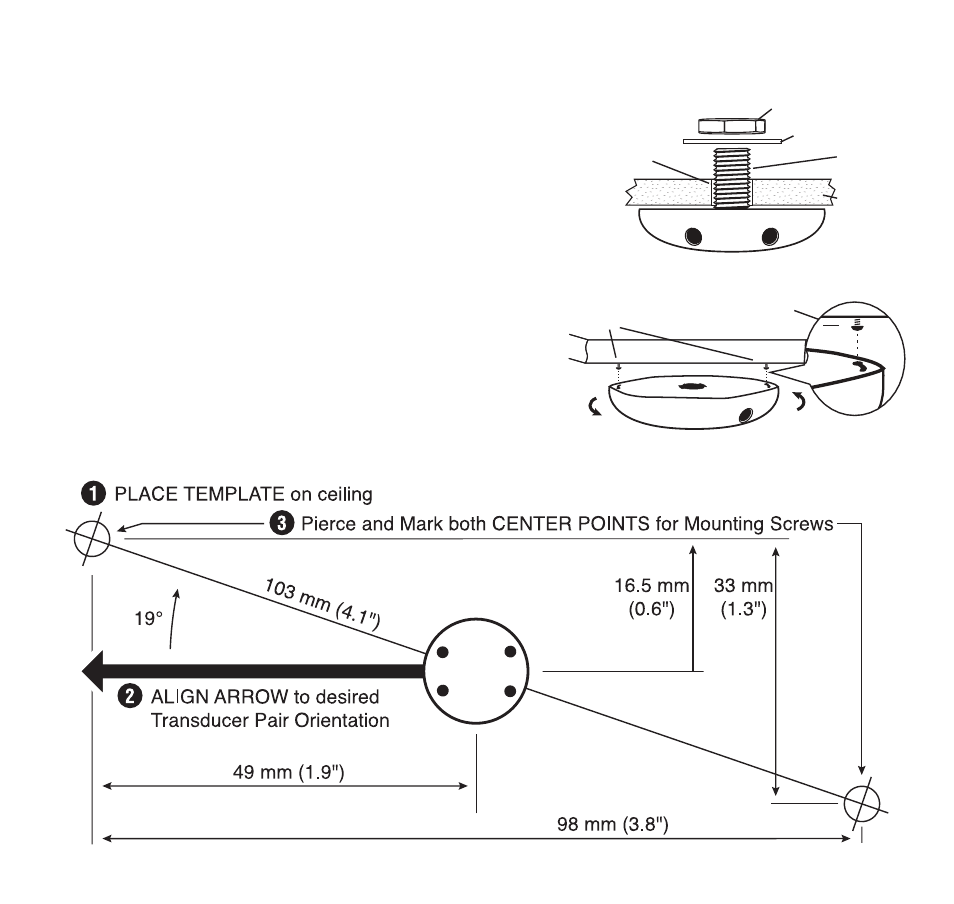
Nut
Washer
Threaded
Insert
7/8" (22mm)
hole
Ceiling
Tile
Rotate
clockwise
Ceiling
Screws:
103mm (4.1") apart
Space:
3mm/(1/8")
Visit our web site at www.passandseymour.com
INSTALLATION
Note: Always try to attach the sensor to a vibration free surface.
Acoustic Tile Mounting
Install the Threaded Insert, flange side, into the hole on the
back of the sensor and turn clockwise until it locks.
Keyhole Mounting
Positioning of keyhole mounting screws is important so that
the transducer pairs point in the desired direction.
1. Use the template below to mark the location of
mounting screws.
2. Install the provided screws—leaving approximately
3mm (1/8") space from the bottom of the screw head
to the ceiling (see diagram).
3. Place the sensor’s mounting keyholes over screw
heads and rotate sensor clockwise until secured.