MacroSystem Photo-Studio User Manual
Page 12
12
13
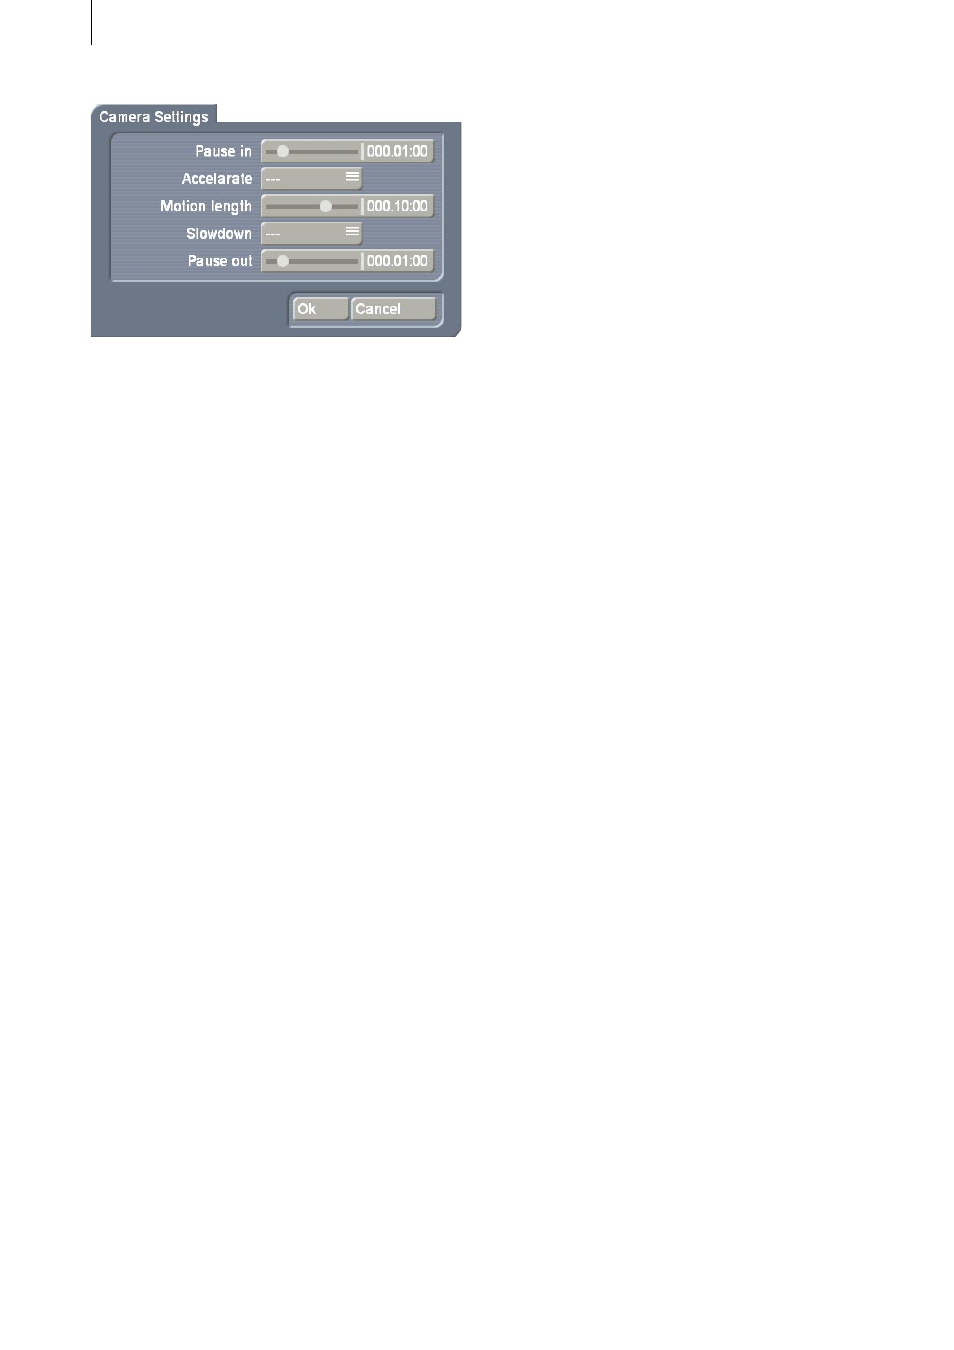
The “Pause in” and “Pause out” buttons
are used to determine how long the camera
will dwell on the detail of your photo at the
beginning and end of the active part of the track.
You can use the “Accelerate” and “Slowdown”
buttons to set how quickly the camera should
accelerate or decelerate between stationary and
movement.. If you select the “---” function, no
setting will be made.
The “Motion length” button determines the time
the camera will require to track from one point
to the next on the active part of the track.
You can also add pivots to your track. Pivots are
used to set the path of a track, e.g. to add an
additional curve. No further adjustments can be
made to pivots. To add a pivot, simply click the
point on the track where you want it to appear.
Then move the trackball until the pivot is in its
desired position and confirm it by clicking “Ok”.
A pivot is deleted by placing the trackball cursor
on it and clicking the right-hand trackball button.
- “Append new”: Clicking this button will add
another point beyond the end point of the track.
The newly-added point will be green and the
most recently active yellow. Every additional
new point will always be added behind the one
most recently active. You will see that the part
of the track behind the green point is shown
as a dotted green line. Add points until you
have created the desired number and place the
individual points wherever you wish, simply by
clicking them and moving them. You will see
that a box is drawn around each new point while
it is active. Of course, you can vary the size of
the box from point to point. If you have created
several tracks, clicking on one point will activate
the part of the track which starts at that point.
- “Remove”: If you want to remove a point,
activate it and then simply click this button. The
point can also be inside the track. Its position is
immaterial.
The next option is “Waypoint” and includes the
following functions:
- “previous” and “next”: By using these two
buttons, it is possible to jump along the track.
The buttons always start from the currently
active point. You can also click these points
directly, as an alternative to using these buttons.
- “Edit”: You can access a new button bar
by clicking on this button. You will see the
current picture content of the active point in the
background.
Click “Position” to determine the position of a
point. Simply move the trackball and confirm
the new position by clicking the left-hand button
To adjust the size, click the “Zoom” button and
move the ball. The factor shown at the edge of
the screen is an aid. The higher the zoom factor,
the larger the display in the box. Please note that
quality declines from a factor >1.
Then exit from the “Edit” menu window by
clicking “Ok”, to assume the settings made.
Click “Cancel” to exit from the menu window
without making any settings.
- “Preview”: By using this button you can
preview the track to make any corrections.
- “Process”: You can make your Casablanca
process the animation here, which may take
some time, depending upon the length of the
camera track.
- “Length”: Here you can read off the length of
the full camera track/animation.
Exit from the “Animation” menu window by
clicking the menu symbol in the lower right-
hand corner. In this case, cancelling with the
right-hand trackball button is not possible, to
prevent accidental cancellation.