Resetting the microprocessor – Marantz SR5005 User Manual
Page 86
80
ENGLISH
DEUTSCH
FRANÇAIS
ITALIANO
ESPAÑOL
NEDERLANDS
SVENSKA
ENGLISH
DEUTSCH
FRANÇAIS
ITALIANO
ESPAÑOL
NEDERLANDS
SVENSKA
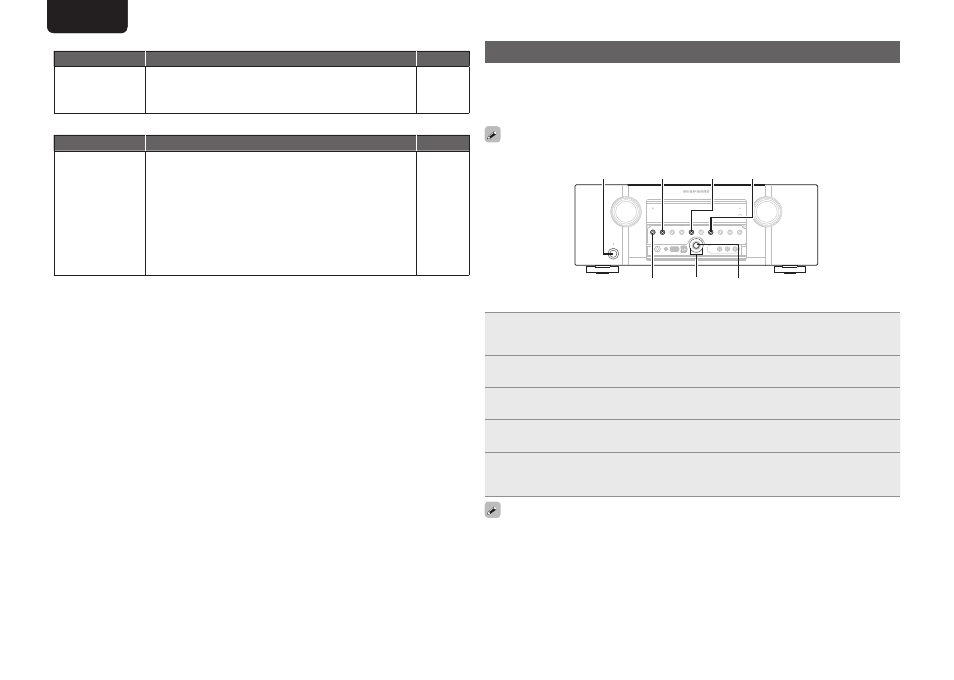
Resetting the microprocessor
Perform this procedure if the display is abnormal or if operations cannot be performed.
When the microprocessor is reset, all the settings are reset to their default values.
Various setting details can be saved and reset on this device. If setting details are saved before returning
to the default values, after returning to the default settings, setting details can be returned to the same
values as before returning to the defaults.
To return all of the settings to the default values, perform steps 2 to 4 without performing step 1.
ENTER
o
p
AUTO
MENU BAND
SURR.
MODE
ON/STANDBY
1
When the power is ON, press and hold
BAND
and
ENTER
for more than 3 seconds.
After “MEMORY SAVING” is shown on the display, “COMPLETE”is shown to inform you that the
settings have been saved.
2
Turn off the power using
ON/STANDBY
.
3
Press
ON/STANDBY
while simultaneously pressing
SURR. MODE
and
AUTO
.
4
Once the display starts flashing at intervals of about 1 second, release the two
buttons.
5
Press and hold
MENU
and
BAND
for more than 3 seconds.
After “MEMORY LOAD” is shown on the display, “COMPLETE” is shown to inform you that the
settings have returned to those saved in step 1.
If in step 4 the display does not flash at intervals of about 1 second, start over from step 2.
G
M-XPortH
Symptom
Cause/Solution
Page
Audio is not output
when a wireless
receiver (RX101 is
connected).
• Check that the Bluetooth device and Wireless receiver (RX101)
are correctly paired.
–
G
Remote control unitH
Symptom
Cause/Solution
Page
The set cannot be
operated with the
remote control unit.
• Batteries are worn out. Replace with new batteries.
• Operate the remote control unit within a distance of about 7 m
from this unit and at an angle of within 30°.
• Remove any obstacle between this unit and the remote control
unit.
• Insert the batteries in the proper direction, checking the q and
w
marks.
• The set’s remote control sensor is exposed to strong light (direct
sunlight, inverter type fluorescent bulb light, etc.). Move the set
to a place in which the remote control sensor will not be exposed
to strong light.
70
70
70
70
70