Warning, Handle installation and removal – Maytag MFX2876DRM User Manual
Page 11
11
4. Install the water supply tube clamp around the water supply
line to reduce strain on the coupling.
5. Turn shutoff valve ON.
6. Check for leaks. Tighten any connections (including
connections at the valve) or nuts that leak.
7. On some models, the ice maker is equipped with a built-in
water strainer. If your water conditions require a second water
strainer, install it in the
¹⁄₄" (6.35 mm) water line at either tube
connection. Obtain a water strainer from your appliance
dealer.
Complete the Installation
1. Plug into a grounded 3 prong outlet.
2. Flush the water system. See “Water and Ice Dispensers.”
NOTE: Allow 24 hours to produce the first batch of ice. Discard
the first three batches of ice produced. Allow 3 days to
completely fill the ice storage bin.
Handle Installation and Removal
Parts Included: Refrigerator door handles (2), Refrigerator
drawer handle (1), Freezer drawer handle (1),
¹⁄₈" hex key, spare
setscrew(s)
NOTE: Handle style may vary by model.
Install Handles
Refrigerator Doors
NOTE: Handle mounting setscrews are preinstalled inside the
handle.
1. Remove the handles from the packaging inside the
refrigerator, and place them on a soft surface.
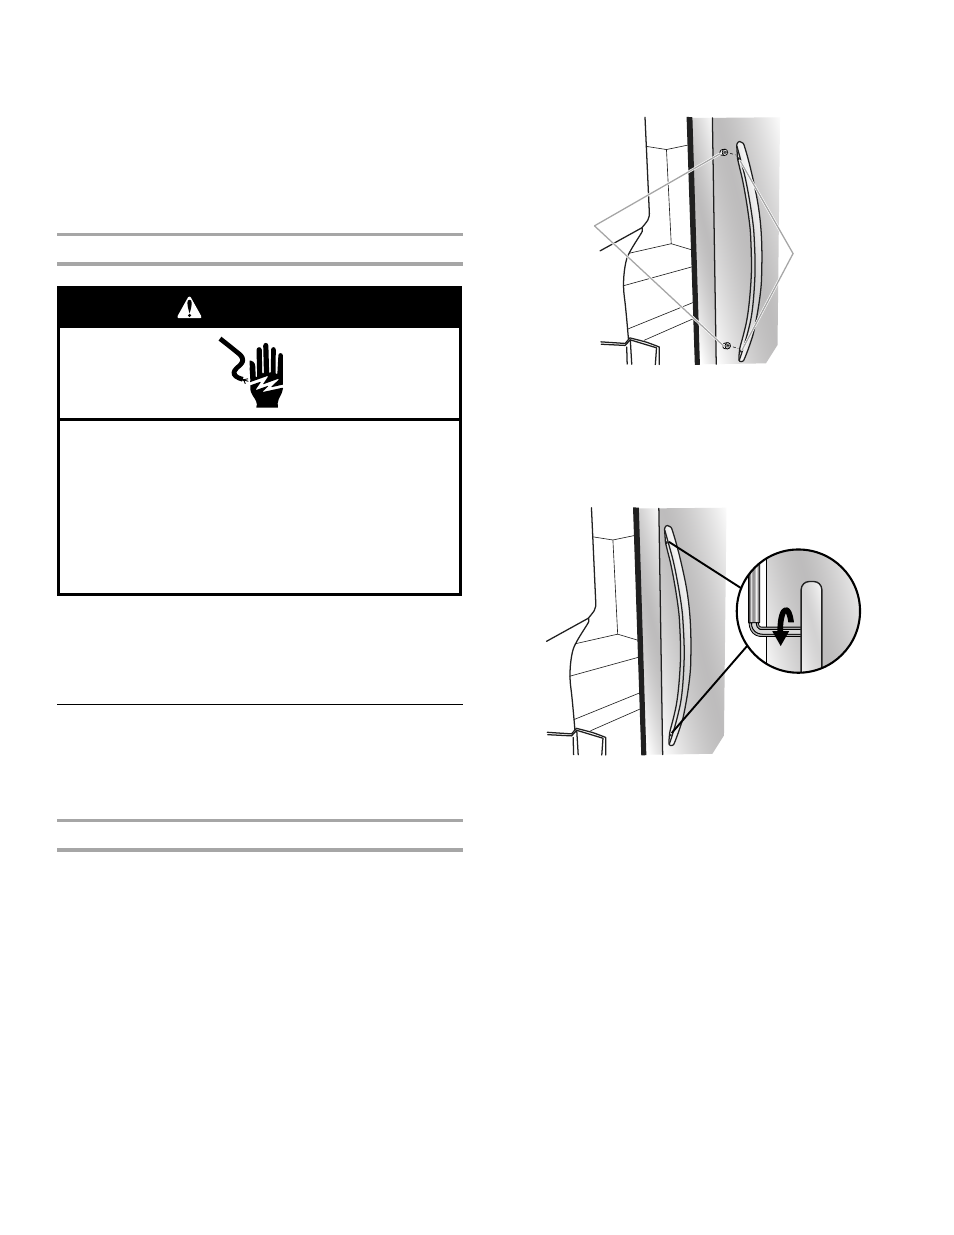
2. Open a refrigerator compartment door. On the closed door,
place a handle onto the shoulder screws so that the
setscrews are facing the adjacent door.
3. Firmly push the handle toward the door until the handle base
is flush against the door.
4. While holding the handle, insert the short end of the hex key
into the upper hole and slightly rotate the hex key until it is
engaged in the setscrew.
5. Using a clockwise motion tighten the setscrew just until it
begins to contact the shoulder screw. Do not fully tighten.
6. Repeat steps 4 and 5 to fasten the lower setscrew.
7. Once both setscrews have been partially tightened as
instructed in the previous steps, fully tighten both setscrews.
IMPORTANT: When the screws feel tight, tighten them an
additional quarter-turn. The handle is not properly installed
without this extra tightening.
8. Repeat steps 2 through 7 to install the other handle onto the
adjacent refrigerator door.
Electrical Shock Hazard
Plug into a grounded 3 prong outlet.
Do not remove ground prong.
Do not use an adapter.
Do not use an extension cord.
Failure to follow these instructions can result in death,
fire, or electrical shock.
WARNING
A. Shoulder screws
B. Setscrews inside the handle
A
B