Door features, Glass freezer shelf, Door rails – Maytag WRT371SZBF User Manual
Page 17: Door bins, Utility compartment and can caddy
17
2. Replace the shelf by inserting the left-hand end all the way
into the shelf supports. Then, lower the right-hand end of the
shelf and insert it into the shelf supports.
NOTE: The shelf should lower slightly and lock into place. If the
shelf does not appear stable, make sure both ends of the shelf are
inserted into the shelf supports.
Glass Freezer Shelf
(on some models)
To remove and replace a glass shelf:
1. Lift the front of the shelf to raise the shelf tabs up and out of
the opening in each shelf track. Slide the shelf out the rest of
the way.
2. Replace the shelf by tilting the back end downward to align
the back shelf tab under the track on each side of the freezer.
Gently push the shelf into the freezer until the two center shelf
tabs are positioned within the opening in each track. Lower
the shelf to rest on the shelf tracks.
Frozen Food Storage Guide
Storage times will vary according to the quality and type of food,
the type of packaging or wrap used (should be airtight and
moisture-proof), and the storage temperature. Seal the package
or container securely to avoid taste and odor transfer throughout
the product. Ice crystals inside a sealed package are normal. This
simply means that moisture in the food and air inside the package
have condensed, creating ice crystals.
Put no more unfrozen food into the freezer than will freeze within
24 hours (no more than 2 to 3 lbs of food per cubic foot [907 to
1,350 g per L] of freezer space). Leave enough space in the
freezer for air to circulate around packages. The freezer door must
close tightly.
NOTE: For more information on preparing food for freezing, check
a freezer guide or reliable cookbook.
DOOR FEATURES
Your model may have some or all of these features.
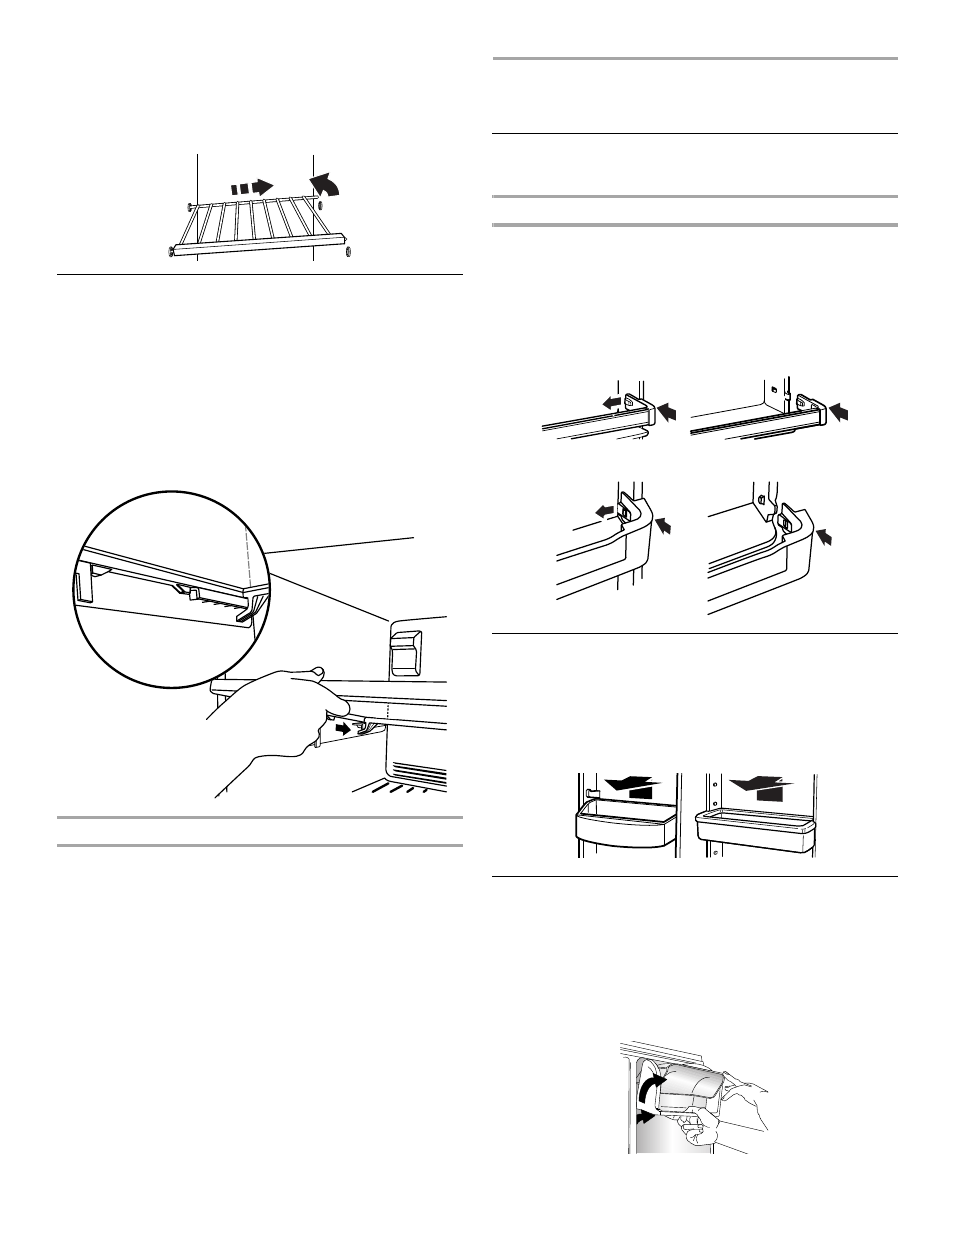
Door Rails
The door rails may be removed for easier cleaning.
Snap on Door Rails (on some models)
To remove and replace the rails:
1. Remove the door rails by pushing in slightly on the front of one
end of the bracket while pulling out on the inside tab. Repeat
these steps for the other end.
2. Replace the rails by aligning the ends of the brackets with the
buttons on the sides of the door liner. Firmly snap bracket and
assembly onto the tabs above the shelf as shown.
Style 1 - Door Rails
Style 2 - Trivets
Door Bins
(on some models)
To remove and replace the racks/bins:
1. Remove the rack/bin by lifting it and pulling it straight out.
2. Replace the rack/bin by sliding it in above the desired support
and pushing it down until it stops.
Utility Compartment and Can Caddy
(on some models)
To remove and replace the utility compartment:
1. Remove the utility compartment by raising and holding the
cover up while lifting the utility compartment up and pulling it
straight out.
2. Replace the utility compartment by sliding it in above the
desired support and pushing it down until it stops.