Warning – Maytag MFT2771XEB User Manual
Page 11
11
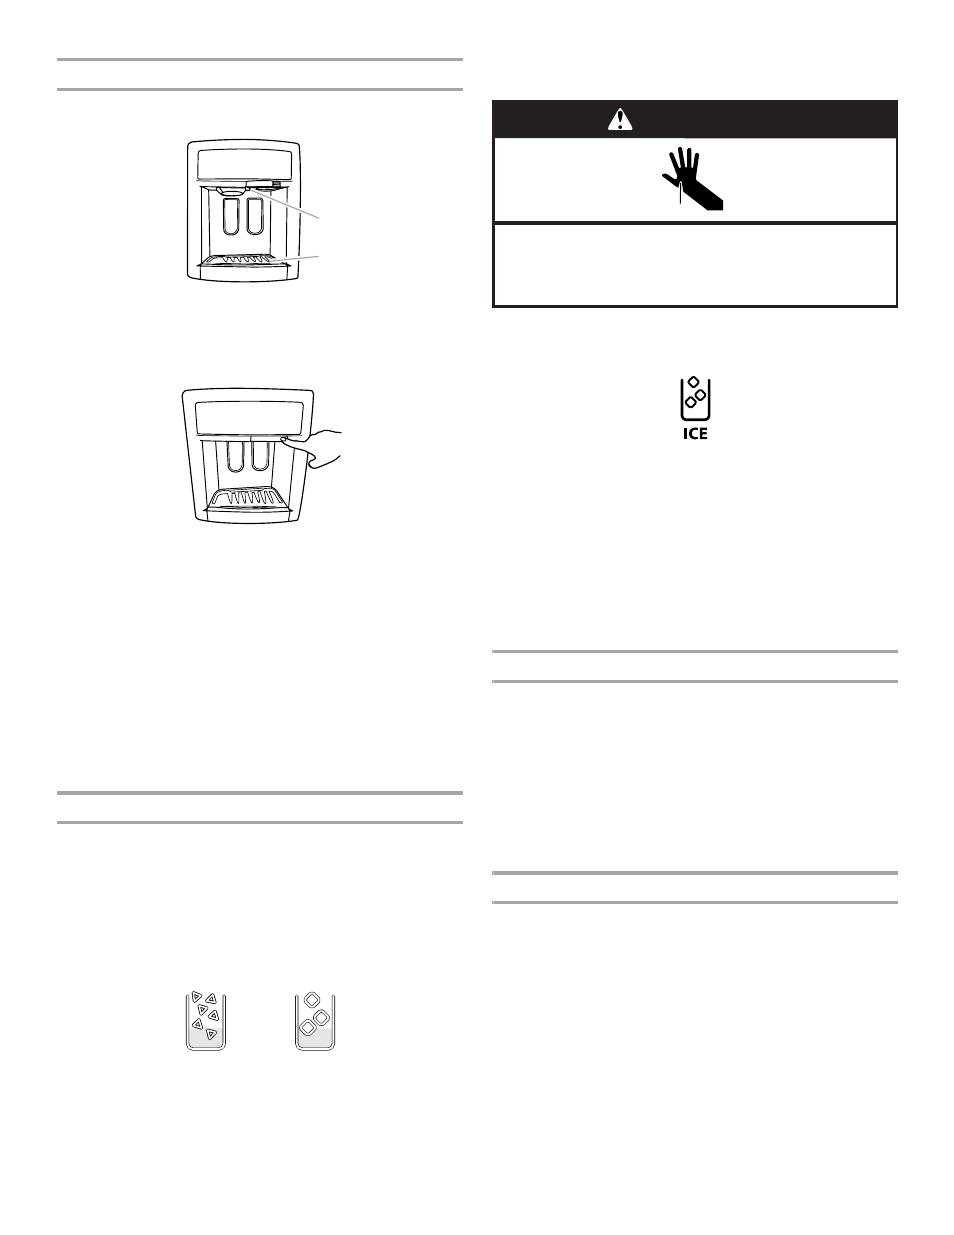
Rotating Faucet and Pull-out Tray (on some models)
Your dispenser may include a rotating water faucet and a small
pull-out tray at the bottom of the dispenser.
■
The faucet rotates to the center to allow for easy dispensing
into large containers. To rotate it, push in on the right-hand
side of the faucet as shown.
Push in on the left-hand side to rotate the faucet back into
place.
NOTE: When using the dispenser with the faucet rotated, do
not use the water dispenser pad. Only use the water
dispenser button to dispense. Dispensing by pressing the
container against the water dispenser pad may result in
unintentional spilling.
■
The tray can be pulled out a bit in order to better support
large containers. It is designed to catch small spills and allow
for easy cleaning. There is no drain in the tray.
NOTE: The tray can be removed from the dispenser and
carried to the sink to be emptied or cleaned. Pull the tray out
until it hits the stop, then gently lift up on the back of the tray
and slide it out the rest of the way.
The Ice Dispenser
Ice dispenses from the ice maker storage bin in the freezer when
the dispenser pad is pressed. The dispensing system will not
operate when the refrigerator door is open. To turn off the ice
maker, see “Ice Maker and Storage Bin.”
Your ice maker can produce crushed and cubed ice. Before
dispensing ice, press ICE on the display screen to select which
type of ice you would like to dispense.
The display screen indicates which type of ice is selected.
For crushed ice, cubes are crushed before being dispensed. This
may cause a slight delay when dispensing crushed ice. Noise
from the ice crusher is normal, and pieces of ice may vary in size.
When changing from crushed to cubed, a few ounces of crushed
ice will be dispensed along with the first cubes.
To Dispense Ice:
1. Select the desired type of ice.
2. Press a sturdy glass against the ice dispenser pad OR place
the glass below the ice dispenser and press the ice dispenser
button.
Hold the glass close to the dispenser opening so ice does not
fall outside of the glass.
IMPORTANT: You do not need to apply a lot of pressure to
the pad or button in order to activate the ice dispenser.
Pressing hard will not make the ice dispense faster or in
greater quantities.
3. Remove the glass OR release the button to stop dispensing.
NOTE: Ice may continue to dispense for up to 10 seconds
after removing the glass from the pad or releasing the button.
The dispenser may continue to make noise for a few seconds
after dispensing.
The Dispenser Light
When you use the dispenser, the light will automatically turn on.
If you want the light to be on continuously, press LIGHT on the
display screen to toggle between the ON and OFF settings. The
display screen indicates which mode is selected.
ON: The dispenser light will remain on at a consistent brightness.
OFF: The dispenser light will remain off except when dispensing
water or ice.
The dispenser lights are LEDs that cannot be changed. If it
appears that your dispenser lights are not working, see
“Troubleshooting” for more information.
The Dispenser Lock
The dispenser can be turned off for easy cleaning or to avoid
unintentional dispensing by small children and pets.
NOTE: The lock feature does not shut off power to the
refrigerator, to the ice maker, or to the dispenser light. It simply
deactivates the dispenser controls and levers. To turn off the ice
maker, see “Ice Maker and Storage Bin.”
■
To lock the dispenser, press OPTIONS, then LOCK, then YES.
The display screen will confirm when the dispenser is locked.
■
To unlock the dispenser, press OPTIONS, then LOCK, then
YES. The display screen will confirm when the dispenser is
unlocked.
A. Faucet rotated
B. Pull-out tray
CRUSHED
CUBED
A
B
Cut Hazard
Use a sturdy glass when dispensing ice.
Failure to do so can result in cuts.
WARNING