Step 4 - configure computer network settings, Step 5 - configure & test the system, Step 6 - connect data acquisition signal lines – Measurement Computing DaqScan 2000 Series User Manual
Page 10
Step 4 - Configure Computer Network Settings
Note: We recommend that you discuss this procedure with your Network Administrator before proceeding.
1. Open the Control Panel by navigating from the Windows Desktop as follows:
Start Menu
⇒ Settings ⇒ Control Panel.
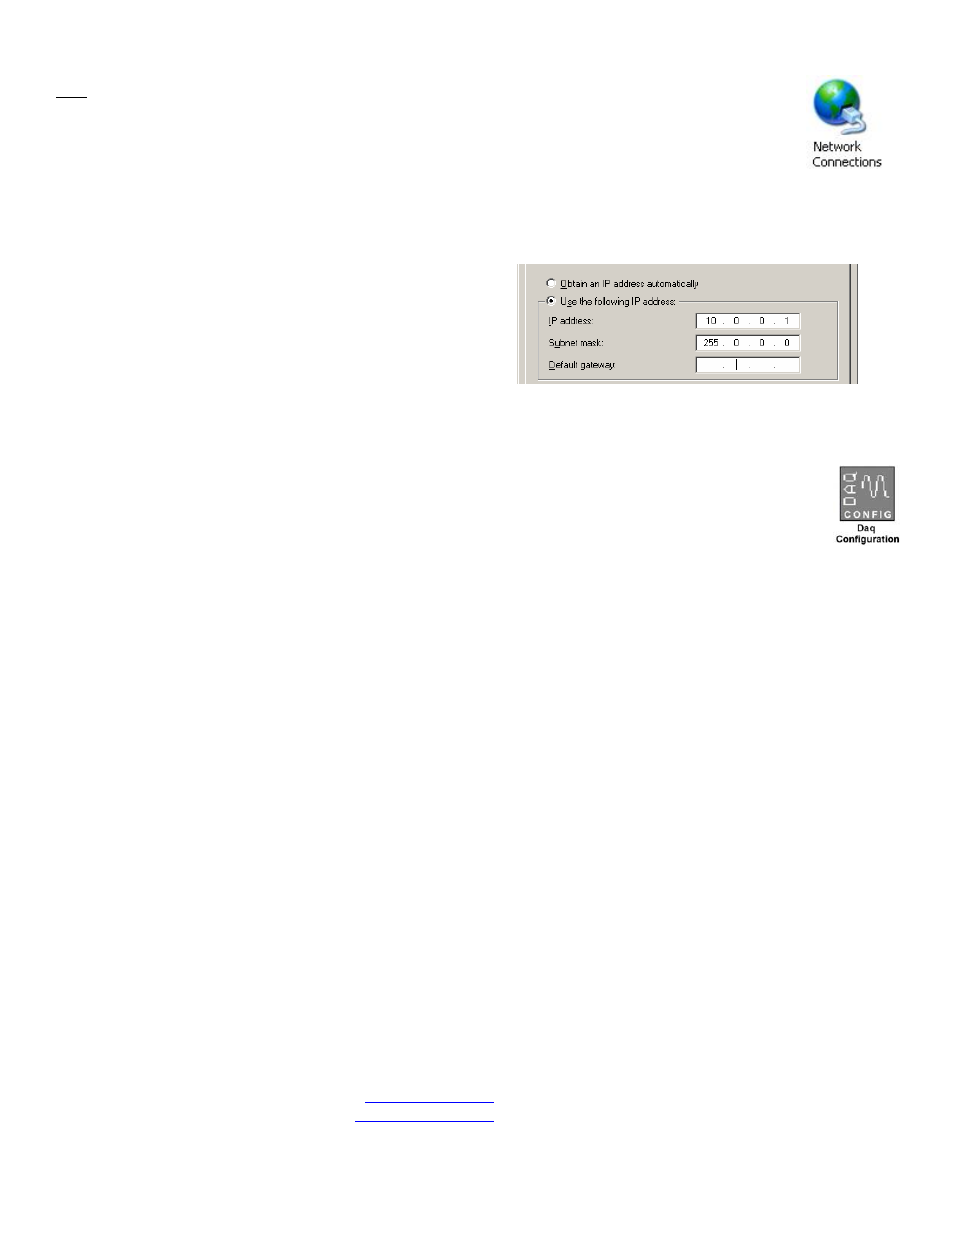
2. Double-click the “Network Connections” icon.
3. Double-click the icon for the network that the 2000 Series device is connected to.
4. In the “Local Area Connection Status” box, click on the <Properties> button. The “Local Area Connection
Properties” box will appear.
5. Double-click the “Internet Protocol (TCP/IP)” component. The “Internet Protocol (TCP/IP) Properties” box
will appear.
6. Select the “Use the following IP Address” radio
button. (See figure at left).
7.
Set the IP address field to 10.0.0.x
where x is some number from 1 to 254.
Make sure that each computer and each device on
the dedicated network has a unique IP address.
8. Set the Subnet mask to 255.0.0.0. Note that the
remaining fields can be left as is. Click <OK>.
9. Click <OK> on follow-up screens to exit.
Internet Protocol (TCP/IP) Properties
(Partial View)
Step 5 - Configure & Test the System
1. Open the Daq Configuration Applet.
a. Navigate from the Windows’ Desktop: Start Menu
⇒ Settings ⇒ Control Panel
b. From the Control Panel, double-click the Daq Configuration icon.
2. Add the 2000 Series Device to the list of installed devices.
a. Select the Computer image in the Device Inventory configuration tree.
b. Click the <Add Device> button. The “Select Device Type” box will appear.
c. Select the DaqScan/2000 Series device from the list of devices.
d. Click the <OK> button. The “Properties” box will appear for the selected device.
e. Enter the Serial Number of the device. The number is on the MAC label (rear panel, upper left). The
serial number is located just below a barcode.
f.
Select the “Auto IP Setting” radio button. The IP Address of the device will automatically be
calculated and displayed in the IP Address field
g. Click the <OK> button.
3. Test the system connections.
a. Make sure the device has been properly installed and is powered-on.
b. Make sure all cables are properly and securely connected.
c. Click the “Test Hardware” tab.
d. Click the <TCP/IP Test> button. This tests the Transmission Control Protocol / Internet Protocol.
e.
Upon completion of the TCP/IP test, click the <Resource Test> button.
When testing, if the unit does not respond within 30 seconds perform the following steps:
1) reboot the system, 2) upon power-up, re-open the Daq Configuration applet, 3)select another
configuration setting, 4) reinitiate the test.
Step 6 - Connect Data Acquisition Signal Lines
Prior to making signal connections review the Specifications chapter of your user’s manual to ensure that your
intended signal inputs do not exceed the specified limits. The manual is included in PDF format on your CD.
*324633A-01*
324633A-01
Printed in Hungary
Measurement Computing
10 Commerce Way
Norton, MA 02766
(508) 946-5100
Fax: (508) 946-9500
www.mccdaq.com