Operation – MMD Equipment 185S-6C1 User Manual
Page 37
4. Operation
4-19
Purging mode operation is already arranged prior to delivery from factory. Therefore, it is
not necessary to perform any adjustment in usual case.
For adjustment of VR1, VR2 and VR3, follow the under-mentioned procedures.
For adjusting set value with knob, turning the knob to left lowers the set value,
while turning the knob to right raises the value.
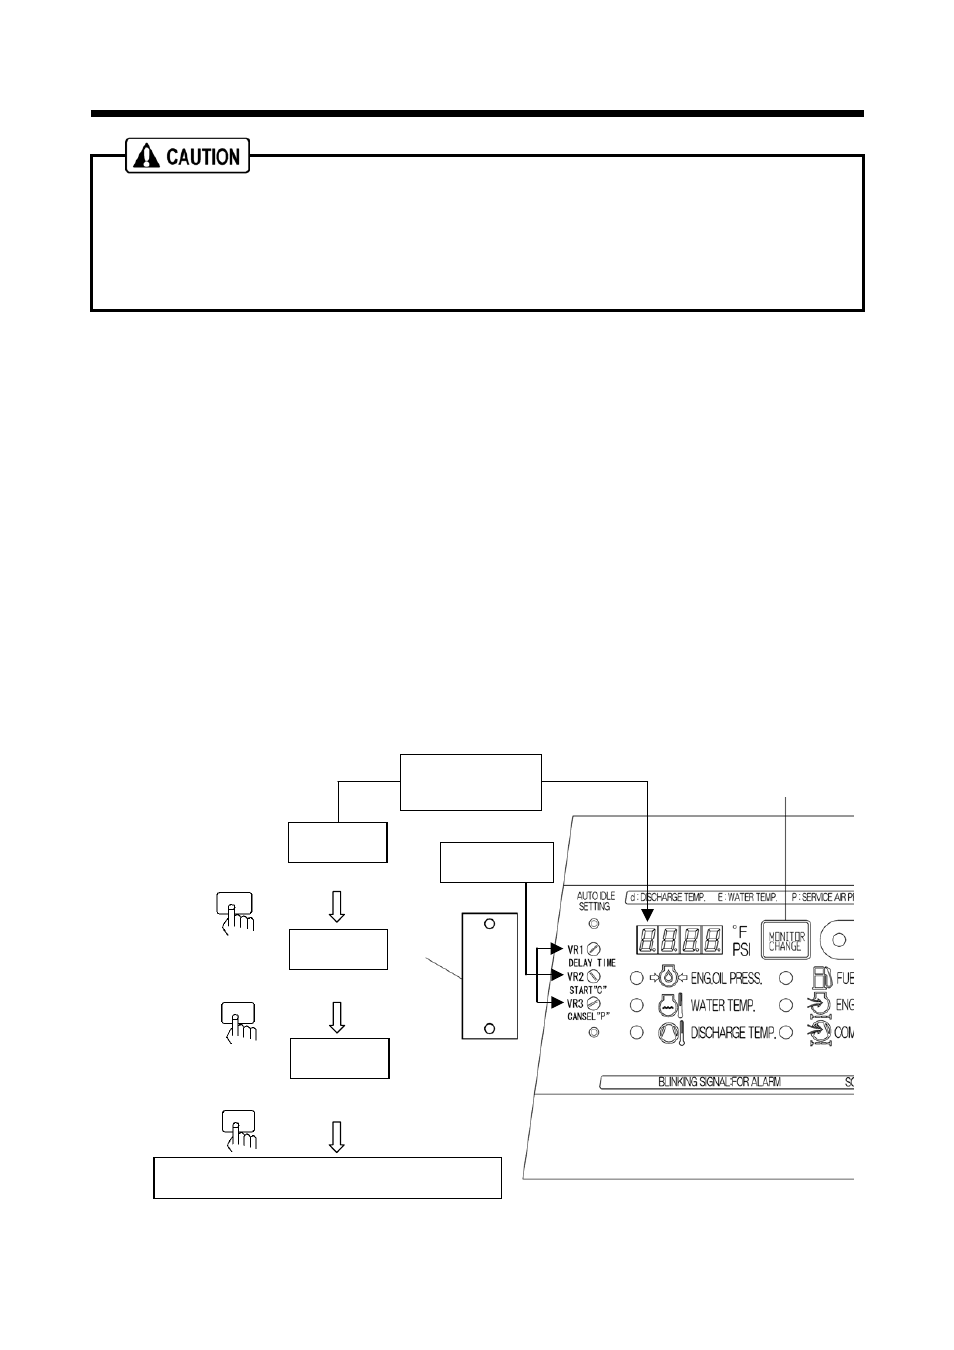
<Procedure>
①
Remove the cover “1”.
②
Place the starter switch “ON”.
③
At first keep pressing digital monitor selector switch “2”for 5 seconds.
④
Then, digital monitor “P” flickers. Adjust the purge release pressure (VR3) to the set
pressure value.
⑤
When pushing digital monitor selector switch “2”after having completed setting of VR3, the
digital monitor “C” flickers. Then adjust the purge starting suction pressure (VR2) to the set
value.
⑥
When pushing digital monitor selector switch “2” after having completed setting of VR2,
the digital monitor “I” flickers. Then adjust the time (VR1) for purge mode operation to the
set value.
⑦
When pushing the digital monitor selector switch “2” after having completed setting it, the
digital monitor returns to display discharge air temperature.
⑧
Install the cover “1” after having completed setting operation mode.
1
2
Digital monitor
flickers.
P flickers.
C flickers.
T flickers.
Setting purge releasing pressure (VR3) to 80psi
Setting purge starting suction pressure (VR2) to 30%.
Setting time for purge mode operation(VR1) to 10 seconds.
Push
Push
Return to display discharge air temperature.
Push
Setting knob
A070276-1