Montigo E36DV-RV User Manual
Page 4
Page 4 of 11
0 9 / 9 6
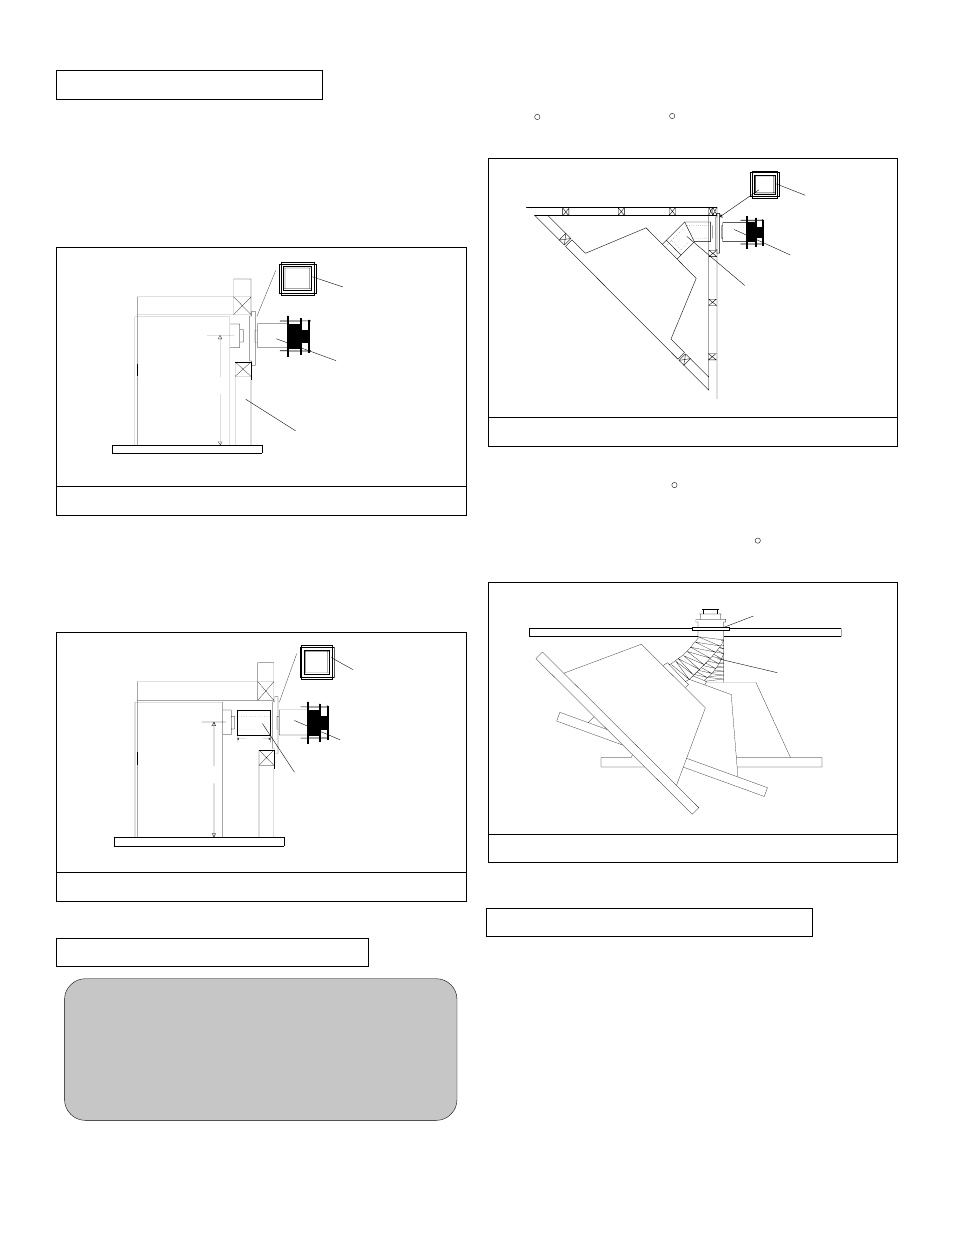
VENTING OF REAR VENT DV
The Econo Plus 36DV-RV has been designed for four possible
rear vent installations.
1). Standard 4" or 6" stud walls. For 4" walls use a stucco
frame and a 5" termination. For 6" walls use a stucco
frame and a 9" termination. (See figure 5).
3). 45 corner kit. Use a 45 elbow, stucco frame and a 5"
termination. (see figure 7).
MSR
ETK-5"
ETK-9"
EEL45
MSR
ETK-5"
ETK-9"
Wall Thickness
(4" - 12")
MSR
ETKFL-12"
ETKFL-18"
Outside wall
All vent pipes must maintain a minimum of 1"
clearance to combustible materials.
Note: It is imperative for satisfactory operation of
the Econo Plus 36DV-RV fireplace that no venting
component be modified in any way. All components
have been manufactured to eliminate the need for
modification when properly selected and installed.
CAUTIONS AND REQUIREMENTS
2). Extended vent kit. For extended vent use a stucco frame,
20" extended vent and a termination. Note: 20" kit may be
cut to desired length but must never exceed 20". (see figure 6).
ETK-5"
ETK-9"
MSR
EXT-1 (10" Section)
EXT-2 (20" Section)
20
INSTALLING THE REMOTE SWITCH
The Econo Plus 36DV-RV is equipped with a remote-operated
valve, located behind the removable brass grille, to the right of the
gas control valve (refer to figure 14.) The valve is pre-wired and
completely self contained to generate its own power DO NOT
connect any external power to it. Note: The switch location must
not exceed 30' from fireplace.
25 1/2
25 1/2
4). Corner installation of 45 or less: Use a Flexible section
(available in ETKFL 12", or 18") a stucco frame and
termination. Flex may be turned to obtain desired degree of
angle required but must not exceed 45 . (See figure 8).
FIGURE 5. STANDARD INSTALLATION
FIGURE 6. EXTENDED INSTALLATION
FIGURE 8. FLEXIBLE INSTALLATION
FIGURE 7. CORNER INSTALLATION