Chip installation and initiation, Chip installation, Control board – Paloma Commercial Conversion User Manual
Page 2: Program chip initiation, Figure 1, Figure 2
This kit contains:
Commercial Conversion Program Chip
Conversion Notification Label
Commercial Warranty
Instructions for Chip Installation.
Chip Installation and Initiation
NOTICE: Tankless water heaters
installed in a commercial application are
not Energy Star qualified. Remove the
Energy Star label from the front of the
tankless water heater.
Chip Installation
1. Make sure electrical power is disconnected and turn off
gas and water to the water heater, then remove the front
cover from the water heater.
2. Carefully remove the existing program chip, see Figure
1 for location. Lightly grip the edges of the chip, top and
bottom, as in Figure 2, and pull the chip straight out from
the Control Board and set it aside.
3. Remove the replacement chip from the packaging.
Gripping the chip, as in figure 2, carefully align and insert
the chip into the socket on the control board. Do Not Force
4. Restore power to the unit.
ON
1
2
3
4
ON
OFF
ON
1
2
3
4
ON
OFF
1 2 3 4
1 2 3 4
DIP2
DIP1
MIN
MAX
ADJ
LED
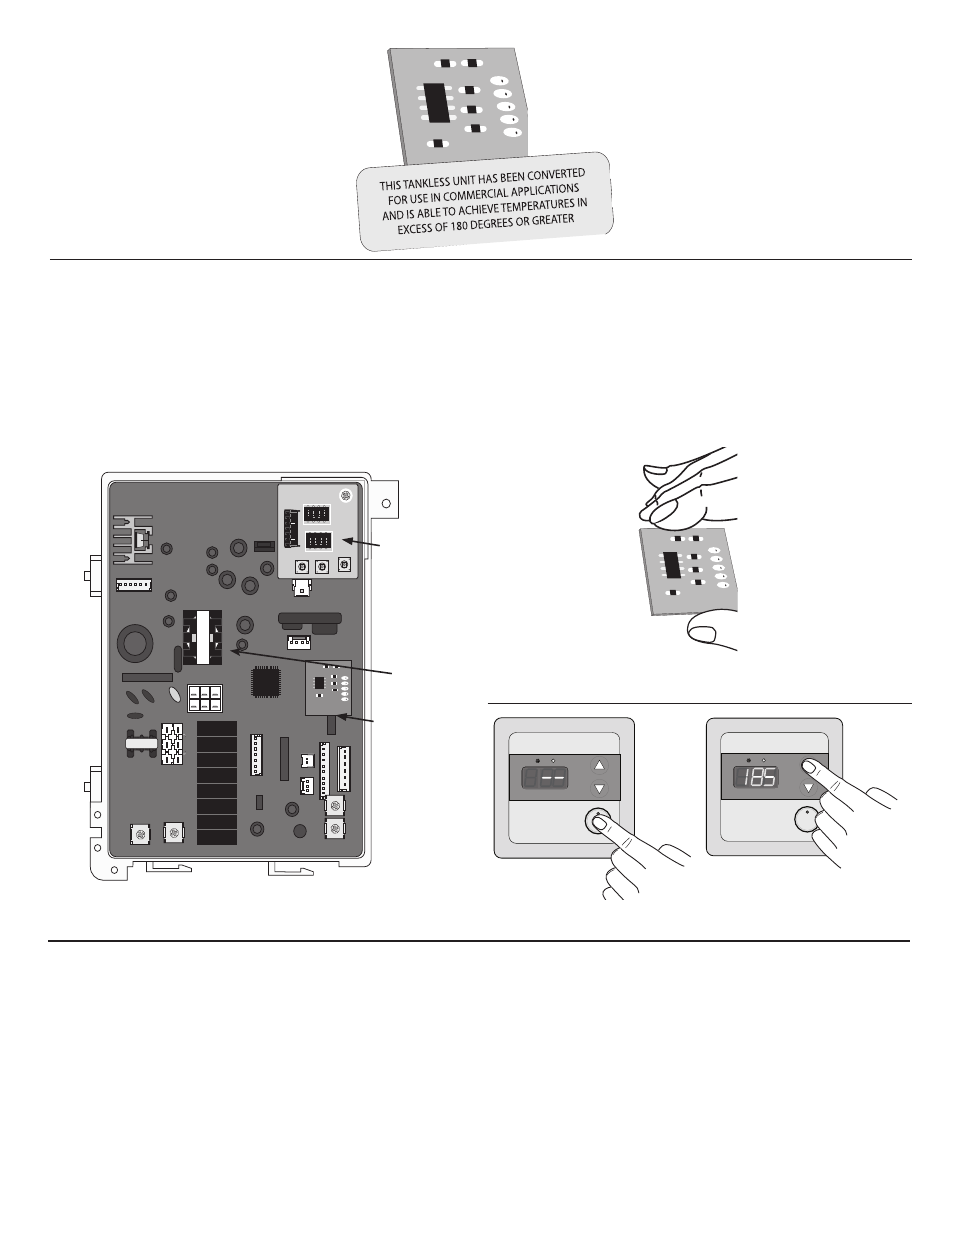
Control Board
- Figure 1
Dip
Switches
Program
Chip
LED
Program Chip Initiation
Figure 2
°F
PRIORITY
POWER
ON/OFF
°F
PRIORITY
POWER
ON/OFF
Figure 4
Figure 3
5. Find the two DIP switches located at the top right hand
side of the PCB. The switch labeled “DIP1” in the top
switch.
6. Change the DIP Switch #4 setting to the “ON” position.
DO NOT alter any other DIP Switch. The LED on the
PCB is flashing. At the same time, the display of the Main
Remote Control starts to flash.
7. Press the “Max” button located at the top right hand side
of the PCB for more than 1 second. The LED on the PCB
starts illuminating continuously. At the same time, the
display of the Main Remote Control is on continuously.
8. Change the DIP Switch #4 setting back to the “OFF”
position. DO NOT alter any other DIP Switch. The LED
on the PCB will stop illuminating. At the same time, the
display of the Main Remote Control will turn off.
9. Turn on the water heater at the remote control by pressing
the power button, see Figure 3.
2