Confguration report & setup mode – Pertech 5300 Series User Manual
Page 28
Pertech
220321A
21
After the printer is set up, you can run two print diagnostic reports / tests and
enter the confguration menu. Below is an example of the confguration report.
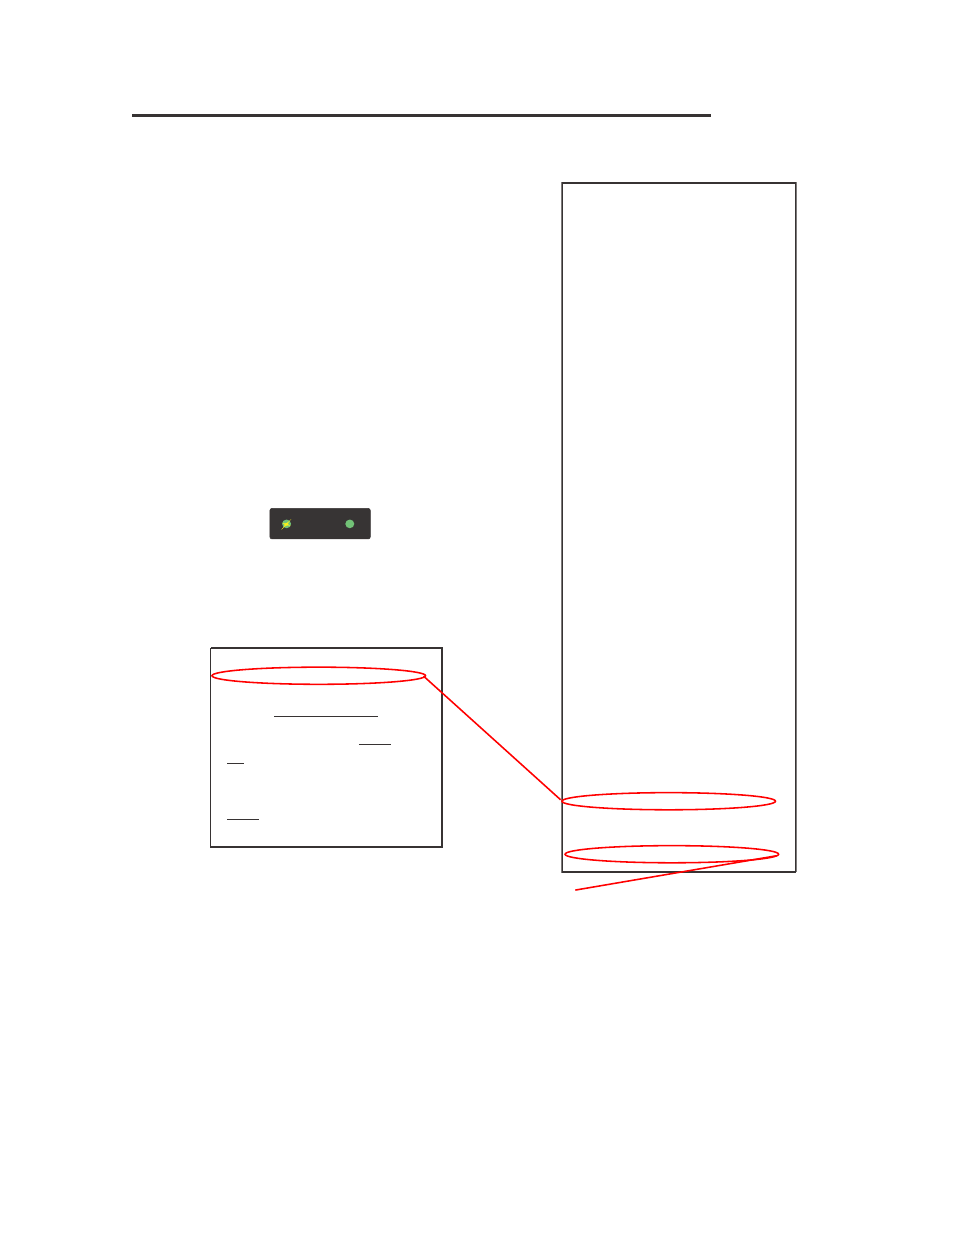
1 Press and hold the Paper Feed Button and then
press the Power Switch to turn the printer on and
start the frst test.
Validation printers will perform a Self Test if a form is
detected, when the power is turned on.
Release the Paper Feed Button after 4 seconds for
the printing to begin.
The 5300 completes a test of RAM , a checksum
test of program memory, homing and maintenance
of the print head, and then prints the confguration
settings.
2 To change the confguration settings, press the
Paper Feed Button when prompted, the Left LED
will begin fashing.
Note: Validation-Only printers do not have this
feature.
Note: If Ink Status Reset is set to “Manual”, frst
option to print will be “Press feed to Reset Ink Tally”.
A. Entering the confguration mode, the printer prints
the Set-Up Instructions and prompts the user to
press the feed button to reject the current settings.
B. If you don’t want to change an option, wait for fve
seconds and the next option will print.
C. After completing the Confguration Mode, the
printer prints the new confguration settings and
stores them in non-volatile memory.
Note: Exiting setup early by turning the printer off
will erase any changes made to the confguration.
You must complete the setup for changes to take
effect.
Confguration Report & Setup Mode
�����
�����
����
��� ���
�����
Serial Number:
********
Main Firmware
Revision:
* ** ***
CRC:
****
Boot Firmware
Revision:
* ** ***
CRC:
****
Printer Control Language
PCL:
ACL Language
Diag Mode:
Standard Print
Auto LF:
CR = CR
Soft Fault Recover:
Automatic
Font:
Font:
Standard
Font Quality:
Draft
Intl Char set:
USA
Code Page:
437 USA
Receipt LPI:
6 Lines Per Inch
Validation LPI:
6 Lines Per Inch
RS232 Serial (when used)
Baud Rate:
57.6K
Data Bits:
8-bits
Stop Bits:
1-bit
Parity:
None
Flow Control:
Hardware
USB (when used)
Descriptor:
Model Number
Hardware
Validation Clamp:
Closed
Form Insert Wait:
1 Min
Paper Low Sensor
Enabled
Ink Status Reset:
Automatic
Document Stop:
1.75 Inches
Column Alignment
Half Speed:
3
Full Speed:
10
Memory
Installed RAM:
128K
Installed ROM:
512K
Total User Flash:
64K
Flash Logos
32K
Flash Fonts
0K
Flash Macros:
0K
Flash Raw Data:
32K
Total User Ram:
24560
Ram Logos:
24560
Ram Fonts:
0K
Ram Macros:
0K
Tallies
Printed Lines:
0
Dot Count:
0
Validation Opens:
0
Feed Distance:
0
Hours On:
0
Flash Updates:
0
Cover Opens:
0
Diagnostic:
0
0
0
====================================
Press paper feed to change configuration
Press paper feed to enter print test
=================================
Press paper feed to change confguration
SET-UP INSTRUCTIONS
PRESSING THE PAPER FEED BUTTON WHILE THE
GREEN LIGHT IS FLASHING WILL REJECT THE
LAST PRINTED PARAMETER. IF THE BUTTON IS
NOT PRESSED WITHIN 5 SECONDS. THE PARAM-
ETER WILL BE ACCEPTED AND THE NEXT SET-UP
OPTION WILL BE LISTED.
PRESS THE PAPER FEED BUTTON NOW TO
REJECT THE CURRENT CONFIGURATION AND
CONTINUE WITH THE PRINTER SET-UP.
3 Otherwise, wait 10 seconds
and you can choose to enter
an Extended Print Test. After
this test, or Ignoring this
option, will return the printer
to normal operation after 10
seconds.
4. Extended Print Test:Checks the
printers vertical line alignment,
character fonts, and pitches.