REMKO RKL 491 DC User Manual
Page 15
In doing so, the following procedure must be
adhered to:
1.
Switch the unit off.
2.
Pull the power plug out of the socket.
3.
Remove the 2 screws from the cover on the
rear side of the unit (Fig. 12).
2
1
2
Fig. 12: Rear view, indoor unit
1: Cover
2: Screws
4.
Remove the cover from the unit.
5.
Unscrew the cable strap from the connecting
6.
Push in the side clips on the plugged connec-
tion and pull the plug out of the socket
7.
Remove the upper section from the bracket
by means of unscrewing the two screws
8.
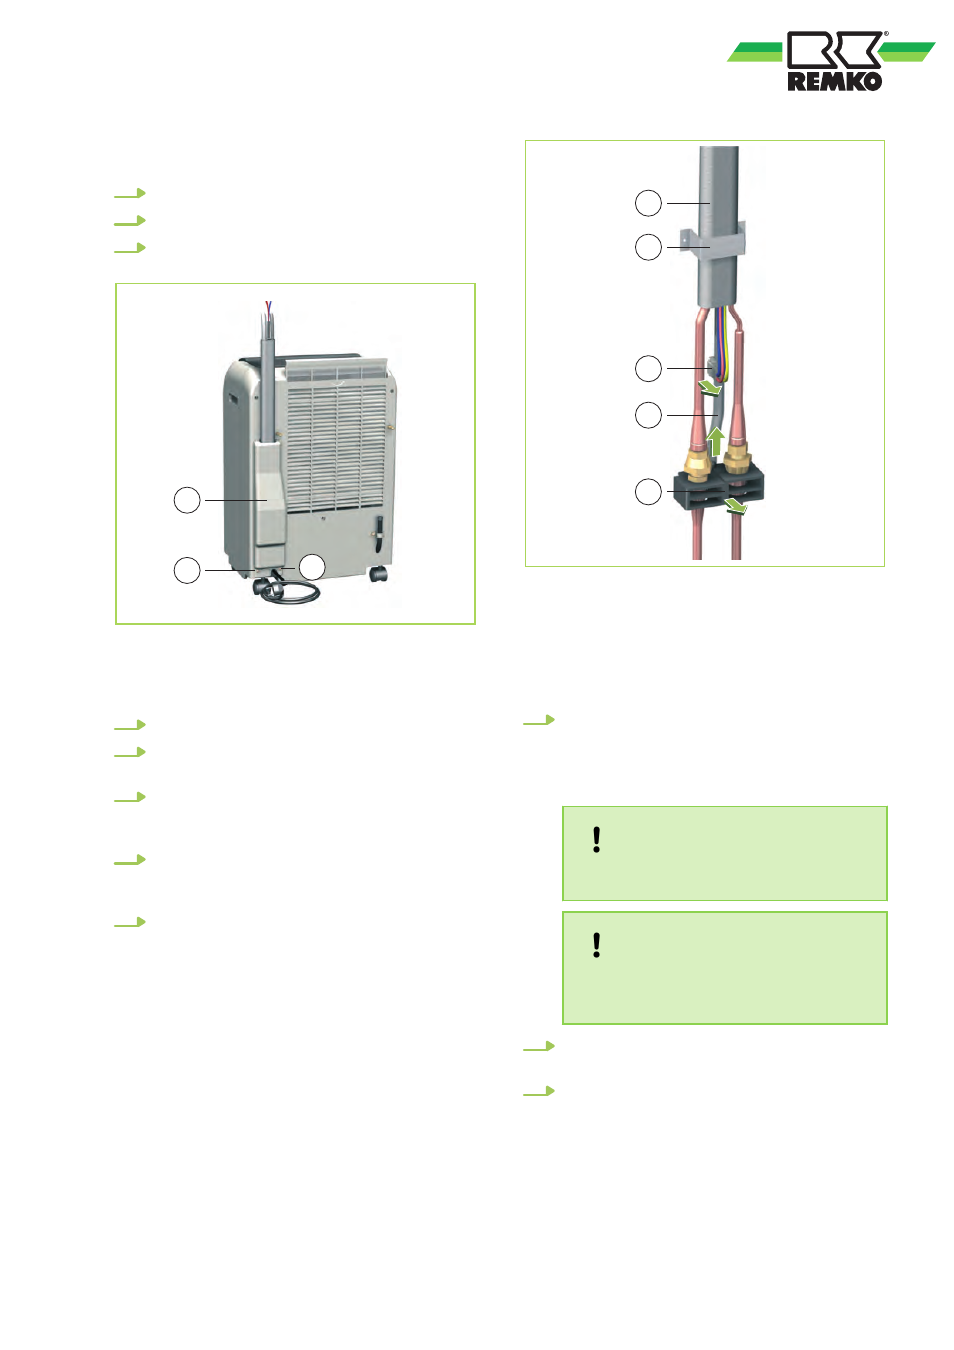
Pull off the condensate drainage hose
2
1
3
4
5
Fig. 13: Dismantling the connecting line
1: Connecting line
2: Cable strap
3: Plug connection
4: Condensate hose
5: Cable strap
9.
Unscrew the left-hand union nut with the size
24 open-ended spanner provided. In doing
so, use the second size 21 open-ended
spanner to hold the lower coupling section
NOTICE!
Never twist the the fixed lower section.
NOTICE!
It is possible that residual fluid can leak
out of the the condensate hose.
10.
Screw continuously until the connection is
disconnected.
11.
Unscrew the right-hand union nut with the
size 24 open-ended spanner provided. In
doing so, use the second size 21 open-
ended spanner to hold the upper coupling
15