ACTi V11 User Manual
Step 4: access the device device overview, Step 2: mount the device, Step 3: connect the device
Step 4: Access the Device
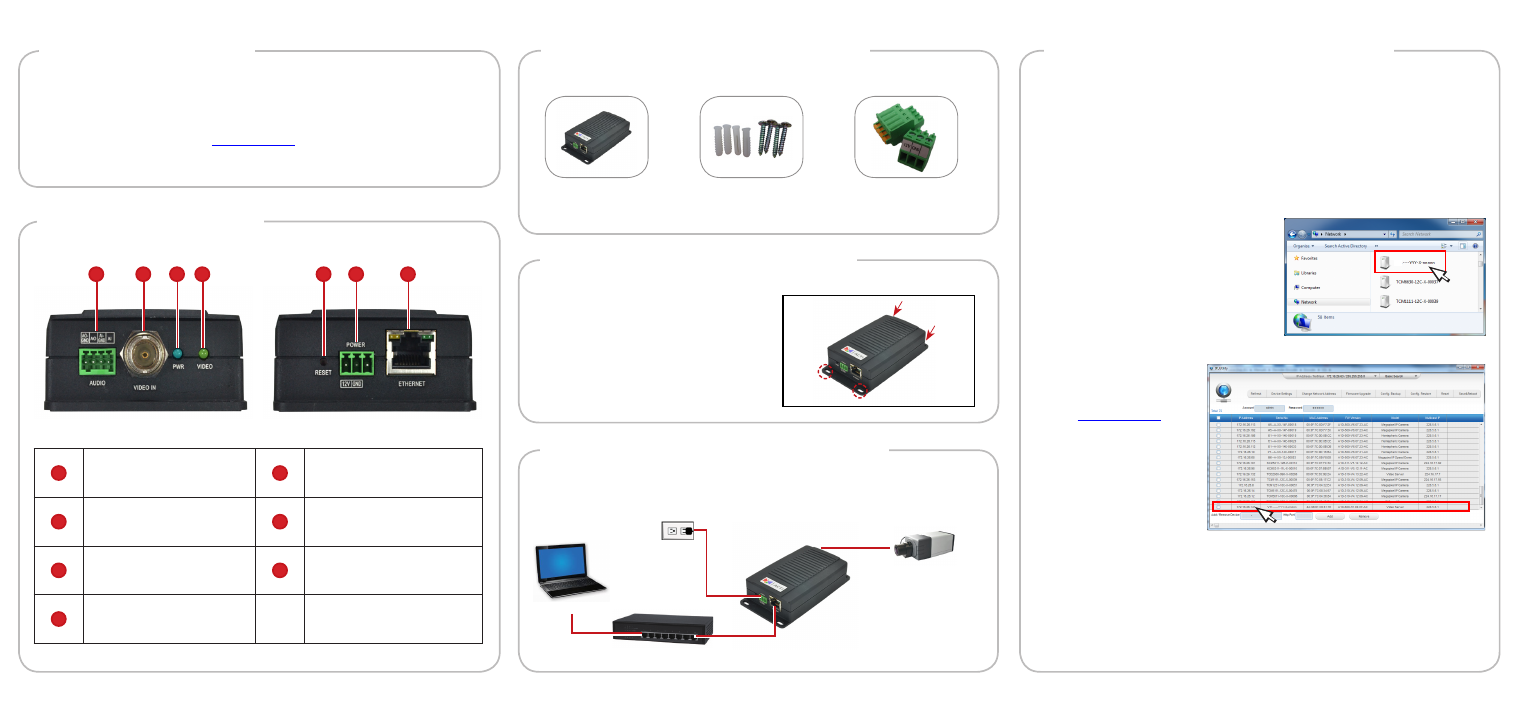
Device Overview
The device can be directly mounted
on a surface, such as walls.
Step 2: Mount the Device
Attach the 4 supplied screws to
secure the device.
Step 3: Connect the Device
Basic Connection Example
PC
Power Source
(optional)
PoE Switch
Analog Camera
1
Audio Input / Output
Connector
5
Reset Button
2
Video In Connector
6
DC 12V Power Connector
3
Power LED
7
Ethernet Port
4
Video In Activity LED
Introduction
This guide contains all the information you need to quickly setup
the Video Encoder. For detailed information on installations or
operations, please refer to the Hardware Manual and Firmware
Manual on ACTi website (
www.acti.com
).
Step 1: Unpack the Device
Check if the package comes with the following items:
Video Encoder
Mounting Screw
Pack
Terminal Blocks
•
Power
•
Audio
2
3
4
1
7
5
6
By IP Utility
a. Download
IP Utility
from our website
(
www.acti.com
).
b. Run
IP Utility to
start searching for
network devices.
c. Click the IP address
of the Encoder.
On Network with DHCP Server / Router (Automatic IP)
1. Connect the device and the PC within the same network segment.
Once connected, an IP address will be assigned to the Encoder.
2. Find the Encoder via
Windows Explorer or IP Utility.
3. The
Web Configurator appears with the IP address of the Encoder
on the URL bar. Login to access the Encoder.
Note: For full functionality, it is recommended to use Microsoft Internet Explorer
®
.
When using non-IE browsers, free 3
rd
party software plug-ins may be required.
Refer to the device Firmware Manual for more information.
By Windows Explorer
a. Go to
Start > My
Computer > Network.
b. Double-click on the device name.
V11