ARM Electronics IP540_620MDVANVP User Manual
Page 21
21
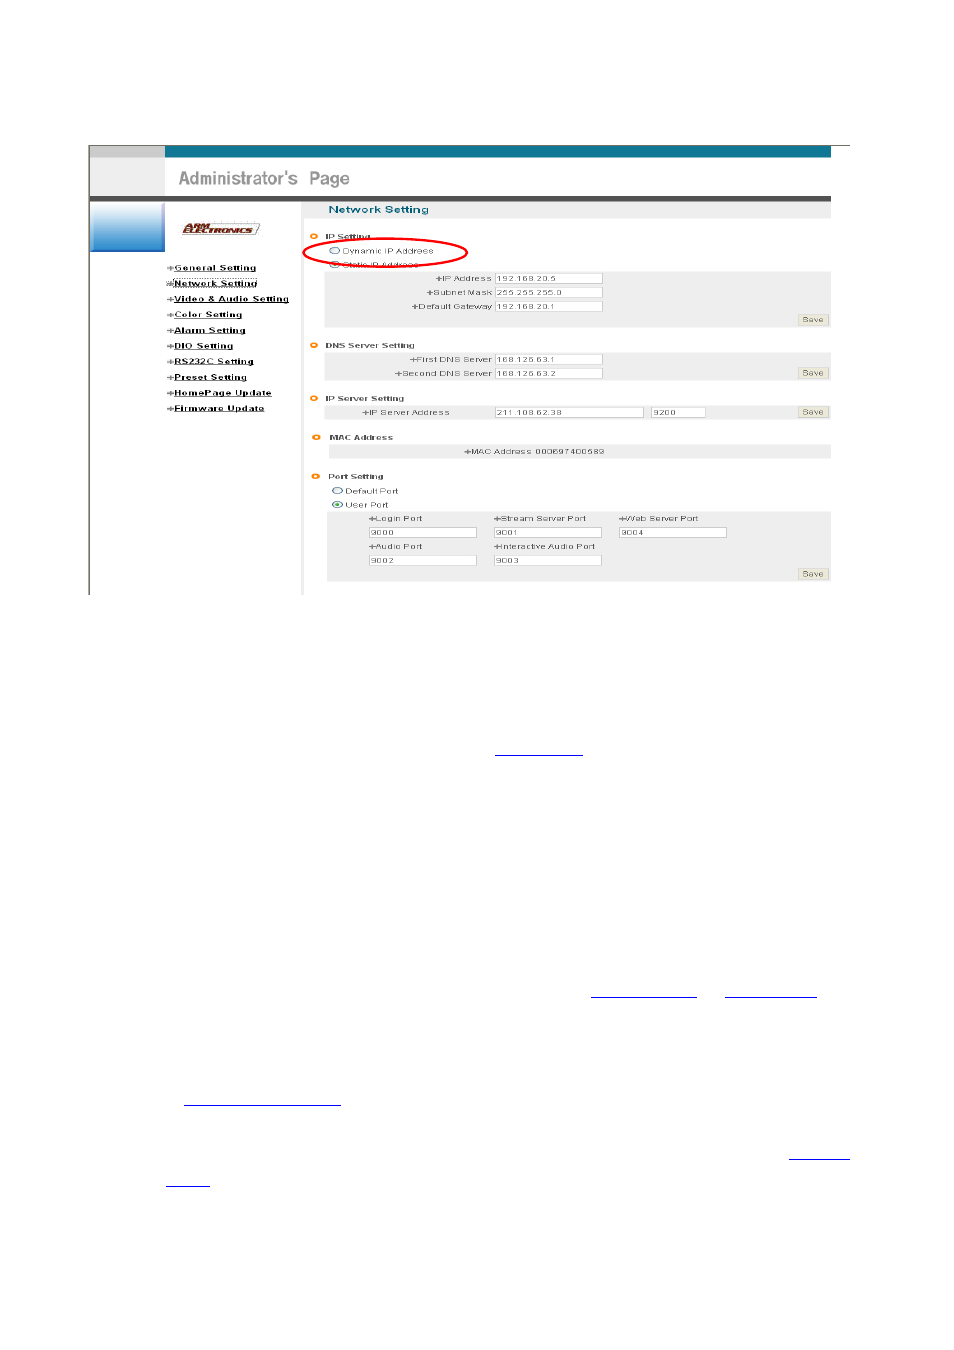
Pic. 3―7 Network Setting
5) Click on ‘Dynamic IP Address’ in ‘IP Setting’.
6) Click
‘Save’
Button.
7) Upon completion of setting, close the Web Page and find IP of IP540/IP620MDVAIVP in ‘IP Utility’
program provided with Proprietary Viewer (see ‘
5. Basic Use
’)
8) If IP found, IP540/IP620MDVAIVP has been given IP. But in case IP is not found, do re-set of [2-1]
to go to initial value because it has not been given IP, then re-start IP Setting. Once
IP540/IP620MDVAIVP is given IP, remove LAN Cable (Cross Cable) connected between
IP540/IP620MDVAIVP and PC.
9) Connect IP540/IP620MDVAIVP to Network with LAN Cable (Straight Cable).
10) Connect PC to Network with LAN Cable (Straight Cable).
11) Set IP address of PC, Subnet Mask and Gateway properly according to Network Environment.
12) Check
After registration of IP540/IP620MDVAIVP in Server (refer to ‘
Use of Server
’ of ‘
5. Basic Use
’,
connect to IP540/IP620MDVAIVP by Domain Name (Server Name) allocated to
IP540/IP620MDVAIVP.
For example, run Web Browser and input Domain Name allocated to IP540/IP620MDVAIVP in URL.
In
http://IP540.goodip.net
, ‘IP540/IP620MDVAIVP’ is to be Name of Server registered in Server by
user.
If the initial page is shown as [Pic. 3-8], check Video of IP540/IP620MDVAIVP referring to ‘
1. Video
Check
’. If Video is seen, set up is properly done.