Eneo NXD-2030PTZ1080IR User Manual
Page 24
24
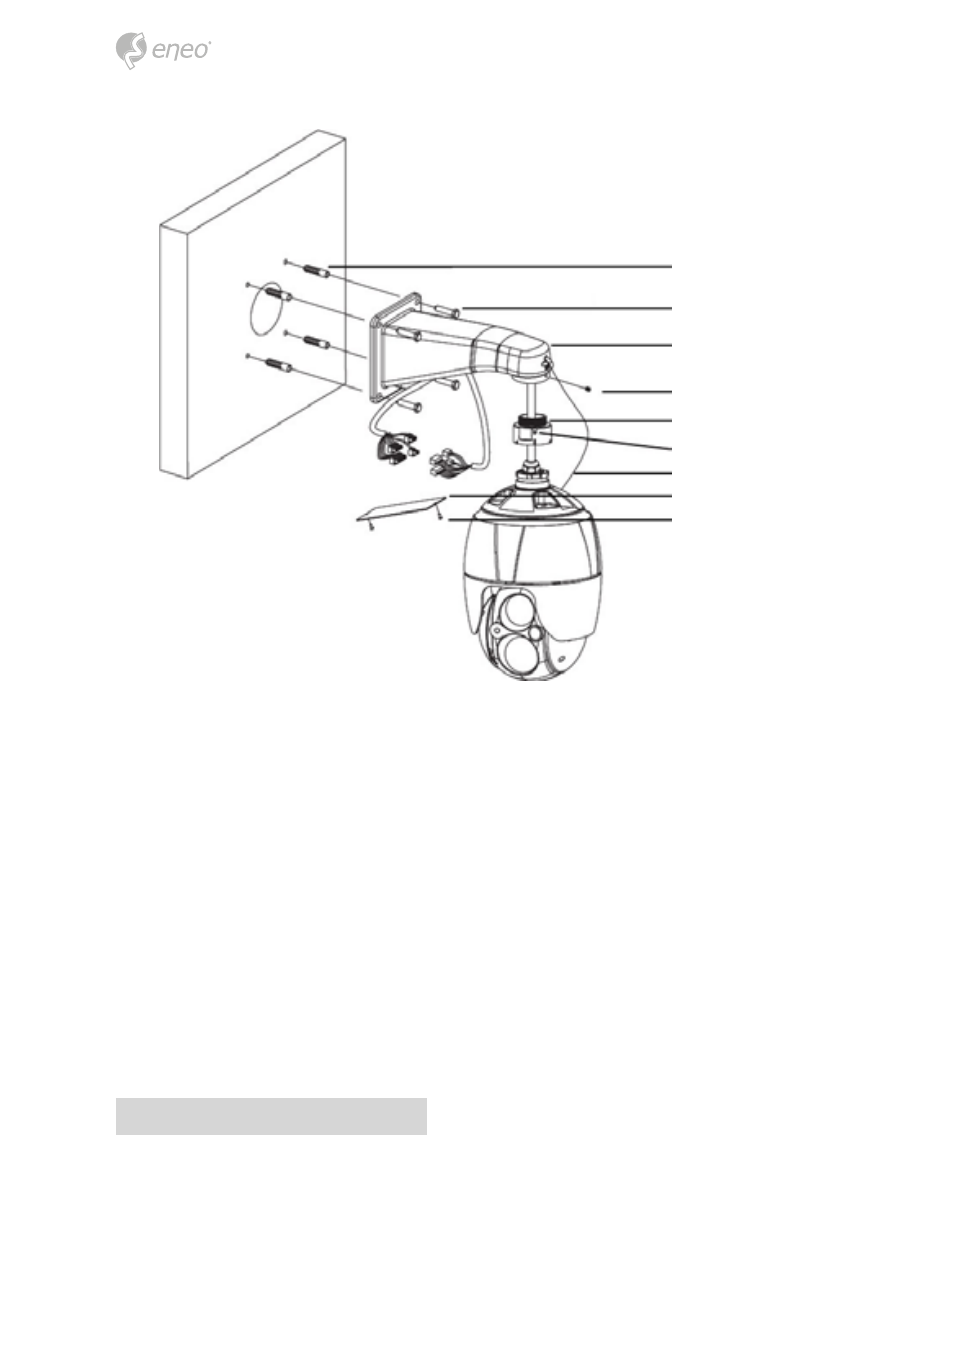
Select a suitable mounting location and verify there is sufficient cable to reach the mid-
dle of the Wall Mount.
1. Mark and drill mounting holes in the surface using the Wall Mount Flange.
2. Pull out cables required to connect to the dome camera from the wall or route
cables through a section of 0.75 in. (19 mm) conduit pipe.
3. Remove the access plate from the wall mount bracket.
4. Attach the wall mount bracket using screws routing cables through the access
plates hole.
5. Attach the housings safety wire to the wall mounts latch.
6. Fix the housing to the wall mount bracket using the locking nut after routing
cables through the wall mount bracket and tighten the housing set screw with
the supplied wrench.
7. After connecting cables, attach the access plate.
Installation - Ceiling Mount
The ceiling mounting plate must be attached to a structural object such as concrete that
will support the weight of the mount and Dome Camera.
Plastic Anchor (4x)
Tapping Screw 8x35 (4x)
Mounting Bracket (1x)
Set Screw (1x)
Adapter
Set Screw (1x)
Safety Wire
Access Plate
Srew Machine 3x5 (2x)