Basic configuration of camera system – Eneo NXD-2030PTZ1080IR User Manual
Page 26
26
1. Select a suitable mounting location and verify there is sufficient cable to connect
with cables from the housing.
2. Mark and drill mounting holes in the surface using the ceiling mount flange.
3. Pull out cables required to connect to the dome camera from the ceiling.
4. Attach the ceiling mount bracket using screws routing cables through the locking
nut.
5. Tighten the housing with the pipe using the socket after routing cables through
the pipe.
6. Attach the housing’s safety wire to the ceiling mount’s m6X35 tapping screw.
7. After connecting cables, fix the pipe to the ceiling mount using the locking nut.
8. Tighten set screws of the socket and locking nut with the supplied wrench.
Basic Configuration of Camera System
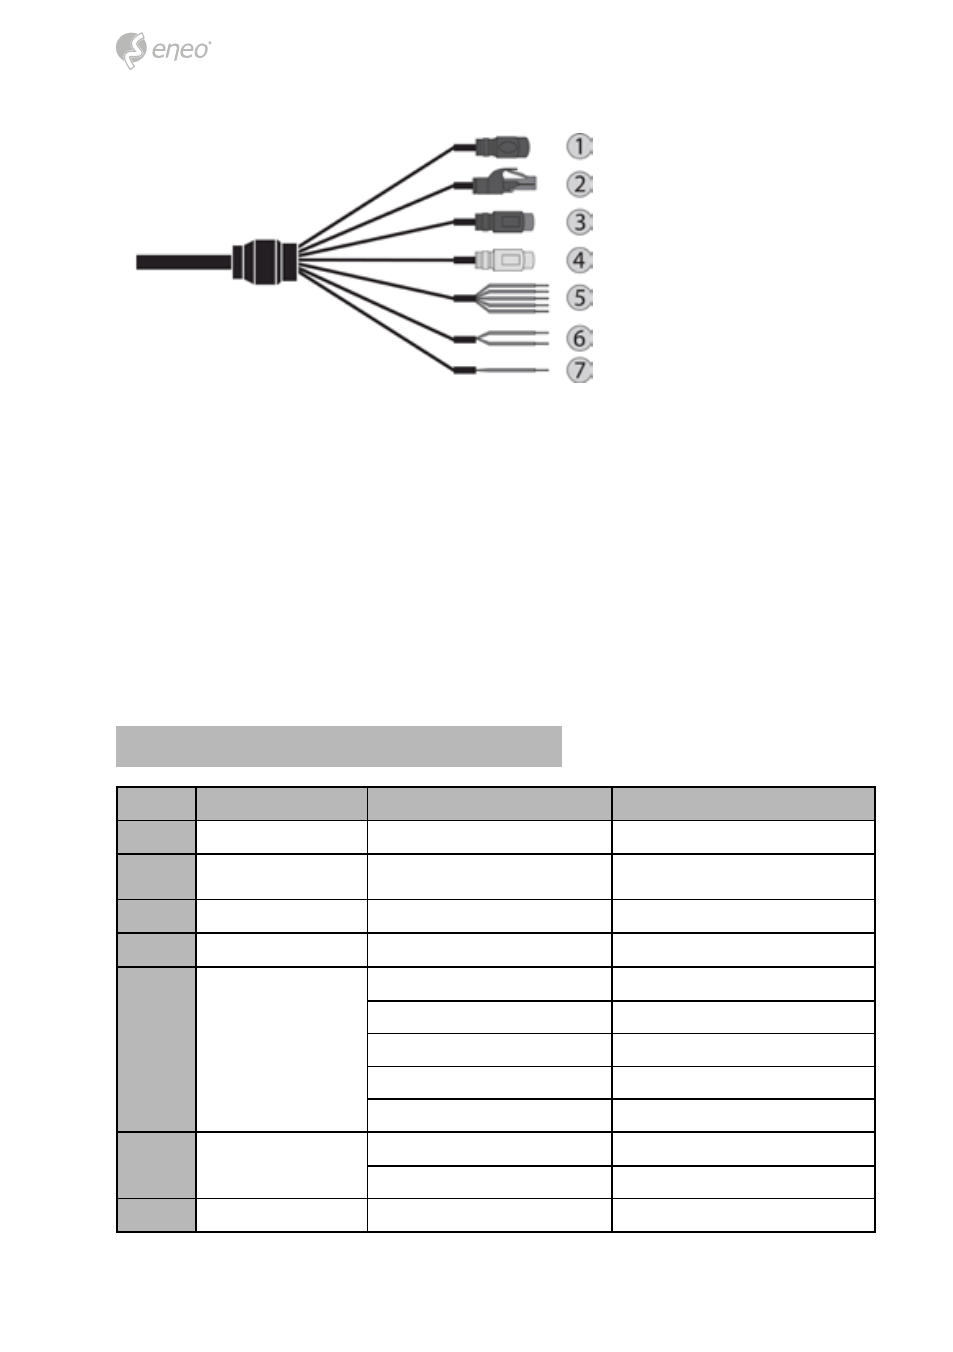
No.
Connector
Wire Color
Description
1
DC Jack
BLACK
12VDC
2
RJ-45
BLACK
Ethernet, RJ-45 port compatible with 10/100Mbps
(Option PoE++ functionality)
3
RCA
BLACK
Audio Input
4
RCA
GRAY
Audio Output
5
5-pin Cable
YELLOW
Alarm Input 1
WHITE
Alarm Input 2
VIOLET
Alarm Input 3
BROWN
Alarm Input 4
GRAY
GND
6
2-pin Cable
RED
Alarm Out
BLACK
GND
7
1-pin Cable
YELLOW/GREEN
F-GND
Screw