Laney AH150 User Manual
Page 12
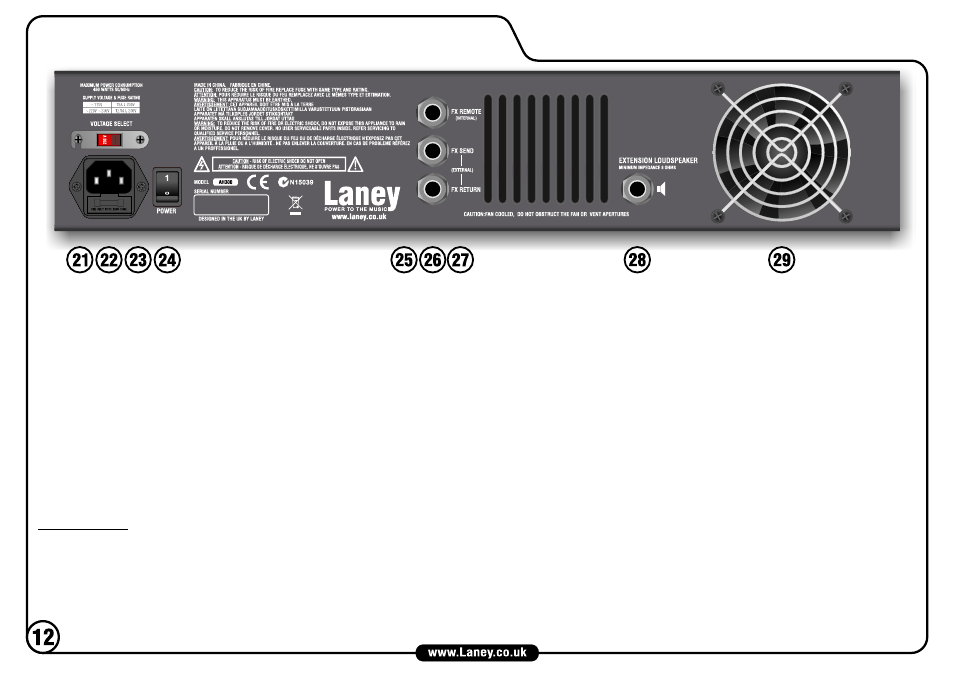
AH150/AH300 REAR PANEL
(AH300 SHOWN. AH150 SIMILAR)
21. VOLTAGE SELECT SWITCH This is factory set to the correct voltage for the region the product is supplied to. If necessary it can be reset by removing the mains lead and
then loosening (but not removing) the screws securing the cover. The cover can then be pivoted away from the switch which can be moved to select the alternate voltage. DO NOT
reconnect the mains lead until the cover is replaced and secured. Please ensure the correct fuse is fitted (as printed on the panel) for the voltage being used.
22. MAINS INLET SOCKET Connect to your power source using the supplied cable.
23. MAINS FUSE This drawer contains the main safety fuse for the unit. USE ONLY THE CORRECT SIZE AND RATING SPECIFIED ON THE PANEL.
24. MAINS POWER SWITCH When turned on, the Power LED on the front panel will light.
25. FX REMOTE Connect a mono latching footswitch such as the Laney FS1 (not included) here to remotely activate the internal FX. (On the AH300 the FX switch on the front
panel must be engaged when using a footswitch.)
26. FX SEND Connect the input of an external FX unit here. This socket can serve as a second Alt Out, should you require another output. With the FX send controls at maximum,
the output level will be -3dB lower than the ALT Out socket. (Note: Only channels 1-4 are present at this output, depending on the FX Send positions.)
27. FX RETURN Connect the output of an external FX unit here. Inserting a jack into this socket will disconnect the internal FX unit. If required, this socket can be used as an extra
input, (internal FX will be muted). Level can be controlled using the FX Level control on the front panel.
28. EXTENSION SPEAKER SOCKET Connect an external loudspeaker here for additional volume. Minimum impedance 8 Ohms.
29. FAN OUTLET (AH300 ONLY) The AH300 is fan cooled. Do not obstruct the vents, and ensure adequate ventilation.
General Notes
Amplifier connection: In order to avoid damage, it is advisable to establish and follow a pattern for turning on and off your equipment. With all system parts
connected, turn on source equipment, tape decks, cd players, mixers, effects processors etc. BEFORE turning on your AUDIOHUB. Many products have large
transient surges at turn on and off which can cause damage to your speakers. By turning on your AUDIOHUB LAST and making sure its Volume control is set to
minimum any transients from other equipment will not reach your loudspeakers. Wait until all system parts have stabilised; usually a couple of seconds. Similarly
when turning off your system always turn down the Volume control on your AUDIOHUB and then turn off its power before turning off other equipment.
Caution: These professional loudspeaker systems are capable of generating very high sound pressure levels. Use care with placement and operation to avoid
exposure to excessive levels that can cause permanent hearing damage. (Refer to guidelines on page 2)
Servicing: The user should not attempt to service these products. Refer all servicing to qualified service personnel.