General guide, Using the clock, Operation guide dq-950s – Casio DQ-950S User Manual
Page 2
Operation Guide DQ-950S
2
GENERAL GUIDE
1
1
1
1
1 SNOOZE/LIGHT button
• Press this button to illuminate the display for about five seconds.
• The SNOOZE/LIGHT button is the area at the top of the clock panel marked “SNOOZE/LIGHT”.
• Pressing this button while the alarm is sounding stops the alarm.
2
2
2
2
2 MAX/MIN button
Press this button to display the high and low temperature and humidity values.
3
3
3
3
3
°
C/
°
F button
Press this button to toggle the temperature units between Celsius and Fahrenheit.
4
4
4
4
4 + (UP) / – (DOWN) buttons
Use these buttons to change the alarm time or the setting that is flashing on the display.
5
5
5
5
5 SET button
Use this button when setting the current time.
6
6
6
6
6 DEMO button
Press this button to test the alarm sound.
7
7
7
7
7 RESET button
Press this button to reset the clock after replacing its batteries.
8
8
8
8
8 Alarm Mode selector
SNOOZE: Snooze alarm on
ON: Alarm on
OFF: Alarm off
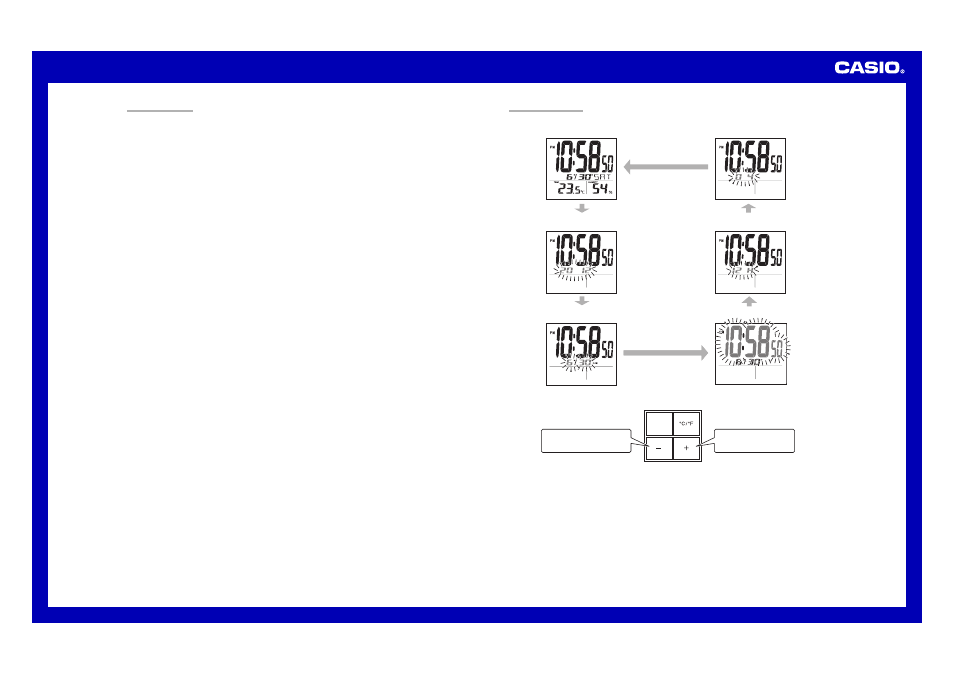
USING THE CLOCK
1. Press the SET button (5) to cycle through the setting screens as shown below.
12-hour/24-hour
Setting Screen
Time Setting Screen
Month and Day Setting Screen
Year Setting Screen
Normal Timekeeping Screen
Contrast Setting Screen
2. While the screen you want is displayed, use the – (DOWN) and + (UP) buttons (4) to change the flashing digits.
MAX/MIN
Press – (DOWN) to decrease
the flashing digits.
Press + (UP) to increase
the flashing digits.
• Holding down + (UP) or – (DOWN) changes the flashing digits at high speed.
• You can set the year in the range of 2000 to 2099. The day of the week is set automatically in accordance with
the date setting.
• Pressing + (UP) or – (DOWN) while the Time Setting Screen is on the display causes the seconds count to be
reset to 00.
• Each press of + (UP) or – (DOWN) while the 12-hour/24-hour Setting Screen is on the display toggles
between 12-hour and 24-hour timekeeping.
• You can set the contrast level in the range of 1 to 10.
3. After making the settings you want, use the SET button (5) to display the Normal Timekeeping Screen.
• The clock automatically returns to the Normal Timekeeping Screen if you leave a setting screen on the display
for about three minutes without performing any operation.