Illustration 2, General guide, Operation guide idr-200 – Casio IDR-200 User Manual
Page 2
Operation Guide IDR-200
2
RESET
SELECT
TEST
°C/ °F
RESET
SELECT
TEST
°C/ °F
RESET
SELECT
TEST
°C/ °F
RESET
SELECT
TEST
°C/ °F
A
8
9
0
™
¡
• A sticker is affixed to the glass of this clock when you purchase it. Be sure to remove the sticker before using the
clock.
• Depending on the clock model, the configuration of your clock may differ somewhat from that shown in the
illustration.
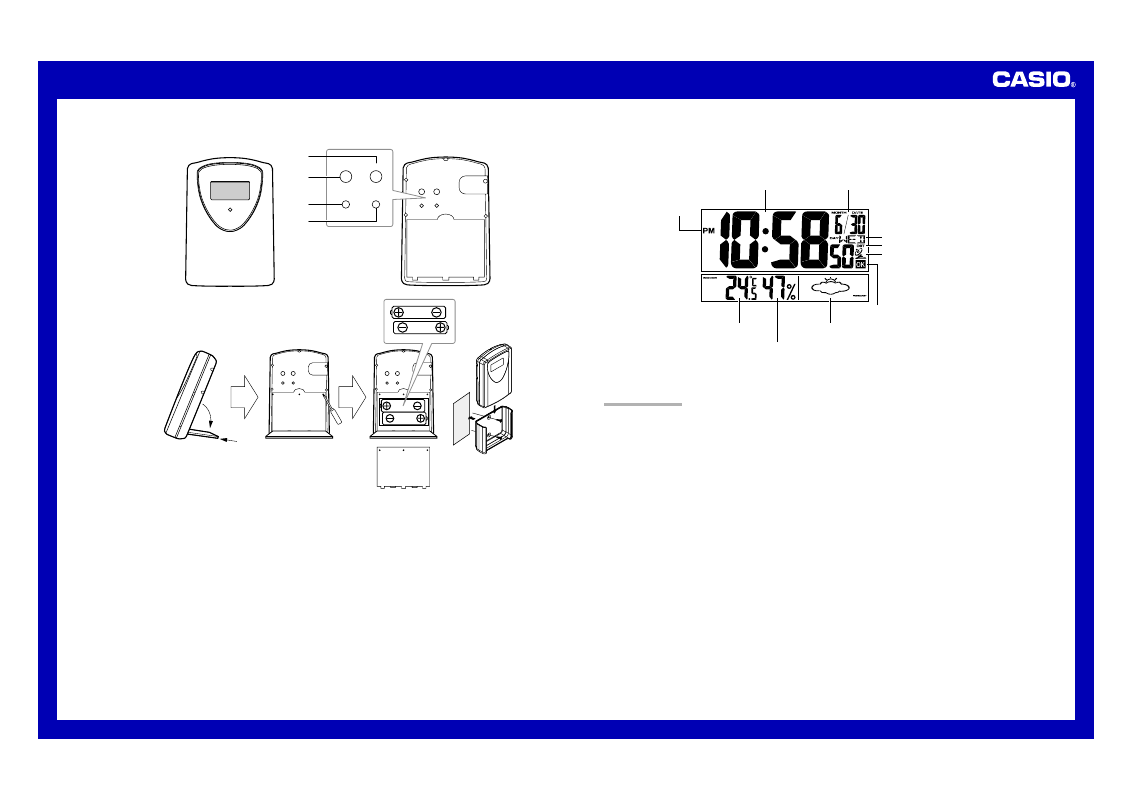
Current time
(Hour, minutes, seconds)
DST indicator
Day of week
PM indicator
Wave OK indicator
Antenna Icon
Current Humidity
Upcomimg weather
indicator
DATE (month - date)
Current Temperature
• In locations subject to radio frequency interference, the product may malfunction and require you to reset the
product.
GENERAL GUIDE
Main unit
1 Time Setting buttons
Use these buttons to set the current time.
2 SET button
Use this button to cycle through setting screens.
3 WAVE button
Press this button to trigger a time calibration signal receive operation.
4 RESET button
Press this button to reset the clock after replacing its batteries.
5
°C/ °F button
Press this button to toggle the temperature unit between Celsius and Fahrenheit.
6 RE-SYNC button
Press this button to re-synchronize the timing of the main unit and the sub-unit.
7 SELECT button
Press this button to toggle the display between main unit (INDOOR) and sub-unit (OUTDOOR) data.
Sub-unit
8 SELECT button
Press this button to toggle the display between the current temperature and humidity.
9 RESET button
Press this button to reset the sub-unit after replacing its batteries.
0 TEST button
This button is for testing the unit. Normally, you should not press it. If you do, be sure to press the
RESET button (9) next.
A
°C/ °F button
Press this button to toggle the temperature unit between Celsius and Fahrenheit.
Sub-unit