Sealey DZRE92/C User Manual
Straightener kit 10tonne with variable upright, Dzre92/c.v2, Instructions for
InstructIons for:
STRAIGHTENER KIT 10TONNE
WITH VARIABLE UPRIGHT
MoDEL no:
DZRE92/C.V2
thank you for purchasing a sealey product. Manufactured to a high standard this product will, if used according to these instructions and
properly maintained, give you years of trouble free performance.
1. SAFETY INSTRUCTIONS
2. ASSEmBLY
3. INTRODUCTION
IMPORTANT: PLEASE READ THESE INSTRUCTIONS CAREFULLY. NOTE THE SAFE OPERATIONAL REQUIREmENTS, WARNINGS & CAUTIONS.
USE THE PRODUCT CORRECTLY AND WITH CARE FOR THE PURPOSE FOR WHICH IT IS INTENDED. FAILURE TO DO SO mAY CAUSE
DAmAGE AND/OR PERSONAL INJURY, AND WILL INVALIDATE THE WARRANTY. PLEASE KEEP INSTRUCTIONS SAFE FOR FUTURE USE.
WARNING! this product should not be used without a safety cable. In the event of the puller/clamp becoming detached from the vehicle
bodywork when under tension a safety cable will minimise the risk of serious injury.
WARNING! Ensure health & safety, local authority, and general workshop practice regulations are adhered to when using this equipment.
familiarise yourself with product application and limitations, as well as the specific potential hazards peculiar to the straightener.
WARNING! No part of this unit or any accessory relating to the straightener is designed for lifting loads. It is intended only as a
pulling device and must be used as such with care.
WARNING! Disconnect the straightener from the hydraulic pump before servicing or performing any maintenance on the unit.
Maintain straightener in good order. replace/repair with genuine parts only. Non genuine parts may be dangerous and will invalidate the warranty.
use qualified person to lubricate and maintain the hydraulic pump.
DO NOT use brake fluid to top up hydraulic unit. use sealey hydraulic oil only.
Keep the straightener clean for best and safest performance.
WARNING! use straightener on level & solid ground, preferably concrete. Avoid tarmacadam since the equipment may sink into the surface.
Keep area clean & tidy and free from unrelated materials. Ensure there is adequate lighting.
WARNING! Ensure you know how much load you are pulling. Never exceed the maximum pulling capacity.
use in conjunction with sealey hydraulic pump, chains, hooks, etc only.
DO NOT use pumps or accessories other than those supplied with
kit, or contact your local agent for details of sealey hydraulic pumps and pulling accessories. non-genuine items may damage unit and void warranty.
Ensure there is positive engagement of straightener chains, claws, hooks, links etc to the chassis or vehicle body before pulling.
Place tarpaulin or heavy cover over chains to minimise any backlash should chains or accessory fail.
should jacks be employed in the operation, ensure they are of the appropriate type and capacity, are in good condition and that you follow
any instructions relating to the jack. Also ensure correct stress supports are used between the jack and jacking surfaces.
Maintain correct balance and footing. Ensure the floor is not slippery and wear non slip shoes.
WARNING! Keep your hands, body and clothing away from the chassis and straightener accessories in use. Take any necessary
precautions to protect your personal safety whilst using the straightener.
Ensure the hydraulic hose is not bent or kinked but laid out correctly.
Keep non essential persons away from the operating area. Be aware of the location of other persons assisting you.
When releasing tension from the load be sure to undo the hydraulic valve VErY slowly.
DO NOT operate the straightener if any parts are damaged or missing as this may cause failure or possible personal injury.
WARNING! DO NOT use straightener as a lifting device of any type.
DO NOT use for any purpose other than for which it is designed.
DO NOT pull chains or cables over or around sharp corners.
DO NOT heat chains or accessories as this may weaken them.
DO NOT bolt links together.
unpack the product and check contents. should there be any damaged or missing parts contact your supplier immediately. Each model
should consist of:
Assemble the unit using the parts list as your guide. When
connecting the hydraulic pump ensure you retain the dust
caps for future use.
ImPORTANT:
only fully trained and qualified persons should use this equipment. these instructions are designed to demonstrate the straightener’s potential.
the content provides a guide to identifying types of chassis damage, and suggested methods of correction. these instructions are not exhaustive,
and are not a substitute for the user receiving full training and supervision under a qualified technician. It is very important that the user
understands the applications, limitations, and specific potential hazards of the product.
VEHICLE DAmAGE INTRODUCTION.
there are two basic vehicle structures, chassis (frame) vehicles, and unitised body vehicles. chassis repair will consist of, first, straightening the
frame, and then the body work. unitised vehicles do not have a frame, so the whole task is essentially body work.
Before using the straightener, you must determine the extent of chassis damage. to do so, the vehicle is usually raised, (subject to it being stable
chassis frame . . . . . . . . . . . . 1
Hydraulic Pump . . . . . . . . . . . 1
ram . . . . . . . . . . . . . . . . . . 1
Pull clamps . . . . . . . . . . . . . . 2
sill clamps . . . . . . . . . . . . . . . 2
chains . . . . . . . . . . . . . . . . . . 2
chain Hooks. . . . . . . . . . . . . . 2
carriage Anchorage tube . . . 1
tube stands . . . . . . . . . . . . . . 2
stand/tube supports . . . . . . . 2
Only fully trained and qualified persons should use this equipment. These instructions are not a substitute for user receiving full
supervised training by a qualified person. It is important the user understands the products applications, limitations, and potential
hazards.
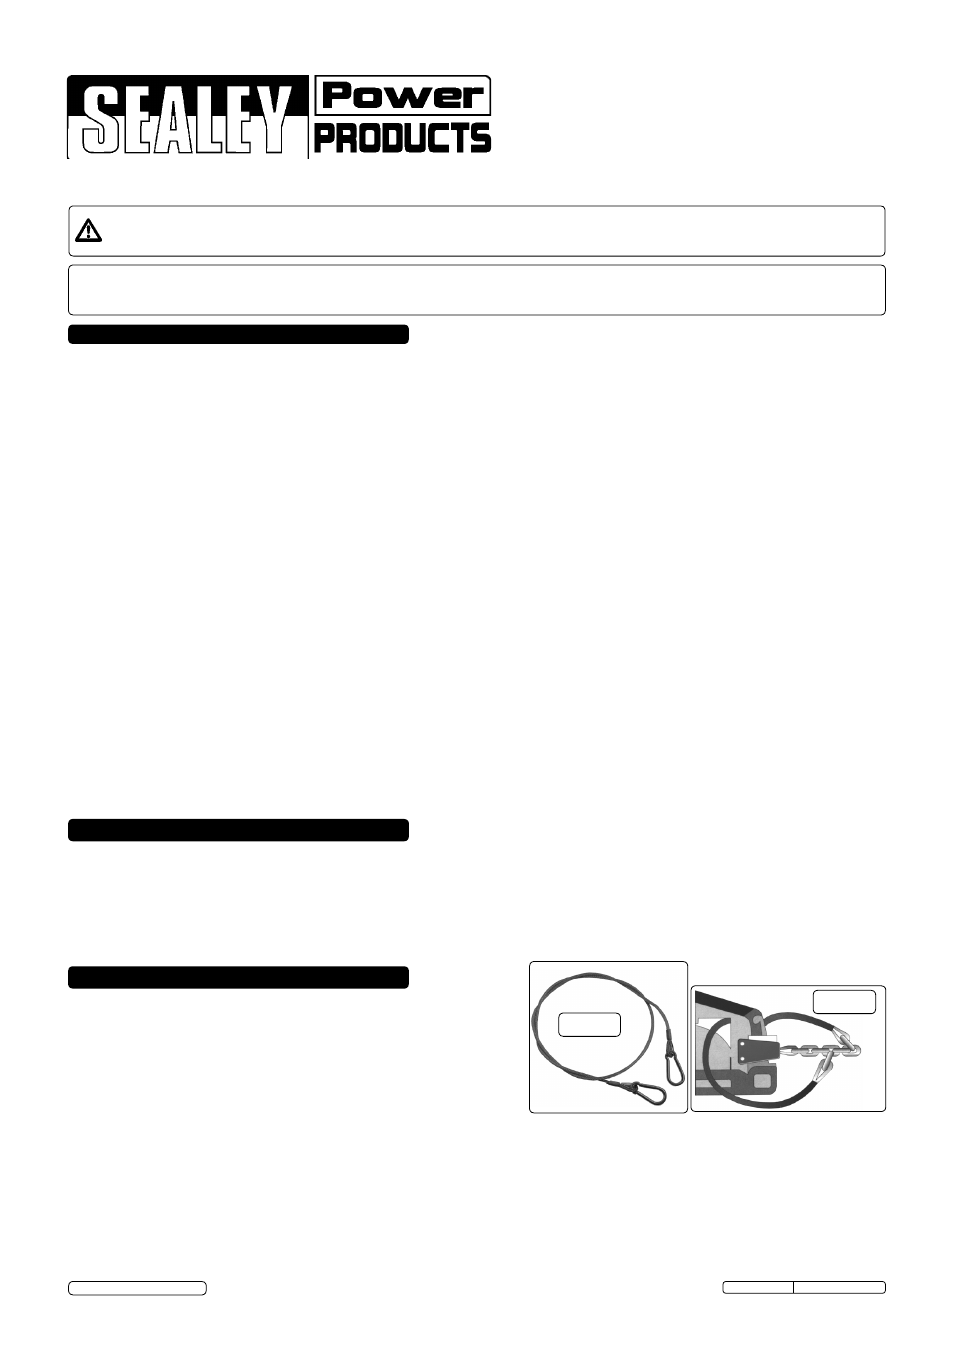
fig. 1
fig. 2
WARNING! this product should not be used without a safety cable. In the
event of the puller/clamp becoming detached from the vehicle bodywork when
under tension a safety cable will minimise the risk of serious injury. Pull clamp
safety cable (fig.1), Model number rE92/sc, is available from your sealey
dealer. After attaching the puller/clamp to the bodywork, but before applying
any tension, one end of the safety cable should be clipped to the puller/clamp
chain and the other end passed through the bodywork and then also clipped
to the chain, as shown in fig.2.
Original Language Version
DZrE92/c.V2 Issue: 1 - 01/07/13
© Jack sealey Limited