Maintenance 3. instructions for use – Sealey AK3845 User Manual
Page 2
3.1. Remove strut from vehicle according to
procedure recommended in the manufacturer’s
service instructions, or a proprietary manual.
3.1.1. Undo the force screw on each compressor
screw so that it is long enough to compress as
much of the spring length as is possible.
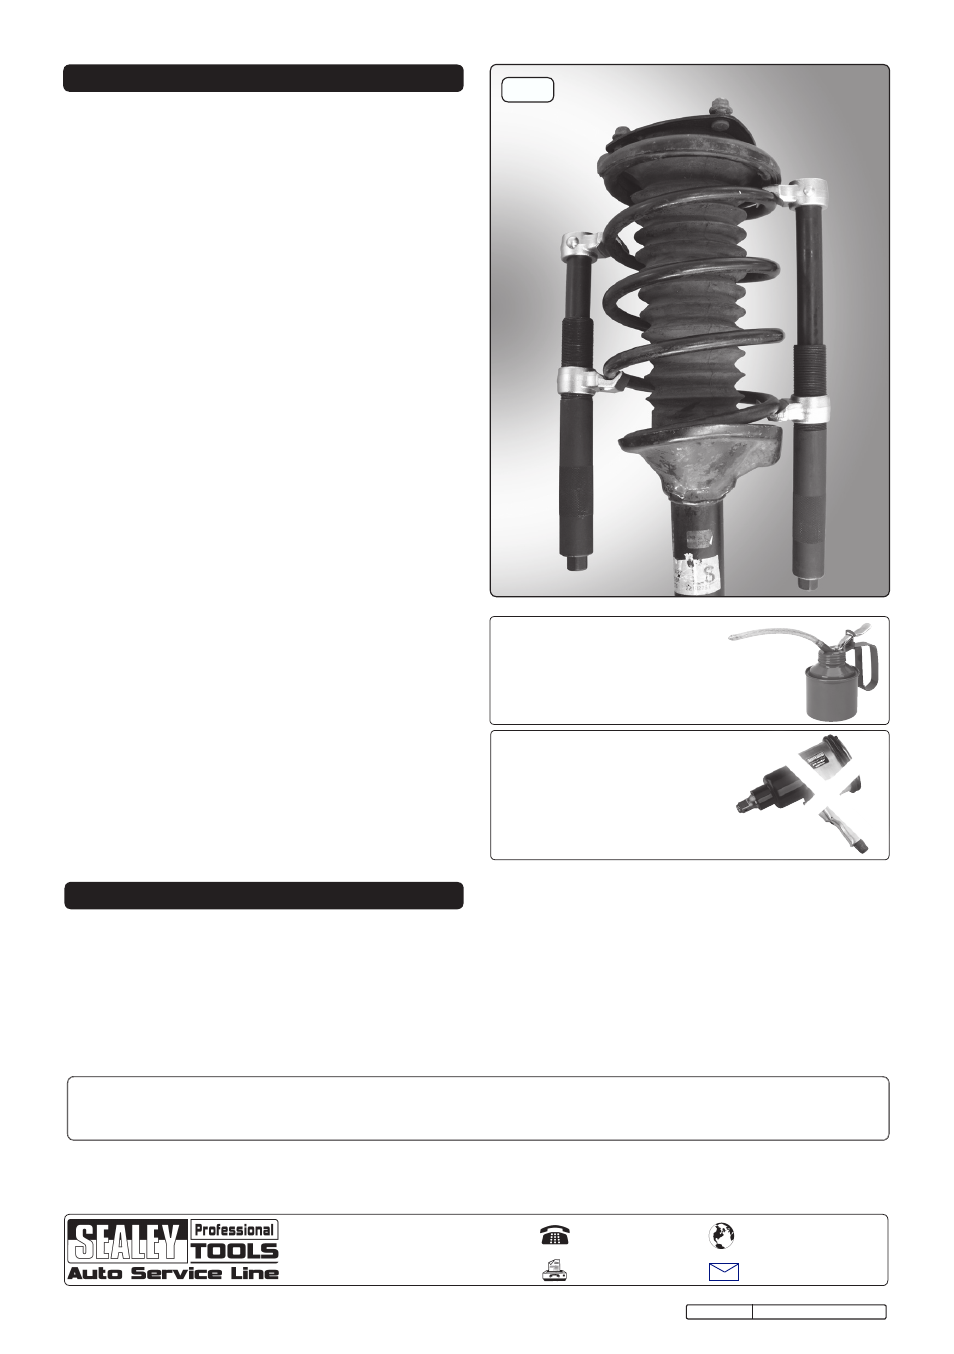
3.1.2. The two compressor screws should be attached
to the spring directly opposite each other as
shown in fig.1.
3.1.3. Attach the first compressor screw by placing the
lower jaw low down on the spring. Slide the
moving jaw upwards and place it as high as
possible on the spring.
3.1.4. Ensure that the compressor screw is vertical
then rotate force screw clockwise until the lower
jaw contacts the spring.
3.1.5. Attach the second compressor screw in the
same way ensuring that it is vertical and
opposite the first screw.
3.1.6. Make a final check that the jaws are correctly
aligned, and the two screws are parallel to each
other, see fig.1.
3.1.7. Commence initial spring compression by
equally rotating the bodies of the screw
compressors counter-clockwise.
3.1.8. Continue full compression of the spring by
turning the force screws clockwise using a
suitable 19mm socket or spanner.
DO NOT use
air tools. The coil will need to be compressed
equally on each side, alternate between each
arm so as to not unbalance the spring.
Compress the spring without allowing it to
become coil bound.
3.1.9. When spring is sufficiently compressed and is
free to rotate on the strut, remove top plate from
strut, then withdraw the spring.
DO NOT drop
the compressed spring assembly or subject
it to any shock.
3.1.10. Reverse the above procedure to replace spring.
4.1. Before each use check the spring compressor set components to ensure they are not damaged or worn. If
suspect
DO NOT use the unit, but contact your local Sealey Dealer who will be able to advise you
regarding repair kits and spare parts.
4.2. Keep the force screws well lubricated.
4.3. Keep the spring compressor set components clean, and when not in use store in a safe, dry, childproof
location.
4. MAINTENANCE
3. INSTRUCTIONS FOR USE
Parts support is available for this product. To obtain a parts listing and/or diagram,
please log on to www.sealey.co.uk, email [email protected] or phone 01284 757500.
Original Language Version
NOTE: It is our policy to continually improve products and as such we reserve the right to alter data, specifications and component parts without prior notice.
IMPORTANT: No liability is accepted for incorrect use of this product.
WARRANTY: Guarantee is 12 months from purchase date, proof of which will be required for any claim.
INFORMATION: For a copy of our latest catalogue and promotions call us on 01284 757525 and leave your full name and address, including postcode.
01284 757500
01284 703534
Sole UK Distributor, Sealey Group,
Kempson Way, Suffolk Business Park
,
Bury St. Edmunds, Suffolk,
IP32 7AR
www.sealey.co.uk
Web
ALWAYS KEEP FORCE SCREW
WELL LUBRICATED
DO NOT USE AIR TOOLS
AK3845 Issue No.1 18/04/12
fig.1