Installation, Installing the device into the iso duct – Silvercrest SAB 160 A1 User Manual
Page 176
172
Installation
SAB 160 A1
GB
■
To avoid function disturbances the installation angle should be less than 30°.
■
Do not install the device in a location where it will be subjected to high
temperatures (i. e. direct sunlight or heating vents), heavy contamination and
strong vibrations.
■
In the event that changes to the vehicle are necessary contact your vehicle
dealer/qualifi ed radio installation facility.
Installing the device into the ISO duct
♦
Pull the installation bracket
48
and the bezel frame
47
from the device’s
housing.
♦
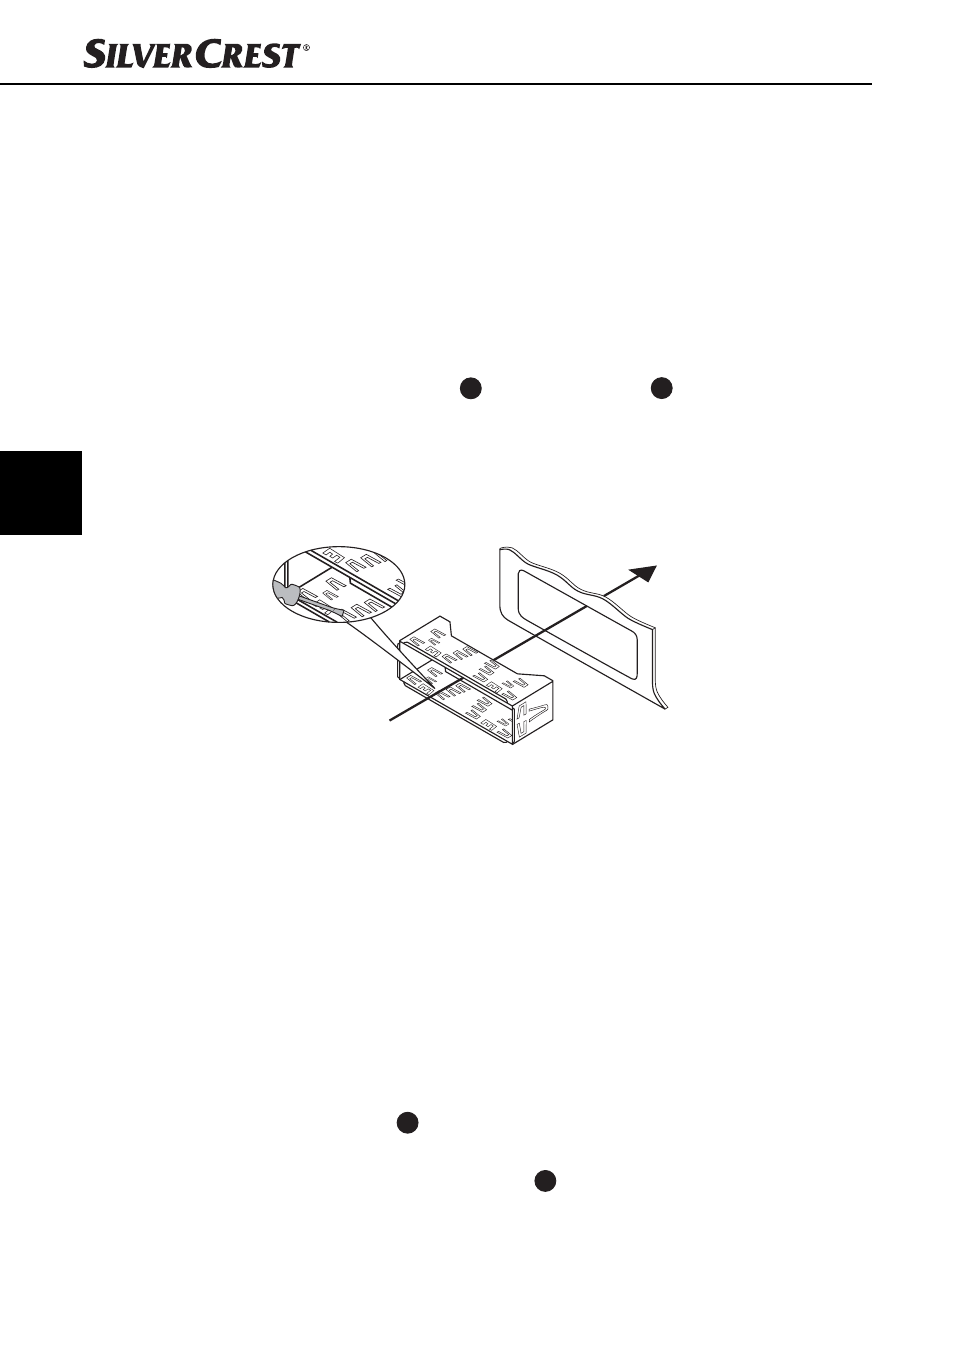
Place the installation bracket into the ISO mounting duct.
♦
Bend the tabs on the installation bracket with a screw driver so that the
bracket is fi xed fi rmly into the mounting duct (see diagram).
♦
Check to make sure that the bracket is securely fi xed.
♦
Connect the ISO socket block of the device with the two ISO plugs on your
vehicle.
♦
Connect the antenna cable from the vehicle antenna to the antenna socket
on the device. The vehicle-specifi c DIN ISO adapter, which under circum-
stances you may need, is available from specialist workshops, specialist
shops or in the specialist sections of department stores.
♦
Feed the microphone unit cable into the aperture and connect it to the
microphone unit socket. Run the cable in such a way that the microphone
unit can be secured in the vehicle interior later, see also the section “Using
the microphone”.
♦
Contingently connect the audio cinch cable of an external amplifi er to the
LINE OUT socket
40
on the device.
♦
Contingently connect the audio cinch cable of an external subwoofer to the
yellow cinch socket SUBWOOFER
38
on the device.
Buch_75726_LB1.indb 172
27.06.12 11:19