Medal Sports SH1458115 User Manual
Page 7
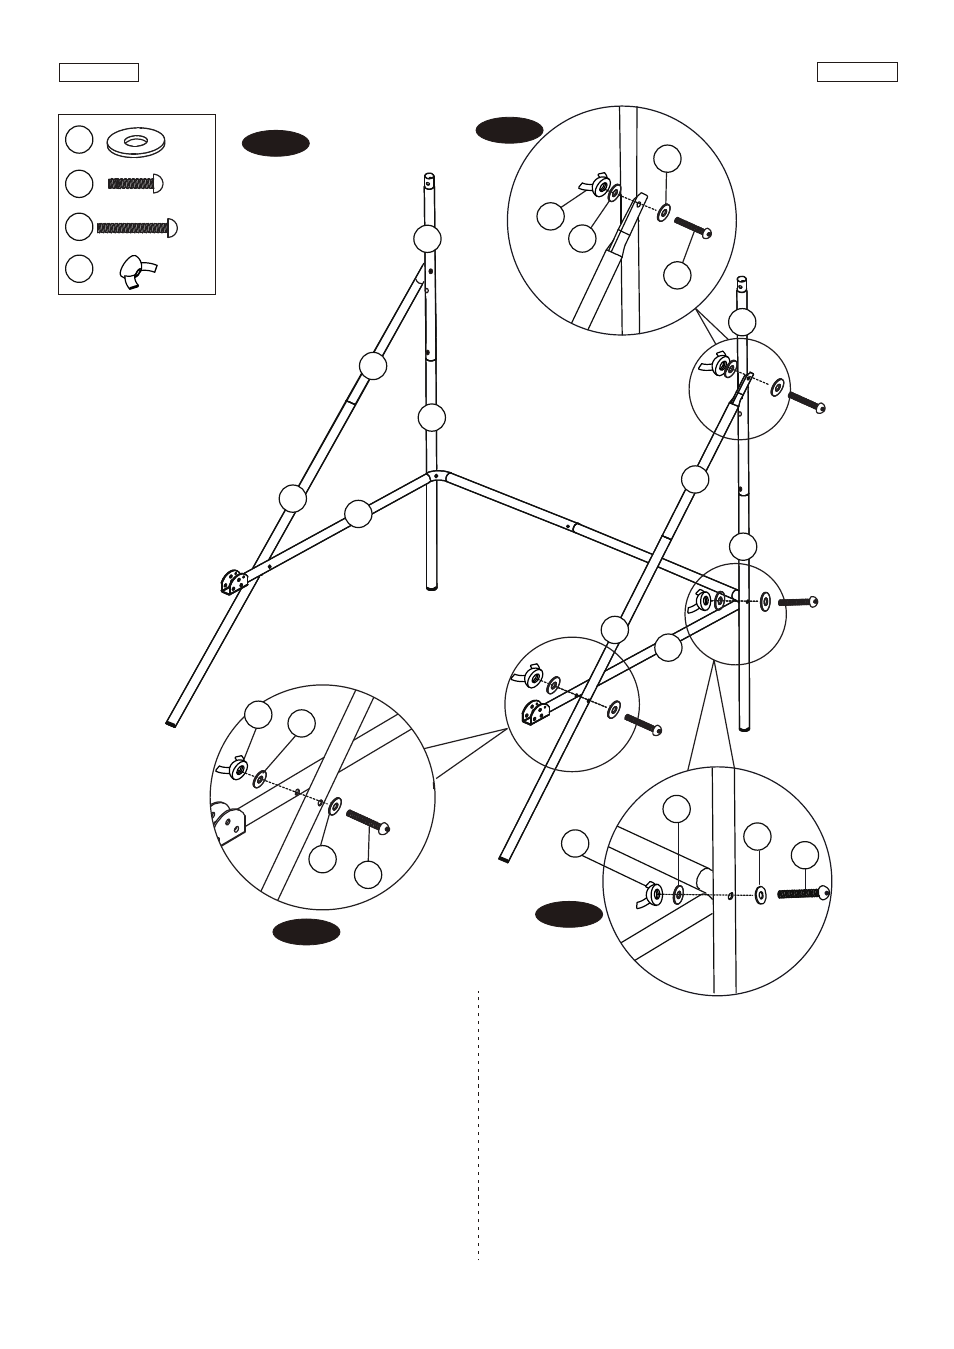
FIG.4
6. Attach the Tube - 5 and Tube - 6 (#5 and #6) to Tube - 3
and Tube - 4 (#3 and #4) using Bolts (#26), Washers
(#22) and Butterfly Nuts (#28), and then attach the
Tube - 5 and Tube - 6 (#5 and #6) to the Tubes - 8 (#8)
using Bolts (#26), Washers (#22) and Butterfly Nuts
(#28) as shown in FIG. 4A & 4B.
7. Attach the Tubes - 7 and Tubes - 8 (#7 and #8) to the
Tubes - 2 (#2) using Bolts (#24), Washers (#22) and
Butterfly Nuts (#28) as shown in FIG. 4C, repeat this
step for other side.
Note: Make sure the spring lock is face down.
FIG.4
6. Adjunte los Tubo - 5 y Tubo - 6 (#5 y #6) a los Tubo - 3 y
Tubo - 4 (#3 y #4) usando Tornillos (#26), Arandelas (#22)
y Tuercas de Mariposa (#28), y luego adjunte los Tubo - 5
y Tubo - 6 (#5 y #6) al Tubos - 8 (#8) usando Tornillos (#26),
Arandelas (#22) y Tuercas de Mariposa (#28) como
mostrado en la FIG. 4A & 4B.
7. Adjunte el Tubos - 7 y Tubos - 8 (#7 y #8) al Tubos - 2 (#2)
usando Tornillos (#24), Arandelas (#22) y Tuercas de
Mariposa (#28) como mostrado en la FIG. 4C, repita este
paso para el otro lado.
Nota: Asegúrese que la cara de la cerradura de resorte
está hacia abajo.
www.themdsports.com
1458115
6
(Continúe en la siguiente página.)
(Continued on the next page.)
Español
English
22
24
26
28
X 12
X 2
X 4
X 6
FIG. 4
5
3
4
2
8
8
6
7
7
2
FIG. 4A
26
28
22
FIG. 4B
22
26
28
FIG. 4C
22
28
24
22
22
22