Fig. 3 – Medal Sports WM.COM1342118 User Manual
Page 8
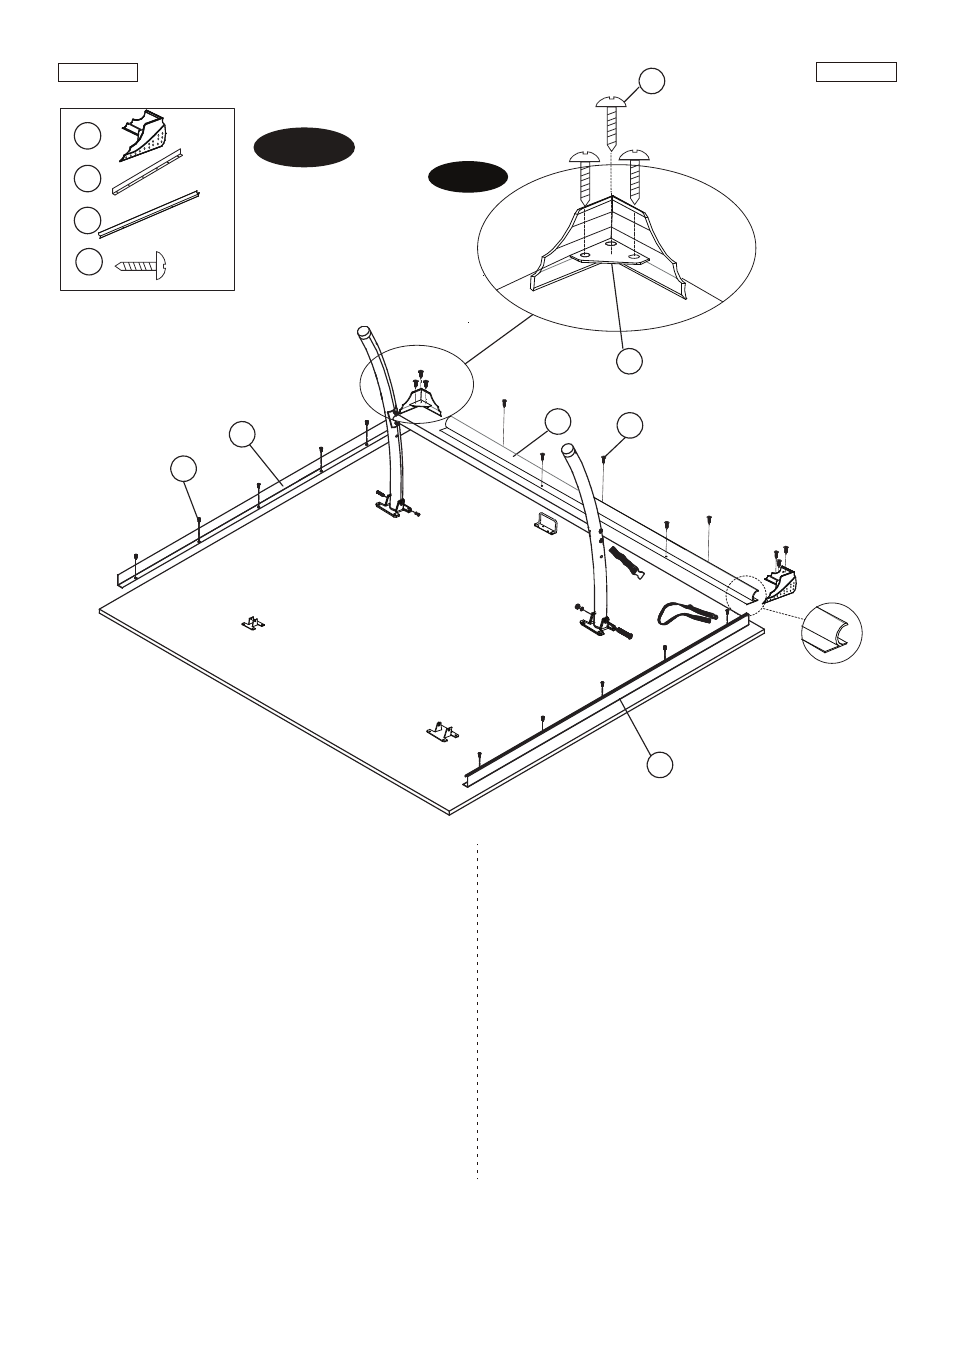
FIG. 3A
FIG. 3
8
9
10
X 42
X 2
X 4
X 4
A1
www.themdsports.com
1342118
7
(Continúe en la siguiente página.)
(Continued on the next page.)
Español
English
FIG.3
9. Place one Plastic Corner (#8) flush with table corner,
and attach using three Screws (#A!) per Corner.
See FIG. 3A
10. Place End Apron (#10) between the corners and flush
with the table edge at the Player end of table using
five Screws (#A1) per End Apron.
See FIG. 3.
11. Place Side Apron (#9) flush with table edge at the
side of the table using five Screws (#A1) per Side
Apron.
See FIG. 3.
12. Repeat above steps for other Table Surface.
NOTE: Make sure all Aprons are inside the Plastic
Corners.
FIG.3
9. Coloque una cisterna del Rincón Plástico (#8) con el
rincón de mesa y coloque a través de 3 Tornillos
(#A1) por Rincón.
Vea la FIG. 3A.
10. Coloque el Delantal Final (#10) entre los rincones y
cisterna con el filo de mesa al Jugador final de mesa
usando 5 Tornillos (#A1) por Delantal Final.
Vea la FIG. 3.
11. Coloque la cisterna del Delantal Lateral (#9) con el
filo de mesa del lado de la mesa usando 5 Tornillos
(#A1) por Delantal Lateral.
Vea la FIG. 3.
12. Repita dichos pasos para la otra Superficie de Mesa.
NOTA:Asegúrese que todos los Delantales están
dentro de los Rincones Plástico.
Player
/ Jugador
Center
/ Centro
9
A1
9
8
A1
A1
10