Multi-Contact MA259 User Manual
Page 5
Advanced Contact Technology
www.multi-contact.com
5 / 8
PV-KO3 I+II
40 mm min.
11
12
13
14
15
10
Indus trie alk ohol
Indus tria l a lcohol
alcool indus triel
9
Montaje
Assembly
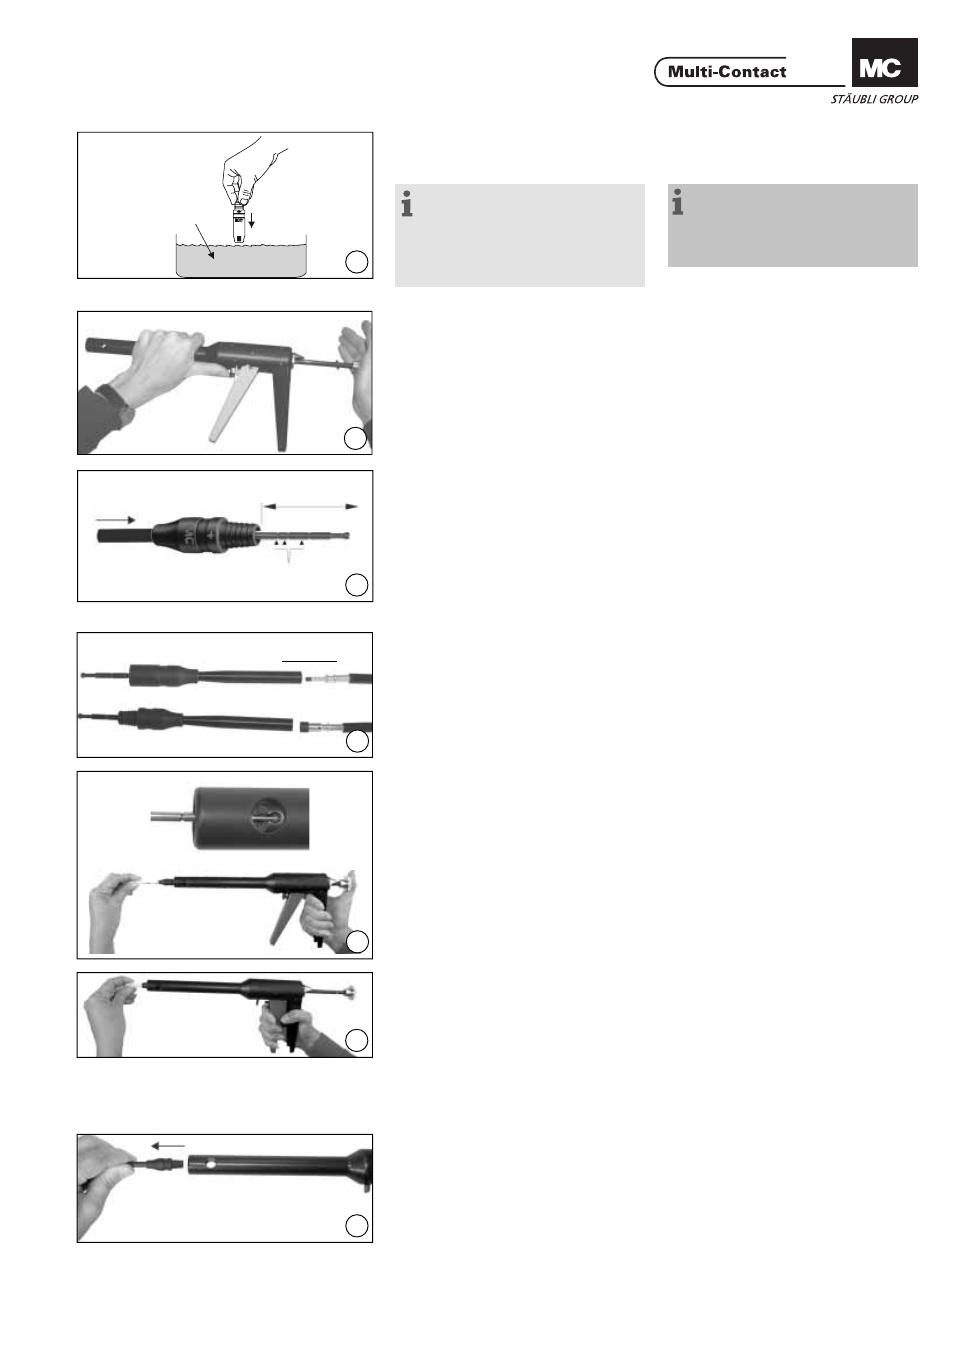
(ill. 9)
Nota:
Puede facilitarse el proceso de
montaje si el manguito aislante de
la salida de cables del conector se
sumerge en alcohol industrial antes
de introducir los contactos.
(ill. 9)
Note:
You can facilitate the assembly pro-
cedure by immersing the connector
insulators in industrial alcohol before
inserting the contacts.
(ill. 10)
Coja la herramienta de ensamble por
el tubo deslizador.
Presiones la palanca de reset R con
el pulgar en la dirección que indica la
fl echa y al mismo tiempo presione la
varilla de tracción Z hasta el límite con
la otra mano.
ill. 10)
Hold the assembly tool by the pull-in
tube.
Press the return lever R with the
thumb in the direction of the arrow
and at the same time press in the
puller rod Z to the limit with the other
hand.
(ill. 11)
Seleccionar el husillo cónico:
• PV-KO3 II para aislamiento de cas-
quillos y clavijas del tamaño IIA
Empujar el cono desde atrás a través
del aislamiento del casquillo o clavija
hasta que la espiga de tracción sobre-
salga aprox. 40mm del aislante del
casquillo o clavija.
(ill. 11)
Select the appropriate tapered spindle:
• PV-KO3 II for male and female coup-
ler insulators of size IIA
Push the tapered spindle from behind
into the male or female insulator until
the puller rod protrudes from the male
or female insulator by approx. 40mm.
(ill. 12)
Inserte el pin hembra o macho con el
cable crimpado en el husillo cónico.
(ill. 12)
Insert the male or female coupler
with crimped-on lead into the tapered
spindle.
(ill. 13)
Inserte el husillo cónico en la herra-
mienta de ensamble y asegúrelo al
sujetador. Durante esta operación
sostenga la varilla de tracción en su
lugar.
(ill. 13)
Insert the tapered spindle into the
assembly tool and attach it to the
spindle holder. During this operation
hold the puller rod in position.
(ill. 14)
Presione la manija de la herramienta
varias veces. Ello empujará el husillo
cónico a través de la abertura de la
herramienta. Aplique una presión
suave a fi n de mantener el cable en
el husillo hasta que el pin macho o
hembra encajen en el aislador. Retire
el husillo cónico del aislador comple-
tamente.
(ill. 14)
Actuate the handle of the tool several
times. This pulls the tapered spindle
through the infeed opening of the
tool. Apply gentle pressure to keep
the lead in the spindle until the male
or female coupler part engages in
the insulator. Pull the tapered spindle
completely out of the insulator.
(ill. 15)
Retire el pin hembra o macho de la
herramienta de ensamblado.
(ill. 18)
Withdraw the male or female coupler
from the assembly tool.
Tacche / Grooves