Installation, Basic application diagram – Rose Electronics Xtensys User Manual
Page 8
INSTALLATION
4
Xtensys Video Extender
Installation and Operations Manual
Installation
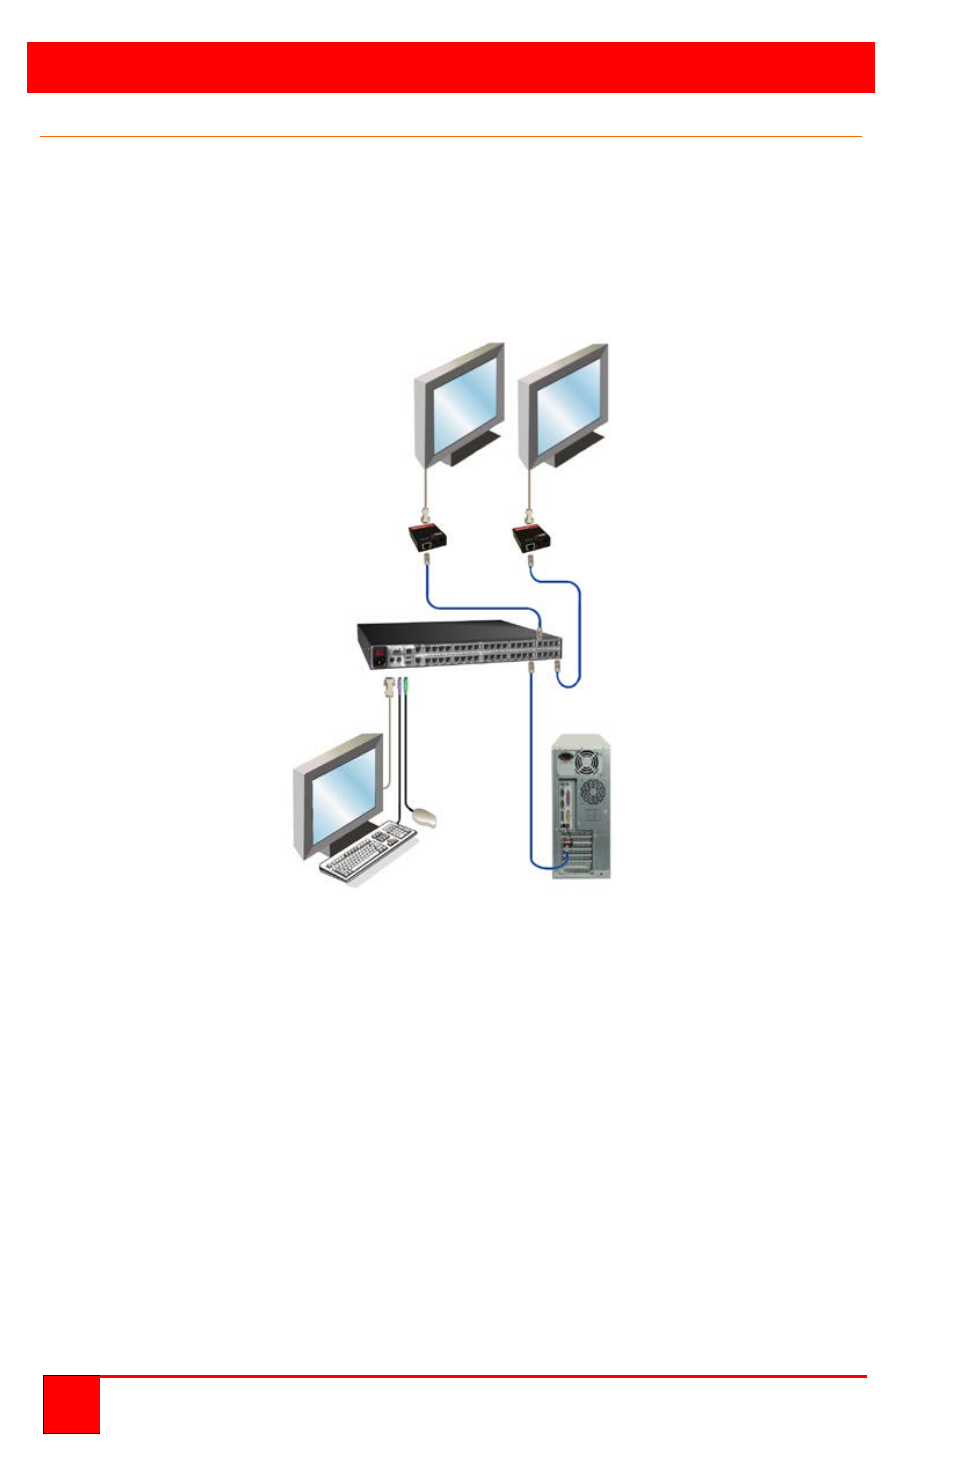
Installing the Xtensys Video Extender is a very easy plug-and-play process.
Simply connect the Xtensys Video Extender’s HD15F connector directly to
the monitor cable; next connect the power adapter to the power jack on
Xtensys Video Extender. Finally, connect the Xtensys Video Extender’s link
connector (RJ45F) to the designated KVM port on the Xtensys KVM switch
with up to 1,000 feet of standard CATx cable. (See below example)
Basic Application Diagram
When power is applied, the Xtensys Video Extender will automatically detect
the cable length, adjust the video gain and equalization and set the skew on
the RGB components to produce a crystal clear display.
There are several application configurations that can be used for selecting
and switching your video sources to the remote monitors. You can use the
local KVM station on the Xtensys KVM Switch to select the video source to
display on the remote monitors. The Xtensys KVM Switch can also be
instructed to switch a video port to a KVM port using serial commands from
an external laptop or terminal connected to the serial port on the Xtensys
KVM Switch.
Remote video monitors
Xtensys Video Extender
(1-16 depending on
Xtensys KVM switch model)
CATx cable
Xtensys
KVM
Switch
CATx cable
Local KVM Computers (1 – 64)
Station (depending on Xtensys
KVM switch model)