Entering a metadata set at the machine, English, Select the image send function – Sharp MX-M1055 User Manual
Page 7: Touch the [mode switch] key. (mx models only), Touch the [data entry] key, Touch the [ok] key
5
ENGLISH
ENTERING A METADATA SET AT
THE MACHINE
Once the machine has been installed (and machine settings have been configured), users can scan an
image file at the machine, enter metadata associated with the file, and have the metadata automatically
routed to a computer folder or a third-party application. Follow the steps below to enter metadata at the
operation panel.
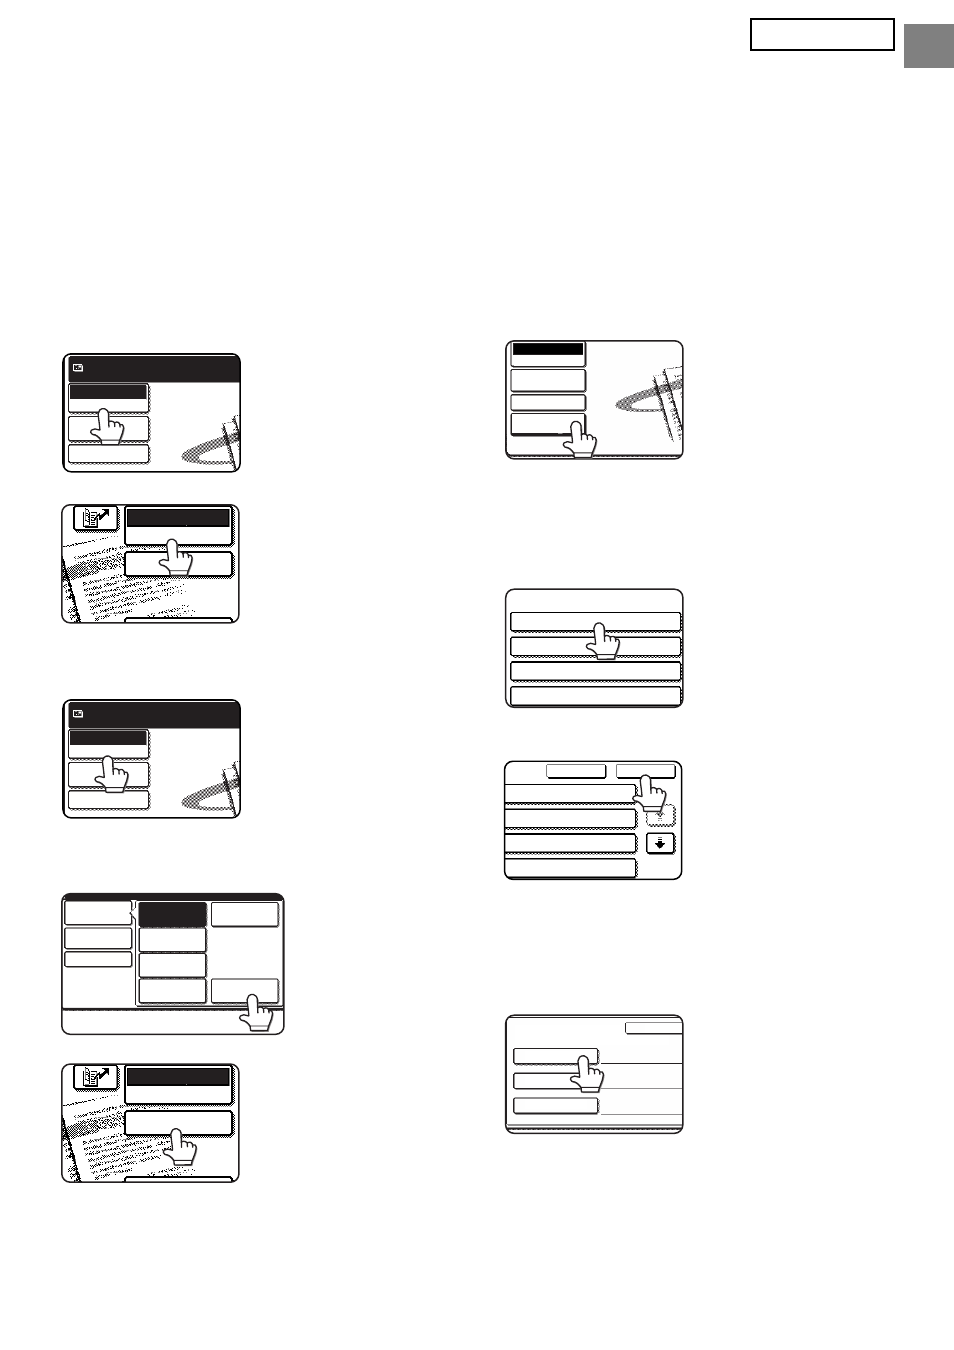
1
Select the image send function.
The base screen appears.
[For MX models:]
[For AR models:]
2
Touch the [Mode Switch] key. (MX
models only)
3
Touch the [Data Entry] key.
[For MX models:]
[For AR models:]
4
Touch the [Metadata Settings] key.
(MX models only)
If default settings have
been configured in the
Web pages, go to step
7.
5
The metadata sets that have been
defined will appear (metadata set
selection screen). Touch the key of the
metadata set that you wish to use.
6
Touch the [OK] key.
7
The items defined in the metadata
set will appear as keys (metadata
settings screen). Touch the key of
the item that you wish to enter.
If you selected the
wrong metadata set,
touch the [Metadata
Set] key to return to the
metadata set selection
screen.
Scan
Mode Switch
Send Settings
Ready to send.
Image
Settings
DATA ENTRY
E-MAIL/FTP
MODE SWITCH
Scan
Mode Switch
Send Settings
Ready to send.
Image
Settings
Fax
Data Entry
PC Scan
USB Mem. Scan
Internet Fax
Scan
Mode Switch
Send Settings
Image
Settings
DATA ENTRY
E-MAIL/FTP
MODE SWITCH
Send Settings
Mode Switch
Data Entry
Image
Settings
Metadata
Settings
Metadata Set
Metadata Set Name :
Metadata 01
Metadata 03
Metadata 05
Metadata 07
Cancel
OK
1/2
ta 02
ta 04
ta 06
ta 08
Metadata Entry
Metadata Set Name : Metadata 01
Metadat
User ID
User Password
Bill Code1