Installation, Installation 9, Steps – Acer CB322QK semipruzx 31.5" 4K UHD HDR Display User Manual
Page 22
9
Installation
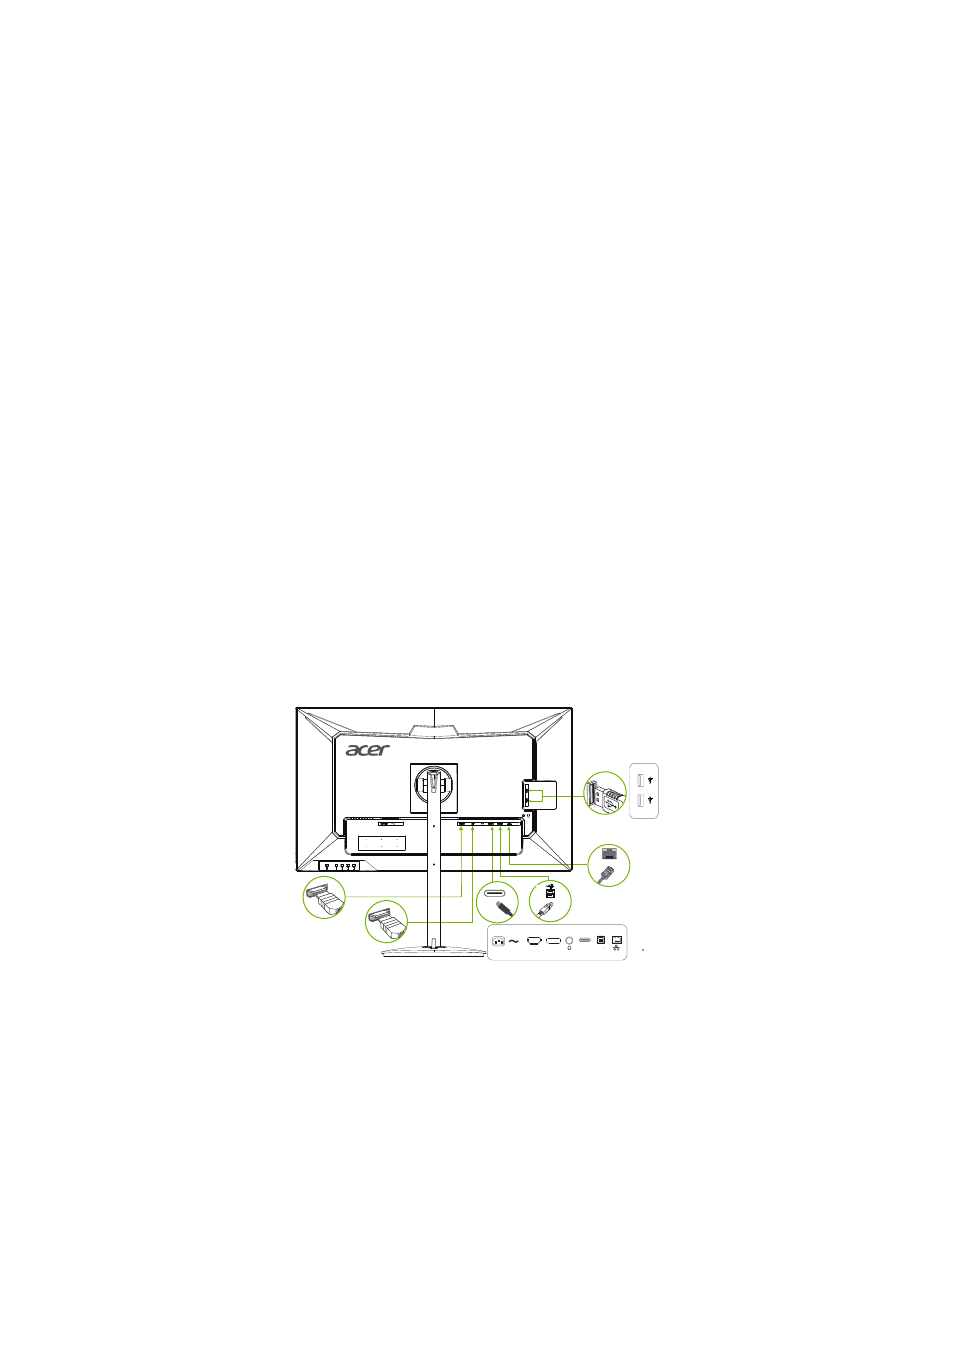
To install the monitor on your host system, please follow the steps below:
Steps
1. Turn off your computer and unplug your computer's power cord.
2. Connect the signal cable to the DP (optional) and/or HDMI (optional) input socket of the
monitor, and the DP (optional) and/or HDMI (optional) output socket of the graphics card on
the computer. Then tighten the thumbscrews on the signal cable connector.
3. Connect one end of the USB Type-C cable to the USB Type-C port of the monitor and the
other end to the USB Type-C port of the computer.
4. If a PC is connected to the monitor using a USB Type-C cable, connect a LAN cable to this port
to connect the PC to the network.
5. Connect the USB Cable(Optional)
Connect one end of the USB cable to the USB terminal of the monitor, and connect the other
end of the USB cable to an appropriate USB port on your device.
Note:
The USB downstream port does not provide power while the monitor switch is off.
USB output: 5V/0.9A
6. Insert the monitor power cable into the power port at the back of the monitor.
7. Plug the power cords of your computer and your monitor
8. Connecting HDMI/DP+USB-B to computer 1 and USB-C to computer 2 when Control up to
2 computers from a single set of keyboard and mouse connected to the monitor.
Note:
If your computer USB-C do not have DP-Alt, pls connect HDMI/DP+USB-B to computer 1 and
HDMI/DP+USB-C to computer 2.
DP
HDMI1
DP
USB C
USB C
USB B
USB
USB B
HDMI
RJ45
*POWER CORD specifications refer to page15
*For the installation of replaceable parts, please refer to the above installation instructions.
*Users may go to the local service network to replace /purchase the qualified replaceable parts.
For local service centers and service contacts, please refer to
https://www.acer.com/ac/en/US/content/support