Wall mounting (optional), Installing the monitor driver – Lenovo ThinkCentre Tiny-In-One 22 Gen 4 21.5" 16:9 Video Conferencing FHD IPS Monitor User Manual
Page 24
Chapter 2.
2-5
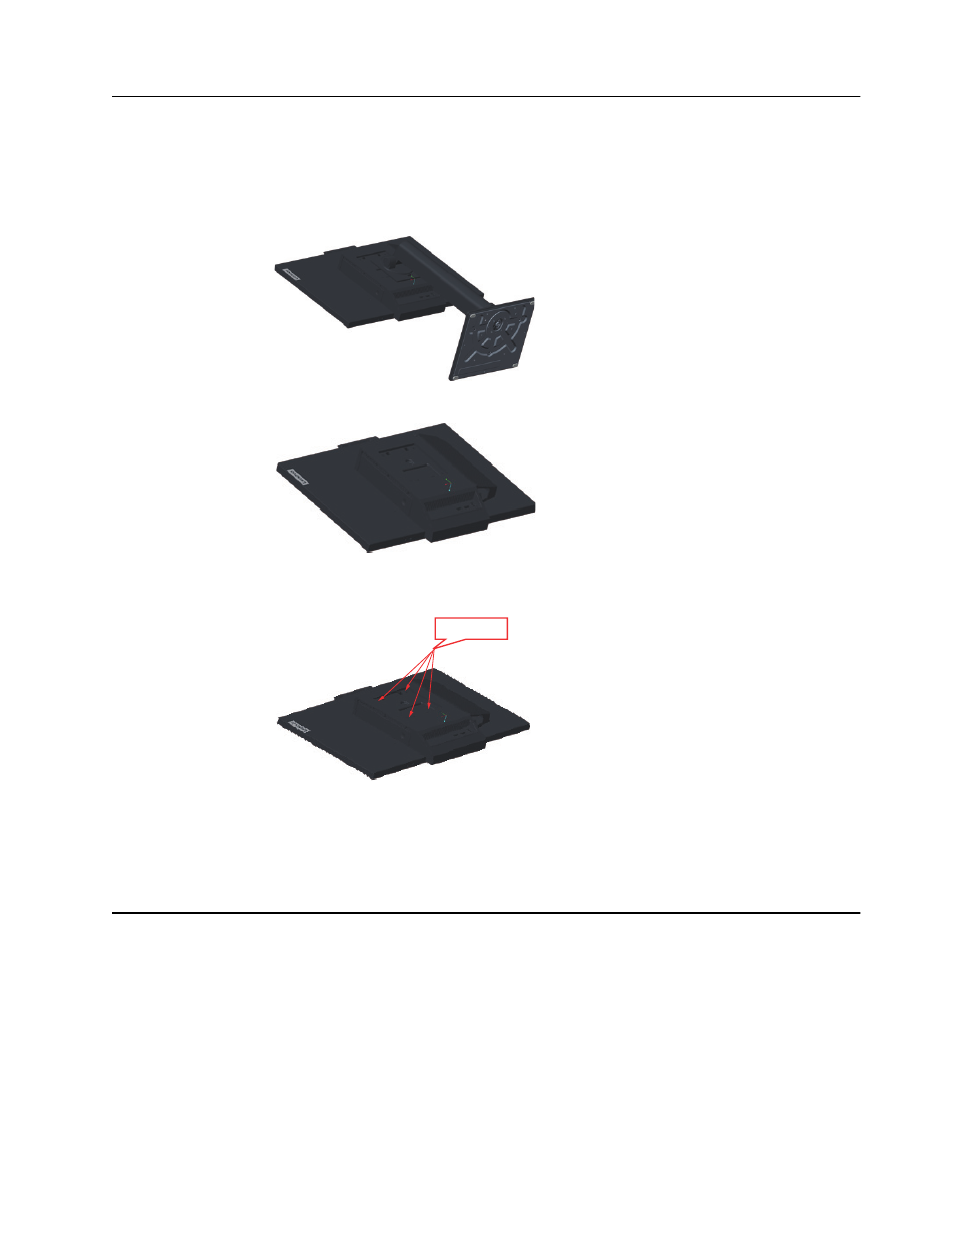
Wall Mounting (Optional)
Refer to the instructions that come with the base mounting kit. To convert your LCD display
from a desk-mounted to a wall-mounted display, do the following:
Step 1: Verify that the Power button is turned Off, then disconnect the power cord.
Step 2: Lay the LCD display face down on a towel or blanket.
Step 3: Remove the base and stand from the monitor.
Step 4: Attach the mounting bracket from the VESA compatible wall mounting kit (100mm
x100mm distance), the type of VESA mounting screw is M4 x 10 mm.
Step 5: Attach the LCD display to the wall, and follow the instructions in the wall-mounting
kit.
For use only with UL Listed Wall Mount Bracket with minimum weight/load: 8kg
Installing the monitor driver
To enjoy a better monitor performance, it is recommended that you install the monitor driver before using
the monitor.
To install the monitor driver, do one of the following:
•
If the optical drive is available, insert the CD that comes with the monitor into the optical
drive. Then, follow the instructions on the screen.
•
If the optical drive is not available, download the driver from the Lenovo Web site at
https://pcsupport.lenovo.com/solutions/tio22
g
en4touch. Then, follow the instructions in
"Manually installing the monitor driver" on page 3-8.
VESA hole