4 multiclient integrated kvm – Philips 439P1 42.5" 4K HDR USB Type-C Docking Monitor User Manual
Page 16
14
2. Setting up the monitor
2.4 MultiClient Integrated KVM
1
What is it?
With MultiClient Integrated KVM switch,
you can control two separate PCs with
one monitor-keyboard-mouse set up. A
convenient button allows you to quickly
switch between sources. Handy with
set-ups that require dual PC computing
power or sharing one large monitor to
show two different PCs.
2
How to enable MultiClient Integrated
KVM
With the built-in MultiClient Integrated
KVM, Philips monitor allows to quickly
switch your peripherals back and forth
between in two devices through the
OSD menu setting.
Please follow the steps for the settings.
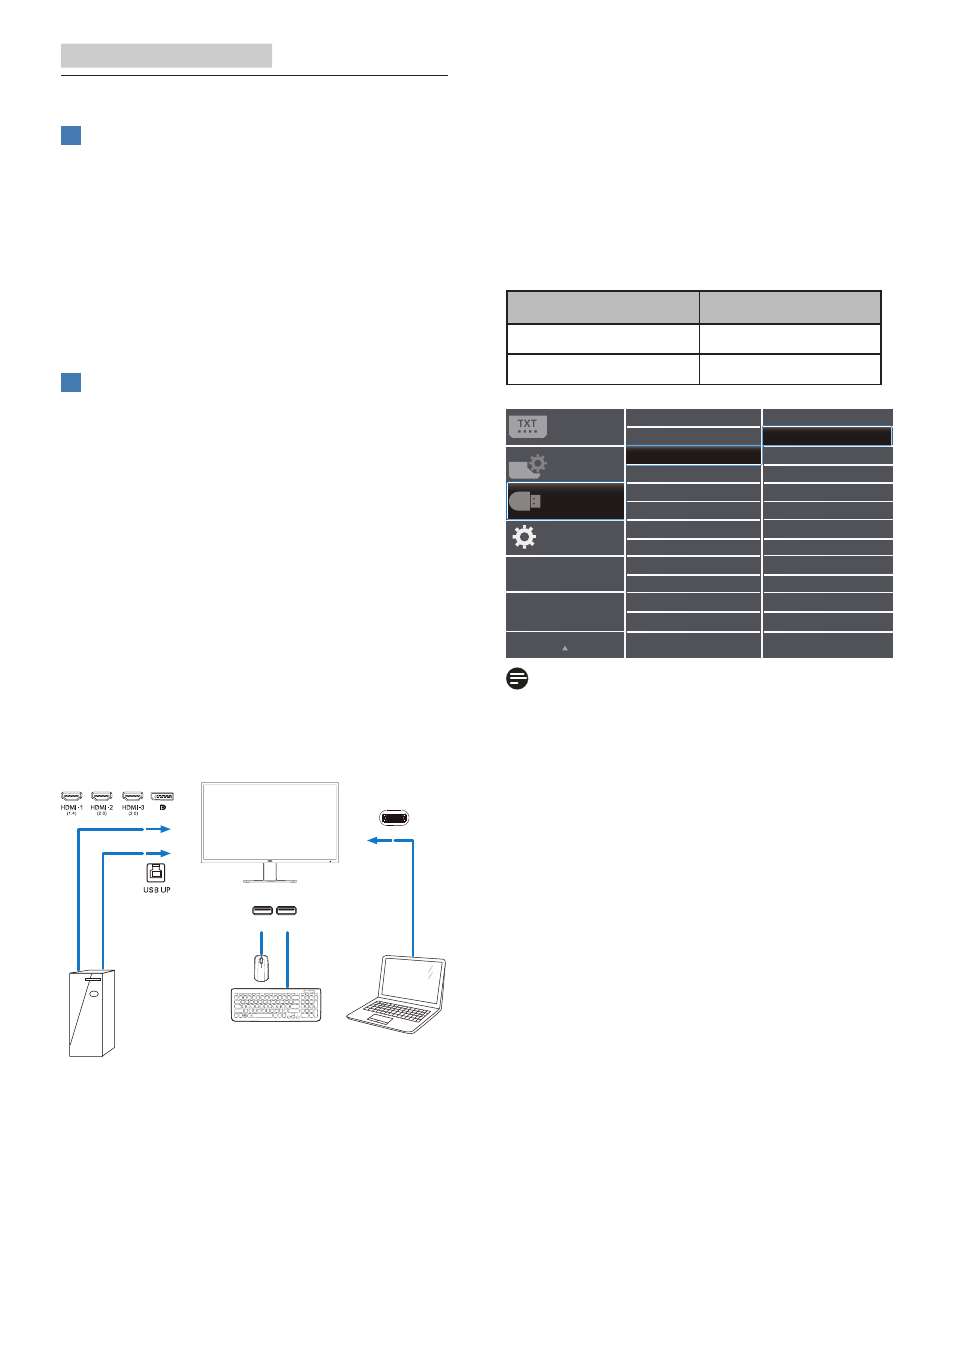
1. Connect the USB upstream cables
from your dual devices to the
“USB-C1” and “USB up” port of this
monitor at the same time.
2. Connect peripherals to the USB
downstream port of this monitor.
PC1
PC2
USB USB
USB-C1
PC1/PC2
3. Enter to OSD menu. Go to KVM
layer and select “Auto”, “USB-C1”
or “USB up” to switch the control
of peripherals from one device to
another. Simply repeat this step for
switching the control system using
one set of peripheral.
KVM Auto:
Source
USB Hub
HDMI/DP
USB UP
USB C
USB C
Note
You can also adopt “MultiClient
Integrated KVM” in PBP mode, when
you enable PBP, you can see two
different sources projected to this
monitor side by side simultaneously.
“MultiClient Integrated KVM” enhances
your operation by using one set of
peripherals to control between in two
systems through the OSD menu setting.
Follow step3 as mentioned above.