Setting up the monitor, 1 installation, Package contents – Philips 439P1 42.5" 4K HDR USB Type-C Docking Monitor User Manual
Page 7: Start
5
2. Setting up the monitor
2. Setting up the monitor
2.1 Installation
Package contents
* HDMI
Power
*CD
This product has been manufactured by
and is sold under the responsibility of Top
Victory Investments Ltd., and Top Victory
Investments Ltd. is the warrantor in relation
to this product. Philips and the Philips Shield
Emblem are registered trademarks of
Koninklijke Philips N.V. and are used under
license.
使用
前请阅读使用说明
保留备用
2
0
2
1 ©
T
O
P V
ic
to
ry
In
ve
stm
en
ts L
td. A
ll rig
hts r
eserv
ed. Un
authorized duplication is a violat
ion
of a
pp
lica
ble
la
ws
. M
ad
e
an
d
pr
in
te
d
in
C
hi
na
. V
er
si
o
n
User’s Manual
Monitor
Contents:
Drivers
User’s Manual
www.philips.com/welcome
*USB C-C
*DP
*USB C-C/A
Screw M4
x 4
Register your product and get support at
www.philips.com/welcome
Quick
Start
439P1
*RS232
*USB A-B
*Remote Control
Batteries AAA R03 1.5V
OK
VOL
* Different according to region.
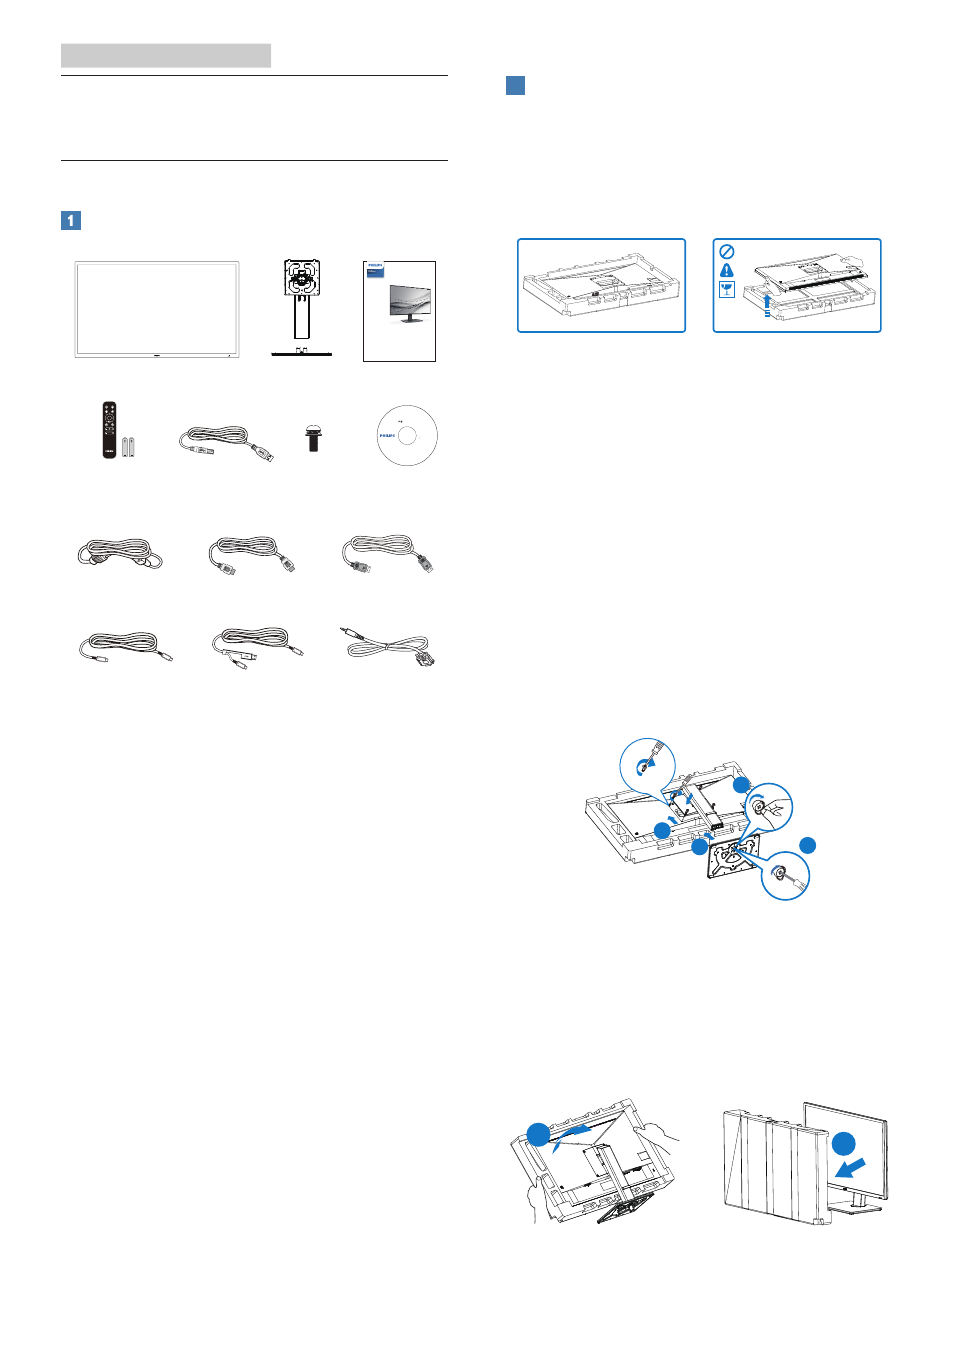
2
Install the base
1. In order to well protect this monitor
and avoid scratching or damaging of
the monitor, keep the monitor face
down in the cushion for the base
installation.
2. Hold the stand with both hands.
(1) Gently attach the base to the
stand.
(2) Use your fingers to tighten the
screw located at the bottom of
the base.
(3) Use a screwdriver to tighten the
screw located at the bottom of
the base, and secure the base to
the stand tightly.
(4) Gently attach the stand to the
VESA mount area until the latch
locks the stand.
2
3
4
1
3. After attaching the base, erect the
monitor with both hands on holding
the monitor together with styrofoam
firmly. Now you can pull out the
styrofoam. When you pull out the
styrofoam, do not squeeze the
panel to avoid broken panel.
2
1