Hisense HAIO163 163" Full HD HDR All-in-One LED Commercial Display User Manual
Page 47
42
(1)
Unpack and check the integrity of components, including two sections of upper front shells, two
side front shells on left and right side, and two sections of bottom beams (including the covers
fixed on them), a total of six components.
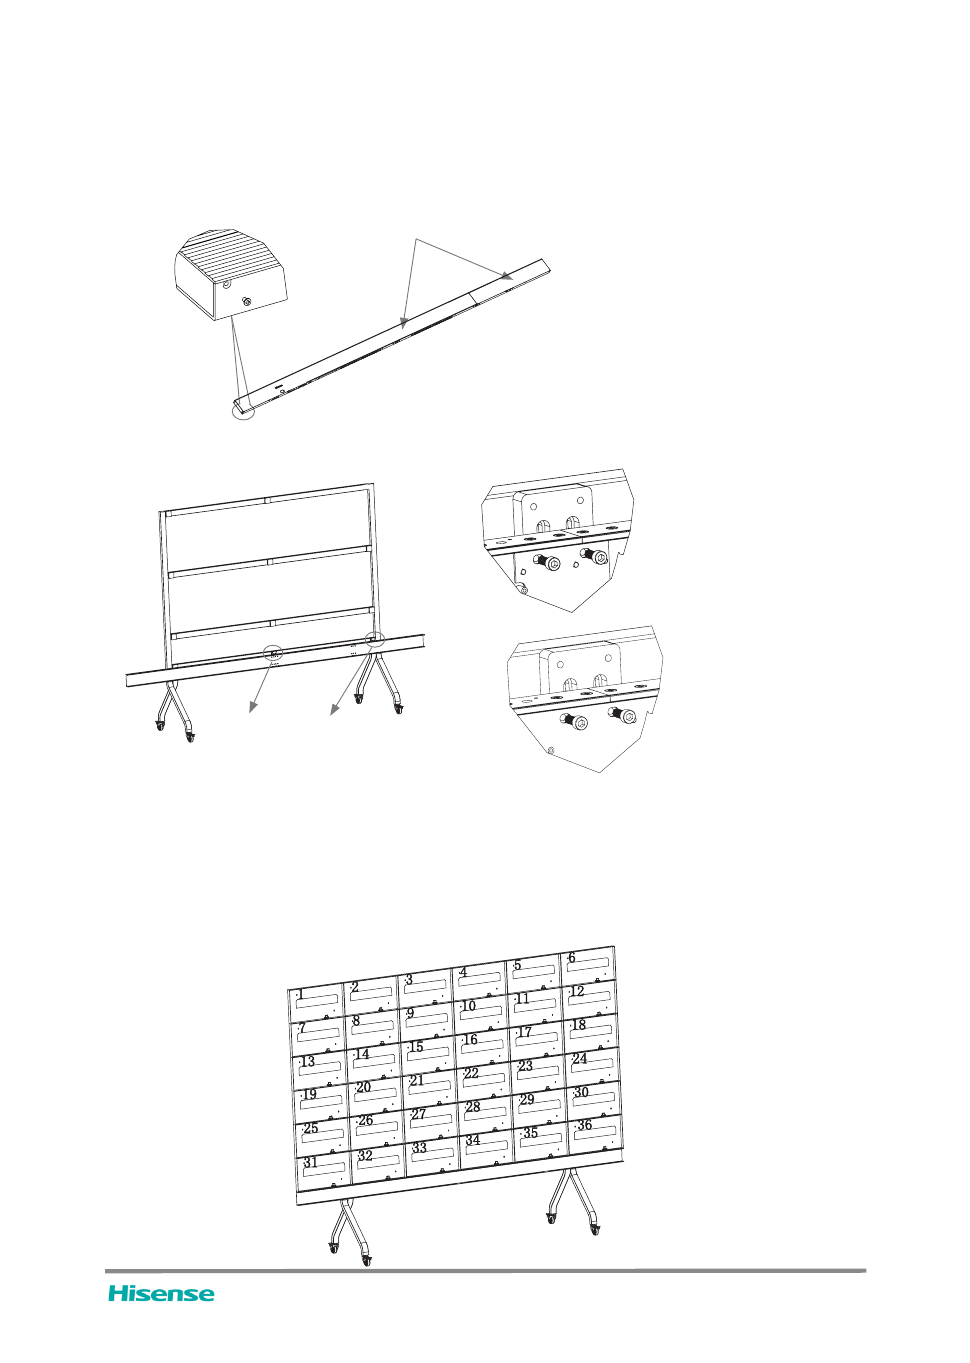
(2)
Take out the already-assembled two bottom beams, as shown in the Figure, remove 16 fixing
screws on the ground side, and remove the front cover (left, middle cover, right cover), while
connecting and fixing the two bottom beams with connecting blocks . Put the wires in the left half
of the bottom beam that need to be connected to the right half, and pass them through the
reserved wire straps according to the wiring positions for fixation and locking.
(
3) Place the bottom beam on the auxiliary support hook of the already-assembled mobile bracket,
and use 4pieces of black screws M6×16 to fix it at the three positions shown in
the Figure.
(1)
Take out the six cabinets at the bottom row, 31-36. The number of each cabinet is shown in the
Figure.
(2)
Fix the cabinets in the bottom row on the bottom beam at first. Fix No. 33 cabinet (or No. 34
cabinet) in the order of fixing from the middle to both sides. Place the cabinet on the bottom
beam and fix the ground side of the cabinet to the upper side of the bottom beam by use of two
stainless steel M6 screws as shown in the Figure(be careful not to lock totally).
(3)
Next, use the two black M6 screws shown in the Figure to fix the rear of the cabinet with the
connecting block of the first cross beam and the connecting block of the second cross beam.
Front cover
Detail A
Detail B
Detail A
Detail B
LED All-In-One User Manual
Cabinet S/N
3.
Installation of side frame and upper frame
4. Cabinet Assembly