When mounting onto the table – Yamaha ADECIA RM-TT Wired Tabletop Array Microphone (Black) User Manual
Page 12
12
RM-TT Installation Manual
When mounting onto the table
Prepare the following.
• This unit
• Tabletop mounting adaptor (hereafter referred to as adaptor) (included)
• Mounting screws × 3 (included)
• Spacers × 3 (included)
• Commercially available countersunk screws × 3
• Drill
1.
Drill a hole in the table.
The hole must have a diameter of at least 25 mm. Use an appropriate drill bit.
2.
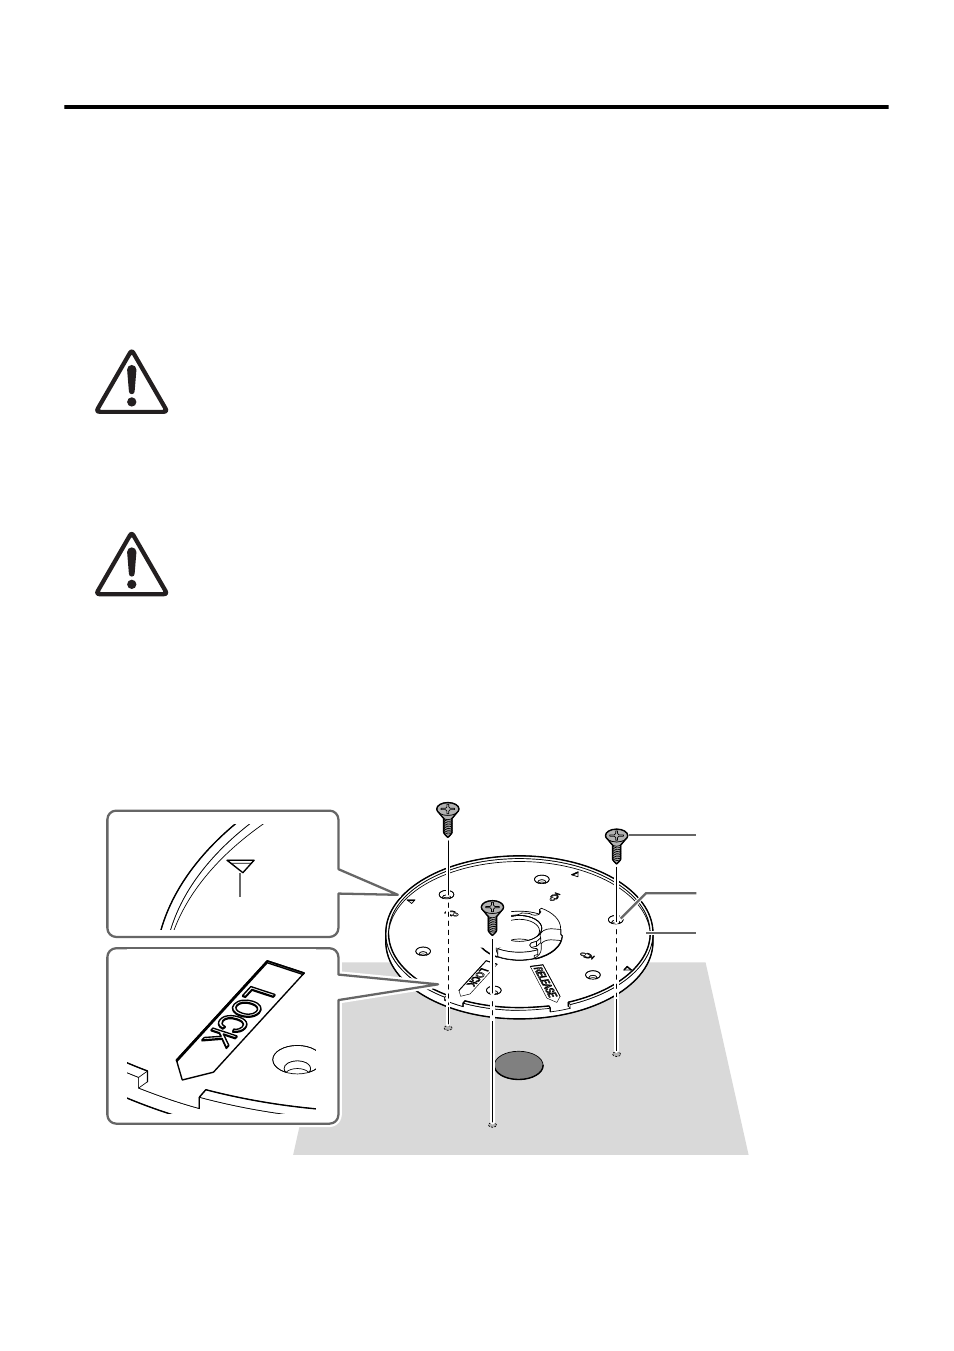
Place the adaptor over the hole in the table and secure it with three
commercially available countersunk screws.
The diameter of the holes for the countersunk screws must be 3.5 mm.
The adaptor is inscribed with one LOCK mark and three triangle marks. These four
marks indicate the orientation of the Mic buttons/indicators when the unit has been
installed. Use these as guides for determining the orientation of the adaptor.
NOTE
: There are six holes (including spares) for the countersunk screws. Use any three
of them.
CAUTION
: Be sure to use countersunk screws and a drill (bit) that are
appropriate for the material of the table.
Using inappropriate hardware and tools may cause injuries or
malfunctions or damage to the table.
CAUTION
: Use appropriate tools when making holes. Using inappropriate tools
may cause hand injuries.
: Be careful not to get debris or dust in your eyes when making holes.
3.5 mm diameter
Commercially available
countersunk screws
Adaptor
Triangle mark