2 custom calibration, English – IK Multimedia iLoud Precision MTM Active 2-Way 175W Dual 5" Studio Monitor (White, Single) User Manual
Page 15
English
15
Try to use a mic stand with a boom arm that is extended as far away from the stand as possible. This helps
avoid reflections from the stand that may interfere with the analysis at high frequencies.
Do not stand or sit near the microphone while the analysis procedure is running.
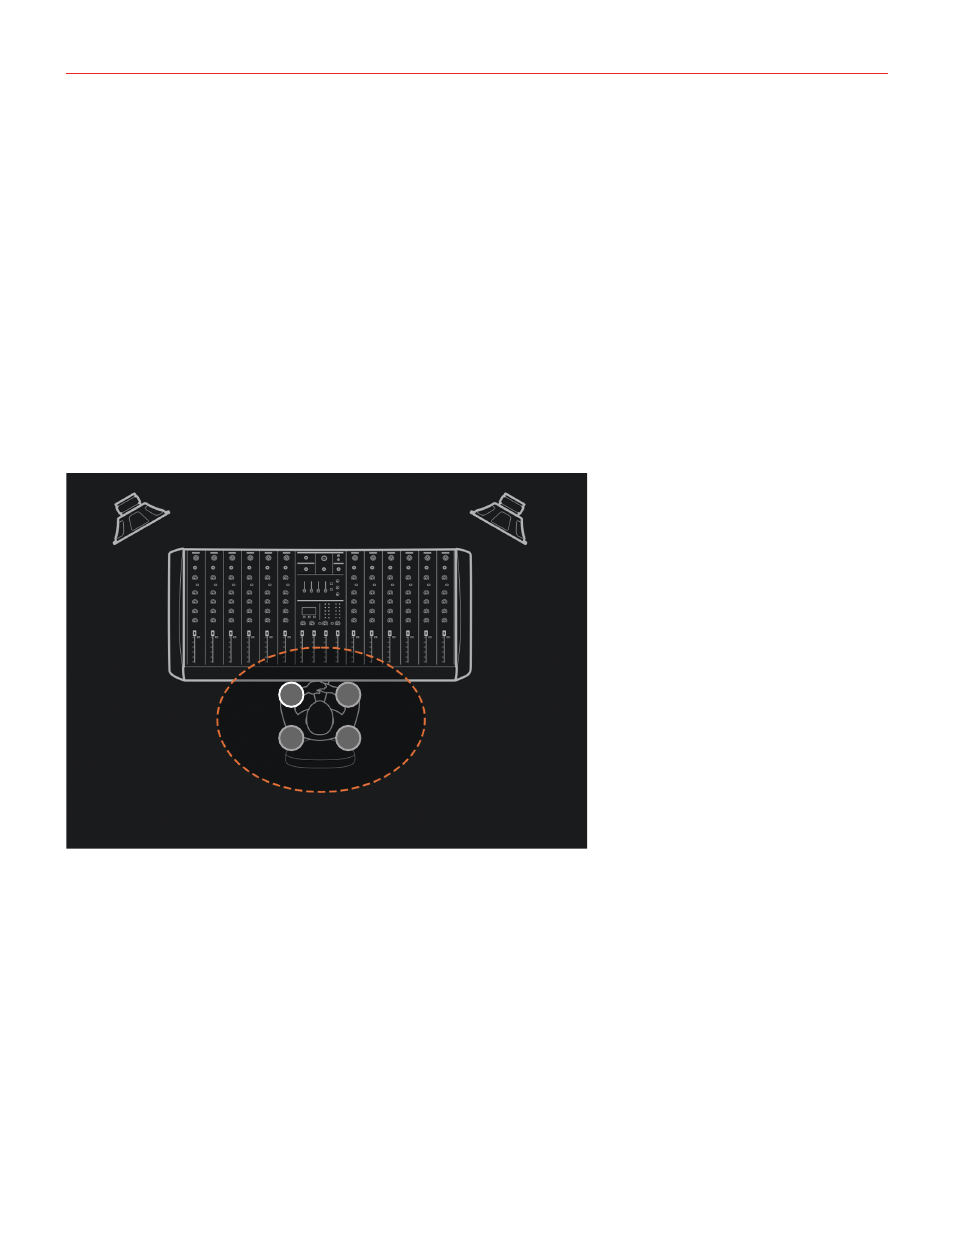
As indicated in the figure above, the microphone has to be set at the same height where your ears are when you
are listening to the speakers.
4.2 Custom calibration
At this point the ARC calibration process can be launched in two ways.
From the speaker
To perform a custom calibration from the speaker, please follow the following steps.
1) Place the microphone at point 1:
3
4
1
2
2) Keep the CAL/PRESET button pressed for three seconds, it switches the speaker into Calibration mode:
• the CAL LED on the back will start blinking together with the front LED (white);
• press again the CAL/PRESET button to start the calibration process;
• after 5 seconds the speaker will emit the calibration test signals (chirps).
- iLoud Precision 5 Active 2-Way 135W 5" Studio Monitor (Black, Single) iLoud Precision 6 Active 2-Way 150W 6.5" Studio Monitor (Black, Single) iLoud Precision 5 Active 2-Way 135W 5" Studio Monitor (White, Single) iLoud Precision 6 Active 2-Way 150W 6.5" Studio Monitor (White, Single) iLoud Precision MTM Active 2-Way 175W Dual 5" Studio Monitor (Black, Single)