Operation – Ryobi P2400 User Manual
Page 11
11
OPERATION
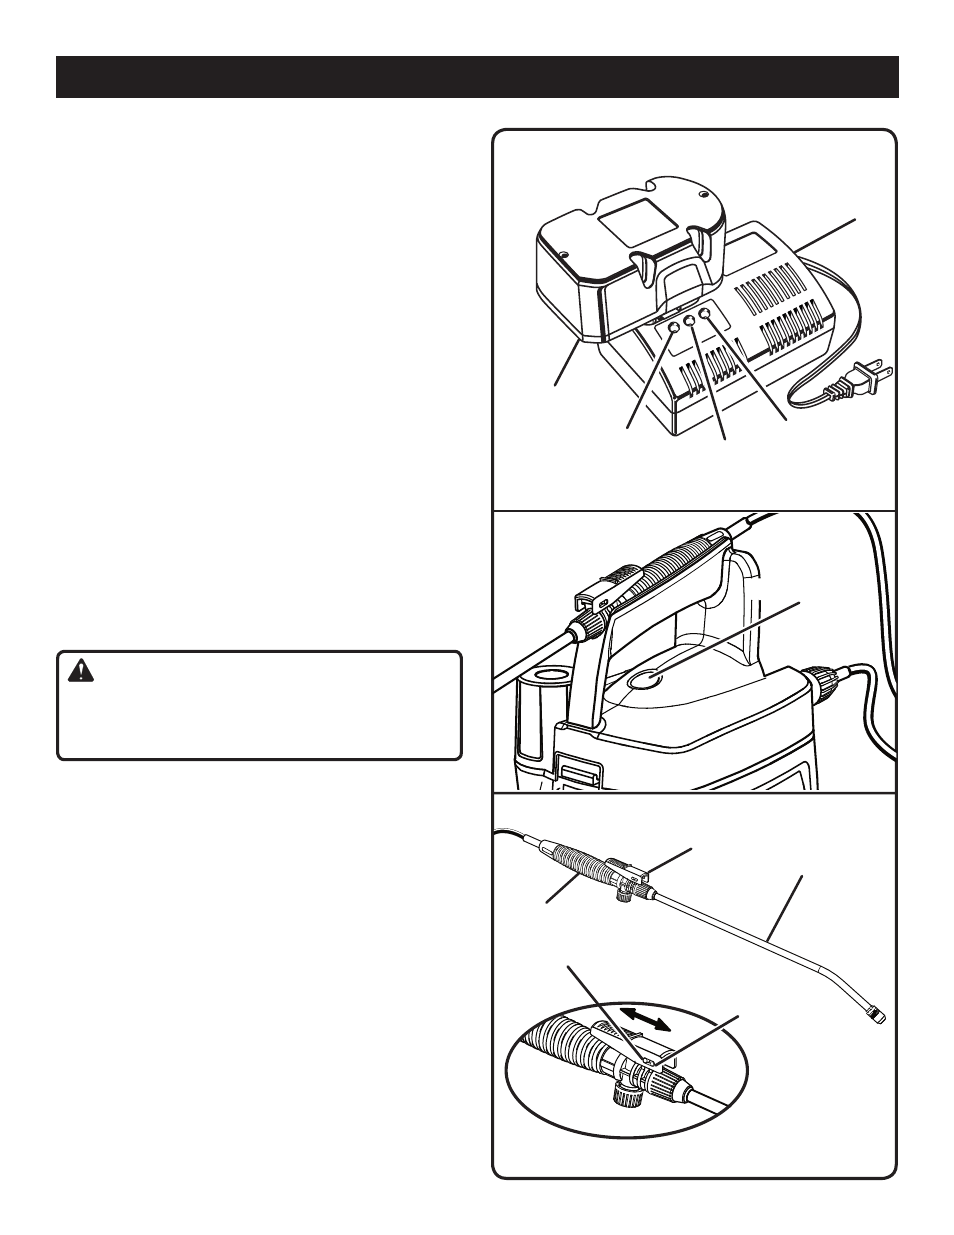
Fig. 4
BATTERY PACK SHOWN IN CHARGER
GREEN
LED
YELLOW
LED
RED LED
P110
CHARGER
P100
BATTERY PACK
Fig. 5
Fig. 6
TRIGGER
TO LOCK-ON
TO RELEASE
SPRAY
WAND
Do not place the charger and battery pack in an area of
extreme heat or cold. They will work best at normal room
temperature.
NOTE: The charger and battery pack should be placed in
a location where the temperature is more than 50°F but
less than 100°F.
When batteries become fully charged, unplug the
charger from power supply and remove the battery
pack.
CHARGING A HOT BATTERY PACK
When using the product continuously, the batteries in the
battery pack will become hot. You should let a hot battery pack
cool down for approximately 30 minutes before attempting to
recharge. When the battery pack becomes discharged and
is hot, this will cause the green LED to come on instead of
the red LED. After 30 minutes, reinsert the battery pack in
the charger. If the green LED continues to remain on, return
battery pack to your nearest Authorized Service Center for
checking or replacing.
NOTE: This situation only occurs when continuous use of
the product causes the batteries to become hot. It does not
occur under normal circumstances. Refer to
CHARGING A
COOL BATTERY PACK for normal recharging of batteries. If
the charger does not charge your battery pack under normal
circumstances, return both the battery pack and charger
to your nearest Authorized Service Center for electrical
check.
WARNING:
Battery products are always in operating condition.
Therefore, the ON/OFF switch should always be turned
OFF when not in use.
TURNING THE SPRAYER ON/OFF
See Figure 5.
To turn the sprayer
ON/OFF, depress the ON/OFF
button.
To start the flow of liquid at the spray wand, depress the
trigger.
To stop the flow of liquid at the spray wand, release the
trigger.
LOCK-ON
See Figure 6.
The lock-on feature is convenient when spraying for an
extended period of time or when covering a large area.
To lock-on, depress the trigger and slide the lock-on
button forward.
To release the lock-on, depress the trigger and slide the
lock-on button toward the handle.
NOTE: Make sure the trigger is not locked on before
inserting the battery pack into the sprayer.
HANDLE
ON/OFF BUTTON