Optoma ZF2100 System User Manual
Page 9
Copyright 2011 Bit Cauldron Corporation
Page 9 of 28
taps in the same direction to make a visible change in the gauge; in certain lighting conditions a single
tap may be visible as a change in brightness viewed through the glasses.
Set Polarity
It is possible that the 3D image, although perfectly clear and free of ghosting, looks incorrect or shows
no depth. The polarity could be reversed, which means the left lens is open when the right eye image is
being displayed – the left eye is getting the right image and vice versa. Simply place the glasses upside
down over your eyes to check if the image is now corrected. If the 3D image is better, the polarity is
reversed. Reversal of polarity can be caused by the source, the content or the projector. The source
equipment or the 3D ready projector may have an option to correct this. If not, the Optoma BC100B
Emitter can be used to reverse polarity.
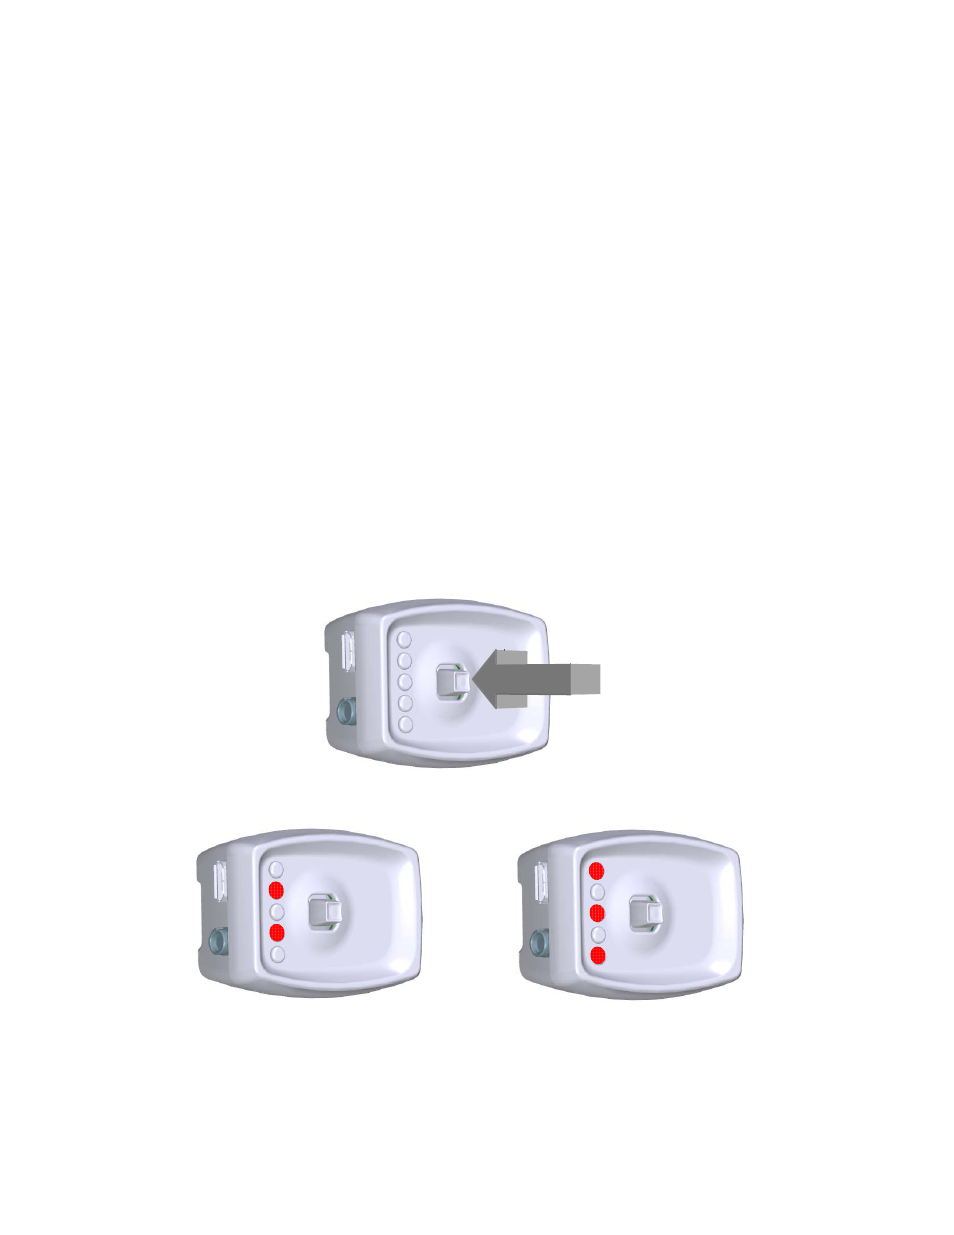
• Select the Manual Tuning Performance Mode, see the Accessing Modes section
• Press and release the joystick
• If the polarity changes to standard, two red LEDs will be lit
• If the polarity changes to reverse, three red LEDs will be lit
• While wearing 3D glasses, view 3D content to ensure proper polarity
• Repeat until correct polarity is selected
PRESS JOYSTICK DIRECTLY INTO EMITTER = SWITCH POLARITY
STANDARD POLARITY
REVERSE POLARITY
Once the correct polarity is achieved, stop pressing the joystick. After 120 seconds, the LEDs will turn
off, indicating that the new polarity setting has been saved. This polarity setting will be saved and used
PRESS