Panel description, Sender unit: at-hd-v40ss – Atlona AT HD V40SRS User Manual
Page 6
4
PANEL DESCRIPTION
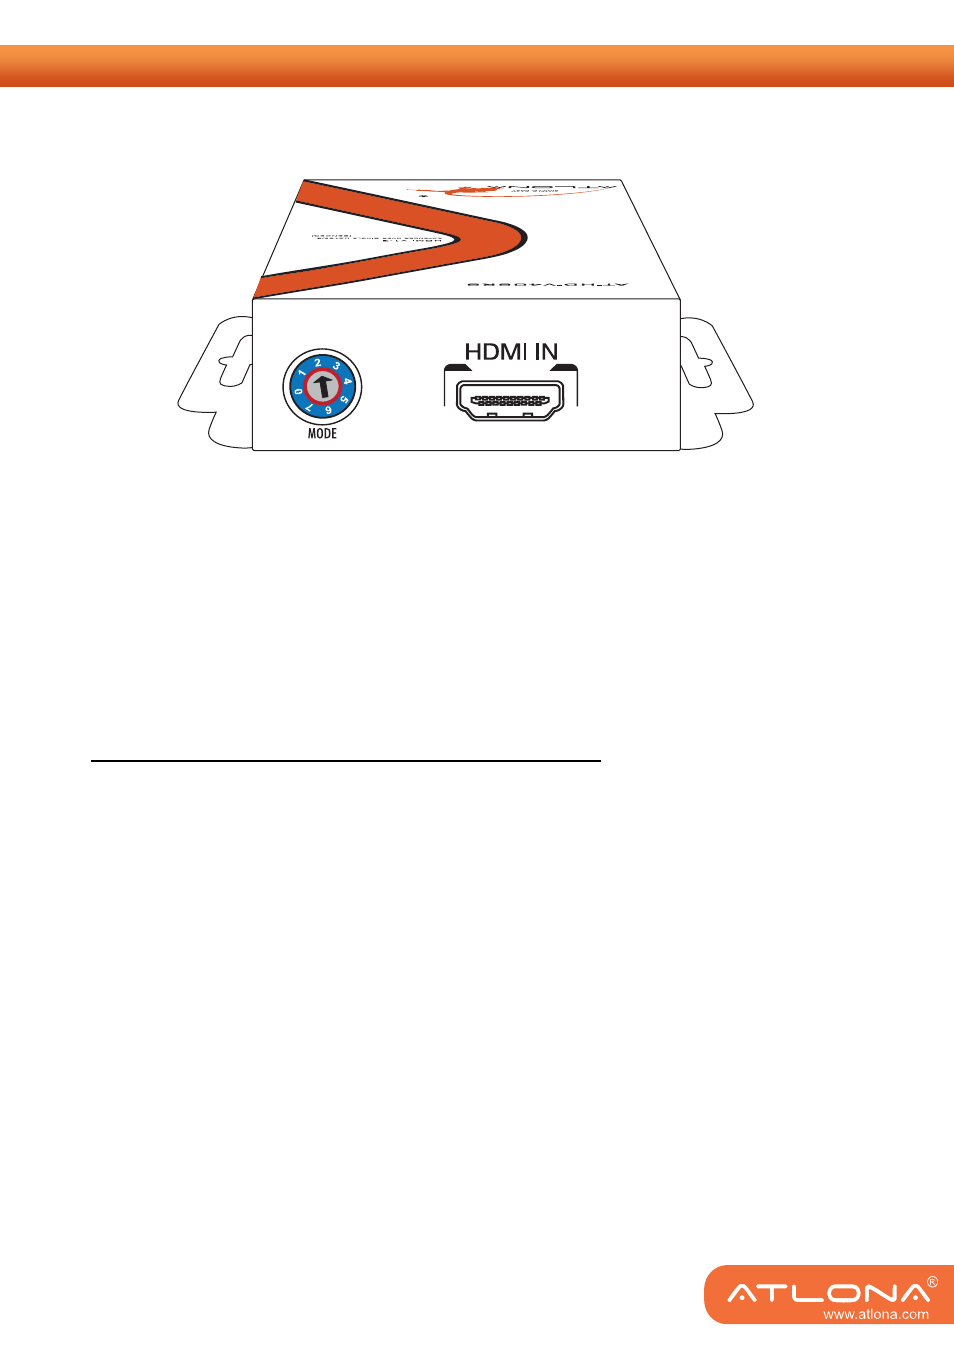
Sender Unit: AT-HD-V40SS
Input Panel
HDMI IN: Connects to a HDMI source with a HDMI male-male cable here
MODE: 0 = [Video] – supports up to HDMI 1.3 output. [Audio] – supports up to 7.1ch output
1 = [Video] – supports up to HDMI 1.3 output. [Audio] – locks to stereo audio output
2 = [Video] – locks to HDMI 1.2 output. [Audio] – supports up to 7.1ch output
3 = [Video] – locks to HDMI 1.2 output. [Audio] – locks to stereo audio output
4 = [Video] – DVI display mode. [Audio] – no audio output
5 = [Safe Mode] – uses default EDID1 with video supported up to 720p/1080i
6 = [Default Mode] – uses default EDID2 with video supported up to 1080p
7 = [EDID Learning Mode] – learns EDID3 from the display
Note for EDID (Extended Display Identification Data) learning
1. If you cannot get the audio/video output from the connected display from the first time setup.
Please follow the instructions below to check if the extender is OK:
Step 1 – Please set the rotary arrow on TX at “
Mode 5
” for Safe Mode, and wait for the LED of the
RJ-45 connector blinks for a couple seconds.
Step 2 – Please turn the rotary arrow counterclockwise [ ] from
Mode 5
to
Mode 3
. If you can get
audio/video from the display, you can stay tune at this setting for 720p or 1080i and stereo
audio. If you need to get 720p/1080i with 7.1ch audio output, please turn the rotary arrow
counterclockwise [ ] from
Mode 3
to
Mode 2
. For better audio/video output, please check
Note#2. If you still cannot get the audio/video out normally, please go on the next step.
Step 3 – Please turn the rotary arrow counterclockwise [ ] from
Mode 3
to
Mode 7
. Wait a few
seconds until the LED of the RJ-45 connector dims and then lights again.
Step 4 – Please turn the rotary arrow clockwise [
] from
Mode 7
to
Mode 1
. You should have normal
audio/video output. If not, please contact technical support.
2. For desirable 1080p video output, please follow the instructions below:
Step 1 – Please set the rotary arrow on TX at “
Mode 6
” for Default Mode, and wait for the LED of
the RJ-45 connector blinks for a couple seconds.
Step 2 –
Please turn the rotary arrow clockwise [
] from
Mode 6
to
Mode 1
. If you can get
audio/video from the display, you can stay tune at this setting for 1080p and stereo audio. If
you need to get 1080p with 7.1ch audio output, please turn the rotary arrow
counterclockwise [ ] from
Mode 1
to
Mode 0
. If you cannot get the audio/video out
normally, please go on the next step.