Installation – Audio Solutions AS-CM3260 User Manual
Page 5
5
SteP 1
Read and understand all of the enclosed instructions and verify that all parts are present and appear in
good working order before you begin.
SteP 2
Choose a location on the ceiling for your new Audio Solutions™ TV Mount. Ensure there is adequate
support in the ceiling to attach the ceiling plate with the supplied screws.
Wood Stud Mounting
Locate the studs and mark the center and edge locations. Position the Ceiling Plate over the marked
wooden stud areas and mark for drilling. Using the correct size drill bit, pre-drill a 2.5” deep hole in each
marked location. Attach the Ceiling Plate to the ceiling joists using 2.5” wood lag bolts and washers (not
included in installation kit). The Ceiling Plate is shown in Figure 2.
NOTE: This installation requires the use of additional support boards.
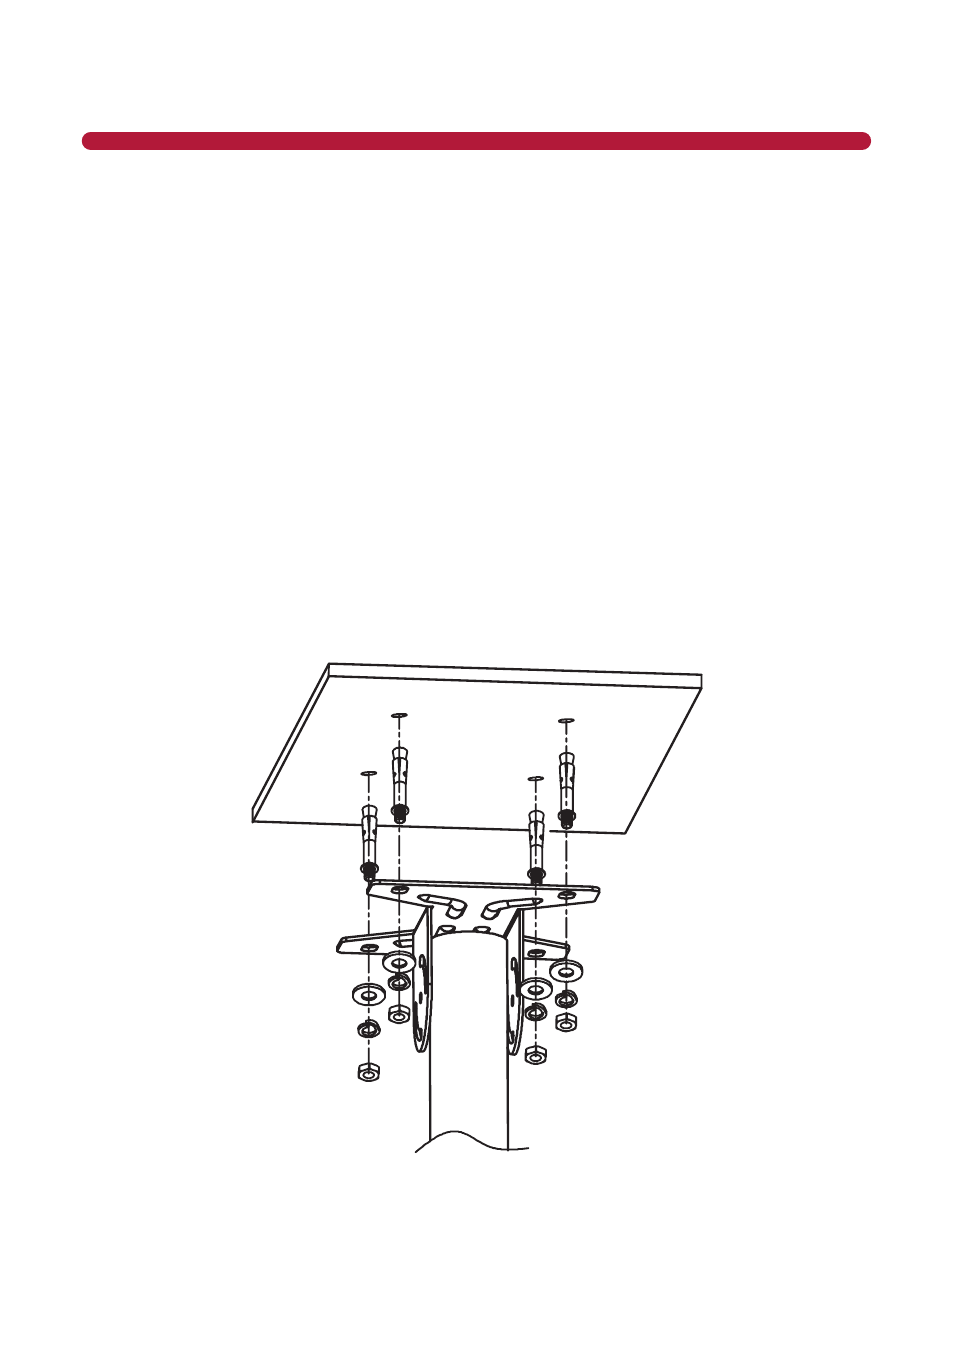
Concrete Ceiling Mounting
Choose a solid ceiling area that will support the weight of the television. Position the Ceiling Plate and
mark for drilling. Using the correct size drill bit, pre-drill a 2.5” hole in each marked location. Remove the
nuts from the concrete bolts and insert a concrete anchor into each hole. Using the supplied wrench,
attach the Ceiling Plate to the ceiling using the nuts you removed from the concrete bolts (Figure 2).
Figure 2 - Concrete Mounting
INStAllAtION