Installation, No! yes – Audio Solutions AS-CM3260 User Manual
Page 8
8
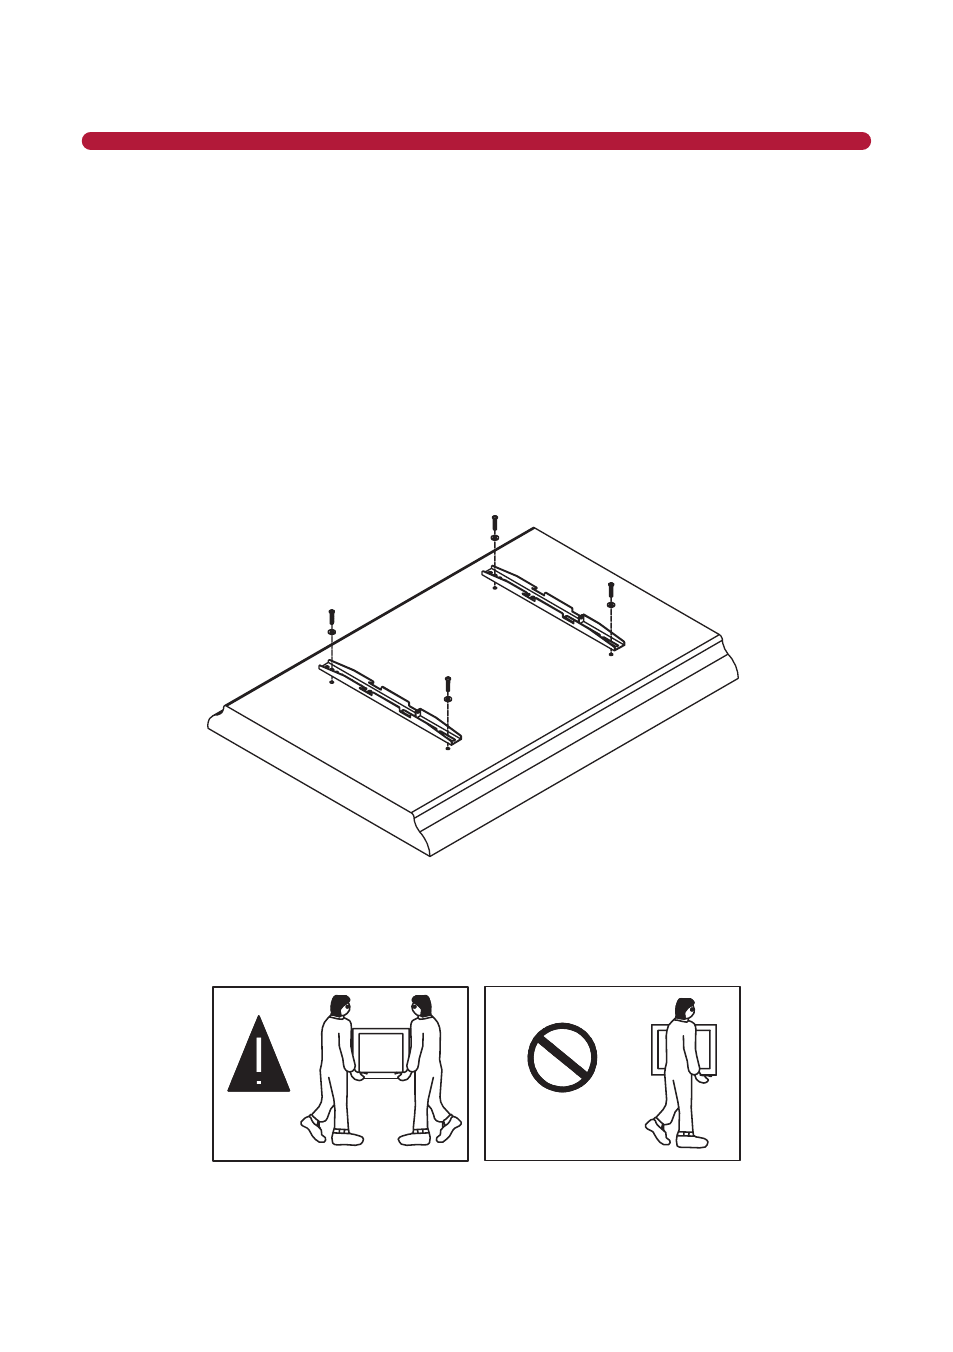
SteP 6
In the hardware bag provided, locate the 4 pan head bolts that fit the thread pattern for your television or
Audio Mount™. With the two vertical brackets centered on the back of the TV or Audio Mount™, gently
thread the screws into the holes by hand, making sure to keep the brackets symmetrical. DO NOT USE AN
ELECTRIC OR BATTERY DRILL until you are certain you have the right size thread. DO NOT OVER TIGHTEN
the screws (Figure 5). When installing an Audio Solutions™ Audio Mount™ 2.1 or 3.1, mount the television
to the Audio Mount™ as instructed in the Audio Mount™ Owner’s Manual and then mount the brackets to
the back of the mount.
NOTE: Use the proper bolts and washers that correspond to the mounting holes on the back of the TV.
Take care to tighten by hand first or damage to the mounting holes can occur. Some TVs without a flat
back may require the use of a spacer when attaching the brackets. If applicable, make sure the two TV
brackets are even and that they’re using the same mounting holes on the bracket. Uneven assembly will
cause the TV screen to slant.
Figure 5 - Attach Brackets to television
NOTE: You will need at least 2 people to finish this mounting procedure. To avoid possible injury, do not
attempt to mount the TV alone.
NO!
YES!
Figure 6 - two Person Install WARNING!
INStAllAtION