Installation – One Systems Pole Mount Mini User Manual
Page 2
and 106IM. These values may also be found on the ONE SYSTEMS web site at
IMPORTANT NOTE: All products in direct weather installations can be
subjected to high wind speeds. For wind speed exposure over 74 miles per
hour (119.1 kilometers per hour, 64.3 knots) the loudspeaker enclosure,
bracket, banding, and link assembly or safety must be inspected for signs of
damage or fatigue!
INSTALLATION
The Pole Mount Mini consists of two parts: the pole bracket assembly, and the
forged shoulder eye bolts and supplied cable assembly. The pole bracket is
shown in Figure 1. The bracket shown in figure 1 is designed for use on circular
poles with diameters of 4 inches (101.6mm) or larger. The Pole Mount Mini may
also be used on square or rectangular pole faces of 3.75 inches (92mm). Round
pole diameters that are smaller than 4 inches or square/rectangular face widths
of less than 3.75 inches must not be used.
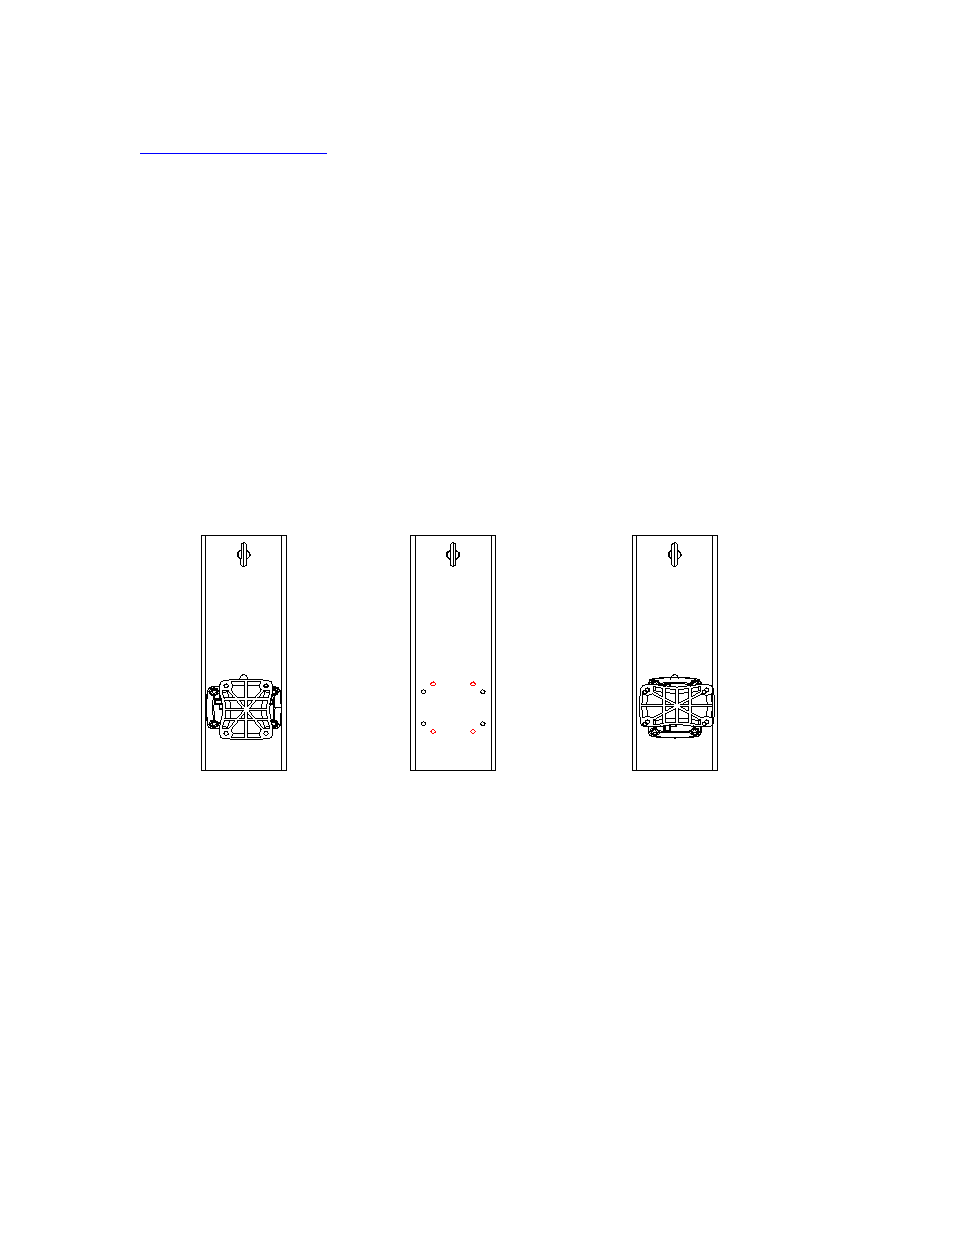
Figure 1
NOTE!
The PT-10 pan and tilt bracket may be oriented in two ways on the Pole Mount
Mini back plate. The orientation on the left is used when the 106IM is to be
mounted. Using this configuration will result in the 106IM being oriented in a
vertical orientation. The PT-10 is mounted using the 4 black holes shown in the
center image above. The red holes, also shown in the center image, should be
used when a 103IM is mounted and the desired orientation of the enclosure is
vertical. The PT-10 should be mounted to the stainless steel back plate before
the back plated is mounted to a pole.