TabletKiosk Sahara Slate PC i575/i535 User Manual
Page 2
Congratulations on your purchase of a TabletKiosk Sahara Slate PC® i500 Tablet PC. This guide
will help you get up and running with your new Tablet PC as quickly as possible.
For more information regarding setting up and using your Sahara Slate PC i500, please consult
the digital User’s Guide located on your desktop or visit our website at
www.tabletkiosk.com
.
What’s in the Box
Your Sahara Slate PC should come securely packaged in its shipping container along with the
items listed below. Contact your dealer immediately if you fi nd that anything is missing or
damaged. Note, however, that contents may be changed without notice.
1.
AC Adapter with Power Cord
2.
Cleaning Cloth
3.
Neoprene Slip Case
4.
Simple Stand
5.
Windows Getting Started Guide (not included if Linux was pre-installed)
6.
This Quick Start Guide
7.
Two (2) Standard Lithium-Ion Battery Packs
8.
Stylus Pen (may not be included with capacitive touch only confi gurations)
Setting Up Your Sahara Slate PC
The following steps will guide you in powering up your Sahara Slate PC for the fi rst time. These
steps might change slightly over time with newer revisions of the installed operating system, or
when your tablet is purchased from a systems integrator or solutions provider.
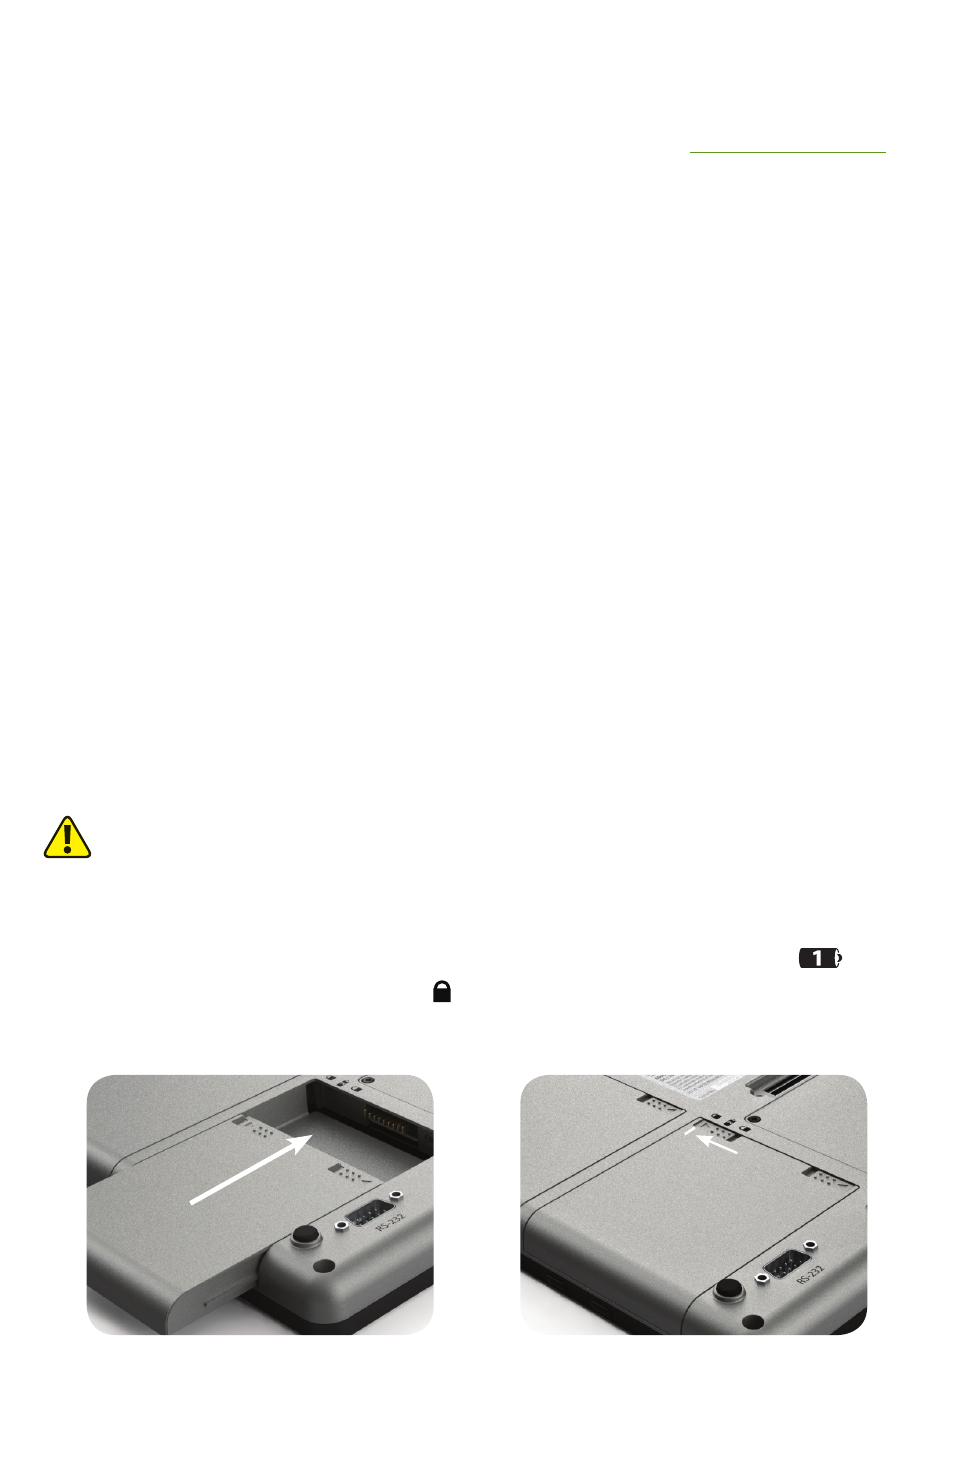
Step 1: Insert the Battery Pack(s)
Turn the tablet over and place it face down on a smooth, clean surface so the back of the system
is facing toward you.
CAUTION: When turning over the Sahara Slate PC, be careful not to place it on a surface that could scratch
or damage the touch panel. You can place the included slip case on the surface before carefully setting the
tablet down to protect the screen.
Align a battery into the battery compartment and then slide it into the computer until it clicks
securely into place. While it does not matter which battery (one or two) that you install fi rst, if
you are only going to install one battery, it should be installed into battery bay one (
).
Slide the battery-locking tab to the locked ( ) position. Once the locking tab clicks into position,
the battery should be securely seated. Repeat for the second battery if applicable.
Align the battery in the bay and slide it into
place. You will hear a click when the battery is
properly seated.
Slide the locking tab on the battery to the
locked position to keep the battery secured in
the bay.