2 flying the array – Adamson SpekTrix User Manual
Page 40
SpekTrix Series User Manual 40 of 72
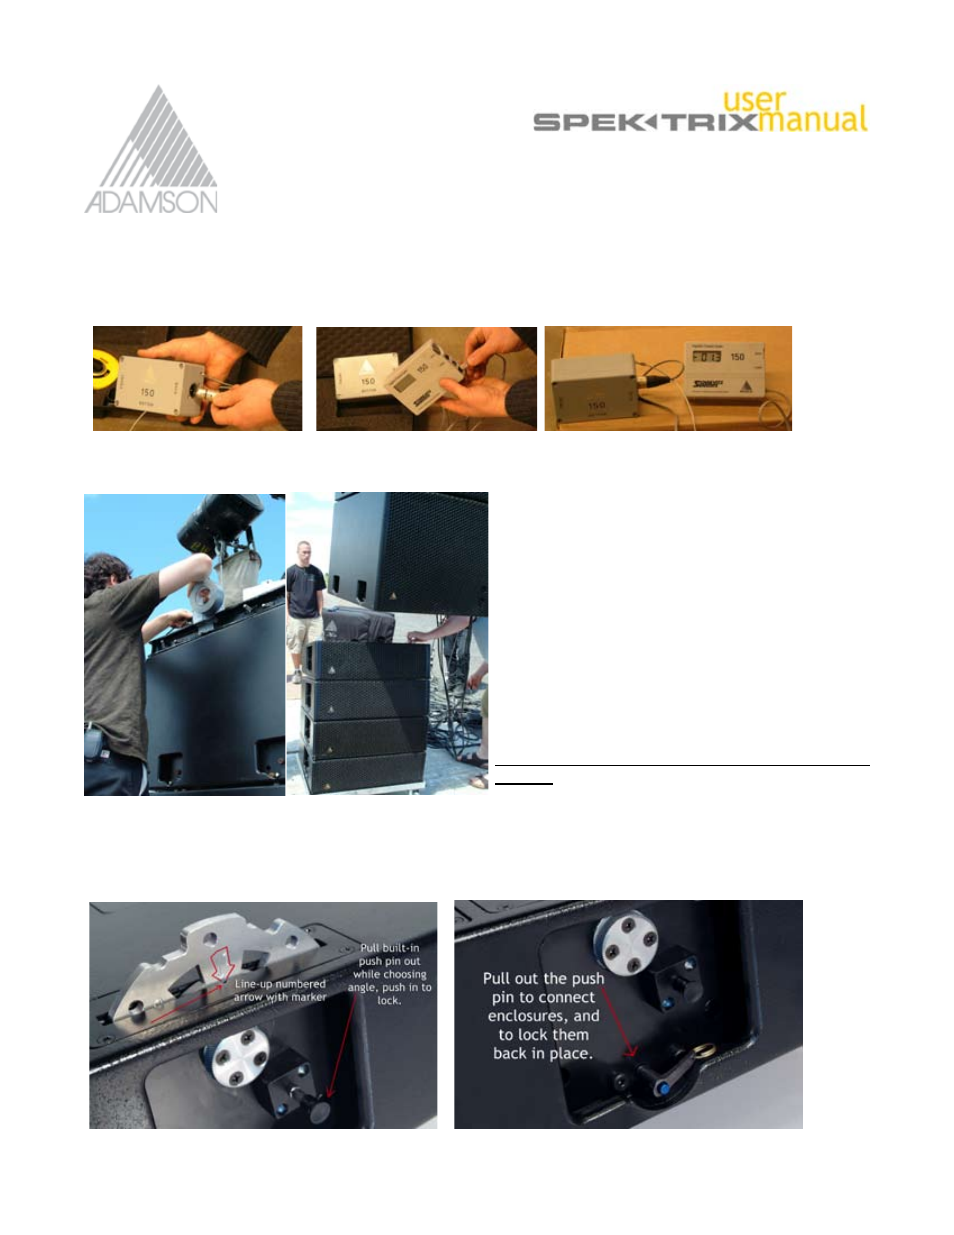
7. Set-up and Calibrate Inclinometer and reader to zero using a flat surface
8. Attach Inclinometer to the top of your rigging frame.
9. Adjust the frame angle to the proper position according the inclinometer reading.
10. Hoist subs up until the bottom box it at a working
level.
Note: When arraying alone (or if you simply prefer
this method of rigging) one must prepare the rigging
positions on the entire SpekTrix 4-stacks prior to flying
the system. When preparing enclosures, reference
your Shooter design, and make sure that when setting
the angles, you work your way from the bottom box to
the top box.
E.g. If there are 8 Spektrix enclosures in your design,
one dolly will have the settings from box 8 (at the
bottom) to box 5 (on top) and the next dolly from box
4 to box 1. To attain a spaceless connection between
the SpekTrix Sub above to the first SpekTrix enclosure,
the top SpekTrix box rigging wheel position must be
set to 4.
11. Wheel the SpekTrix stacks underneath the subs, lower the array of subs so that the rigging wheels on the top
SpekTrix box line-up and pin together with the provided push pins. Lift array to a comfortable working height and
wheel the second SpekTrix set underneath. Lower array so that you can pin the next four to the array using built in
AIR rigging wheel pin.
4.2 Flying the Array
7
.
10. & 11
8. & 9.
3. (Next
Page)