Installation – AGI Security CA-HTDR811 User Manual
Page 3
INSTALLATION
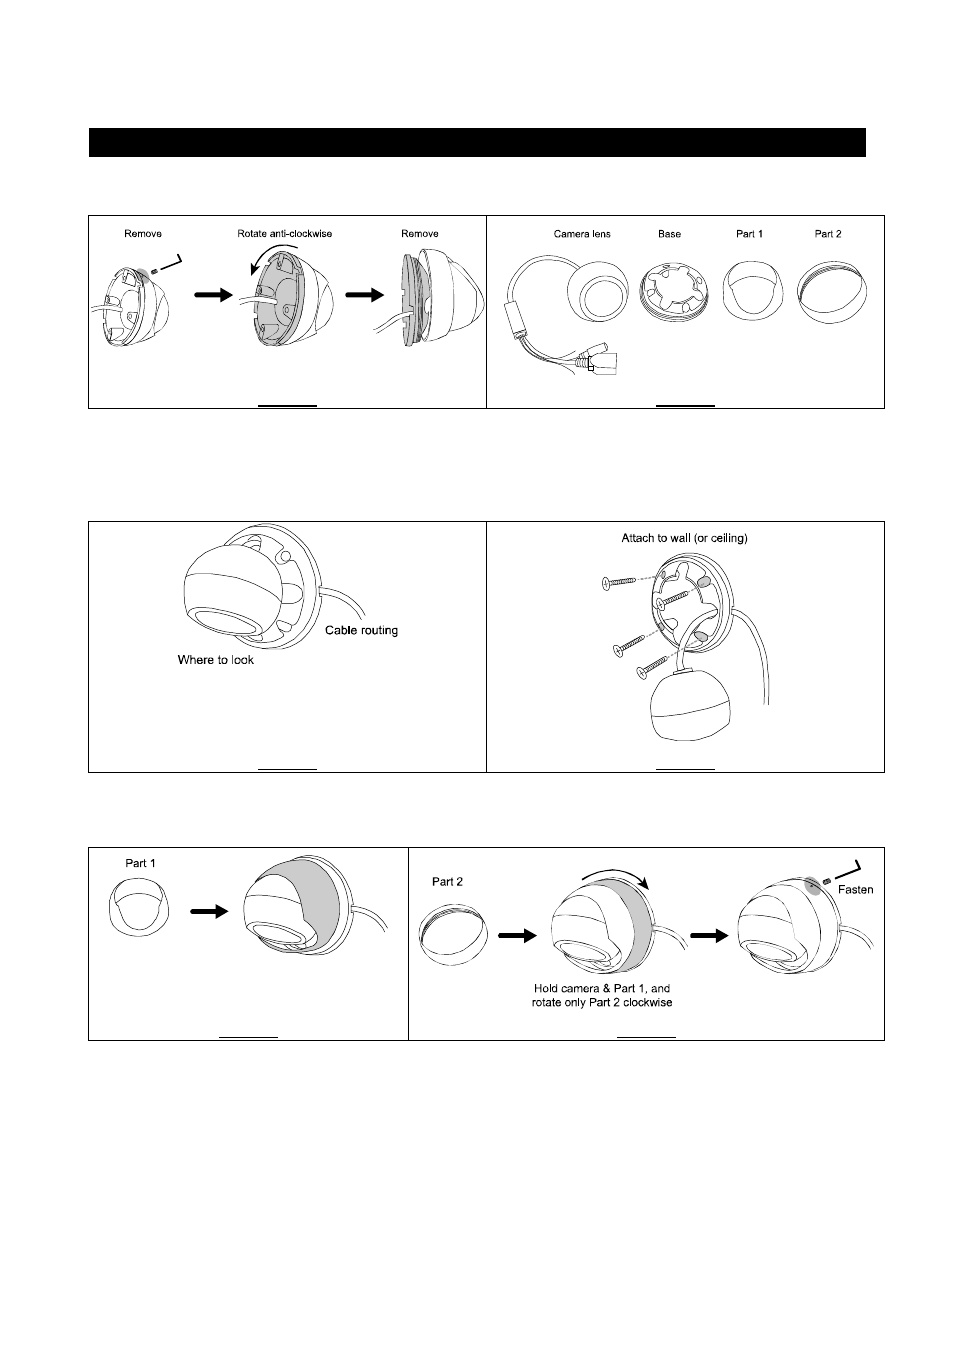
Step1: Find the screw on the camera, and remove it with the supplied wrench.
Then, remove the camera base as shown in Figure 1, and disassemble the camera to four parts as shown in Figure 2.
Figure 1
Figure 2
Step2: Locate where you want to install this camera (wall or ceiling), and drill holes on the wall or ceiling for securing the
bracket and routing the cables (if necessary).
Step3: Attach the bracket to the wall (or ceiling), and make sure the cables are routed and arranged properly in the bracket,
as shown in Figure 3.
Step4: Secure the bracket to the wall (or ceiling), as shown in Figure 4.
Figure 3
Figure 4
Step5: Slightly adjust the camera lens to where it’s supposed to face, and replace Part 1 and Part 2 back, as shown in
Figure 5 and Figure 6.
Step6: Hold the camera lens and Part 1, and rotate only Part 2 clockwise, as shown in Figure 6.
Figure 5
Figure 6
Step7: Power on your camera, and check the viewing angle on the PC.
Step8: Adjust the position and the viewing angle of the camera, if necessary.