Backboxsw installation continued – Amina BackboxSW345 V1.4 User Manual
Page 6
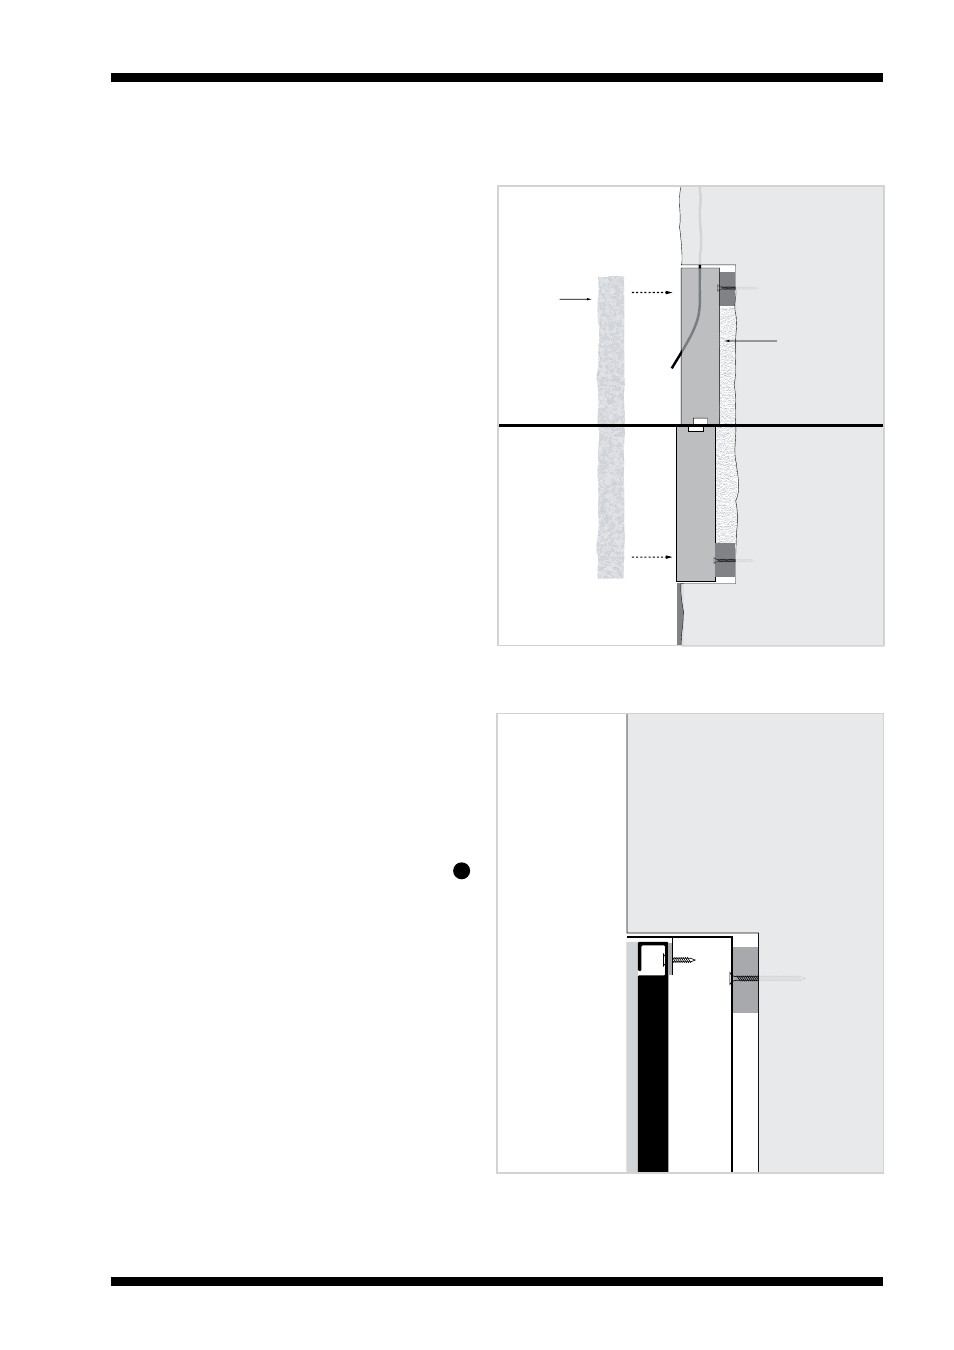
rendered wall
no render
03
BackboxSW installation continued...
Install BackboxSW
Make a small hole in one of the rubber
grommets and pull the speaker cable
through it and into the BackboxSW. There are
four slots in the base of the BackboxSW and
using suitable screws (not supplied), fix the
BackboxSW to the brickwork/concrete within
the cavity. Ensure the front edge of the
BackboxSW aligns flush with the front face of
the surface which will be plaster skimmed.
Shims may be fitted behind the BackboxSW
to achieve a level solid fixing.
It is recommended to add sound absorbing
mineral wool (1” maximum thickness) to the
inside of the BackboxSW and expanding
foam around the sides to prevent resonance.
NB: If there is a layer of render to be applied
or already applied to the brickwork, be sure
to align the front edge of the BackboxSW to
the front edge of the render (as shown in the
lower section of the image)
03
Fixing the speaker to the BackboxSW
Once the speaker has been electrically
connected it can now be fixed to the
BackboxSW.
Remove the backing paper from the 6
adhesive pads on the speaker mounting tabs
and carefully position the speaker onto the
mounting tabs then apply moderate pressure.
There should be an equal perimeter gap
between the BackboxSW and the edge of the
speaker.
Use the flange head screws (supplied with
the BackboxSW) to fix the corners of the
speaker to the four corner mounting tabs.
Testing and plastering
Speaker testing should always be done
before plastering. Please refer to the
loudspeaker’s installation guide for testing
information and for details on how to plaster
your loudspeaker after you have installed the
BackboxSW.
04
05
Mineral Wool
Expanding foam
Top View
04
03
3