Backboxcv installation continued – Amina BackboxCV345 V1.2 User Manual
Page 6
04
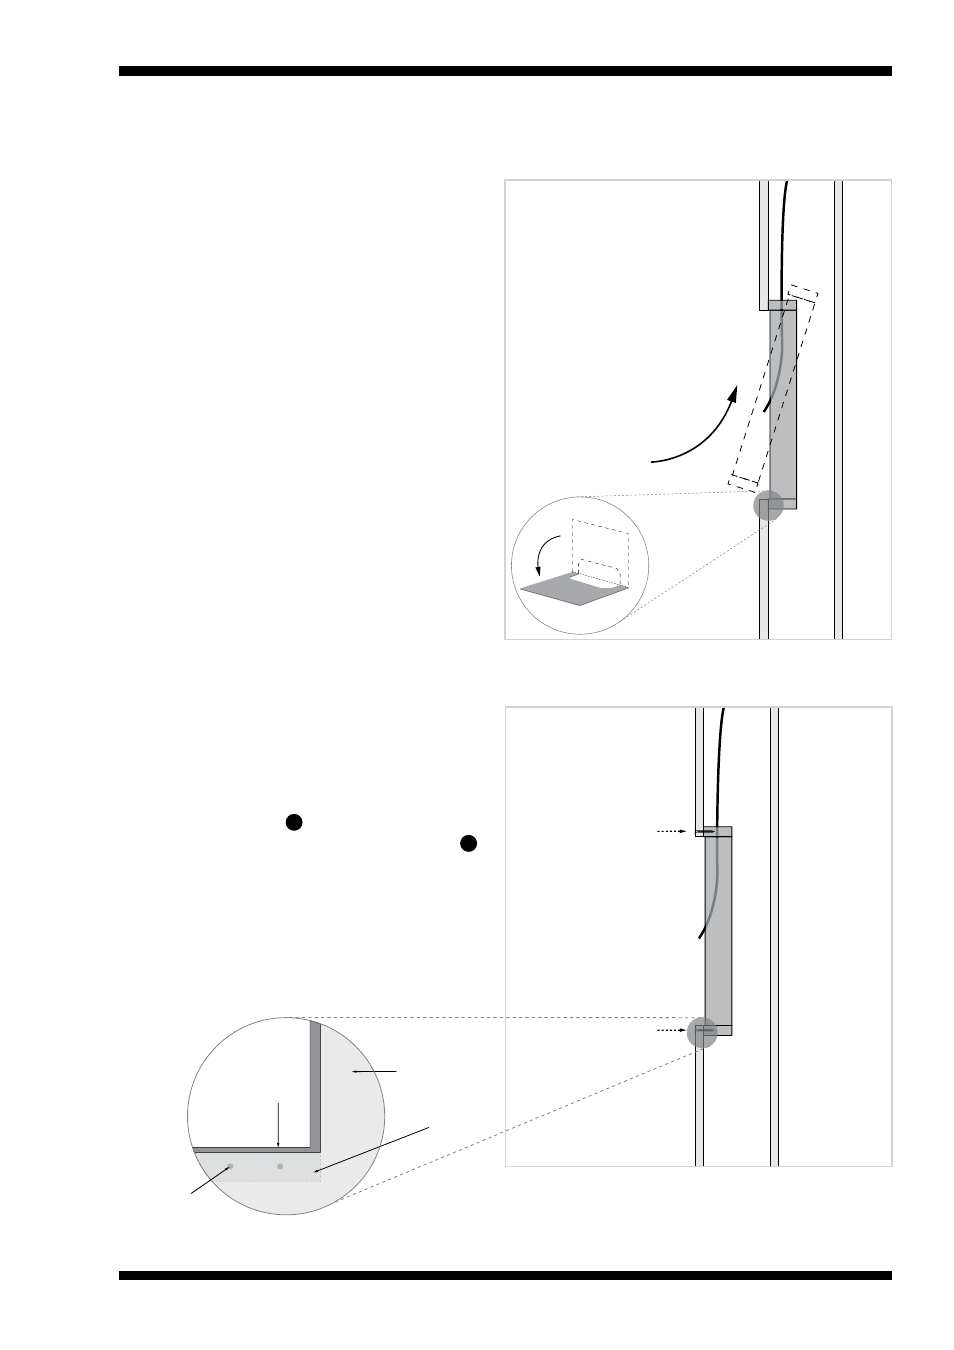
Fix BackboxCV and insert insulation
Using 8 drywall screws (4 at each end) fix
the BackboxCV by screwing through the
plasterboard and self tapping into the
backbox mounting lip . When positioned
correctly, the backbox’s speaker mounting lip
with soft foam surface should be visible along
all four sides of the aperture.
It is recommended to add sound absorbing
mineral wool inside the surrounding cavities
to further reduce sound transmission behind
the speaker. (2” maximum thickness)
03
Locate cable and position BackboxCV
Pull the speaker cable through the rubber
grommet in the top side of the BackboxCV
and ensure speaker cables are pulled
through with a manageable length available.
Doing this will make it easier to connect the
cable to the speaker later on in the
installation process.
Position the BackboxCV within the aperture
so as to rest it against the back side of the
plasterboard.
Use the fold out tabs at either end of the
backboxCV to help support it in position
before securing it to the plasterboard.
A 75mm/3" cavity depth is required to fit a
BackboxCV.
03
Side View
Using the
fold out tabs...
04
Plasterboard
Fixing screw
Mounting
Lip
Backbox
Side View
Front View
Fixing screw
BackboxCV installation continued...
03
4
3