Opera tion o ver view, Edit setup menu pre set mana gement, But ton c ol or us age output setup input setup – Analog Way ASCENDER 16 (LIVECORE) - Ref. ASC1602 Quick Start Guide User Manual
Page 3
OPERA
TION
O
VER
VIEW
EDIT
SETUP
MENU
PRE
SET
MANA
GEMENT
Pr
ec
on
fig.:
Se
tup assis
tan
t f
or adjus
ting all basic se
tup
s.
Outputs:
Manag
e
your
outputs
and
ha
ve
access
to
ev
er
y se
ttings
and par
ame
ter
s.
Inputs:
Con
figur
e y
our inputs c
onnect
ed t
o y
our
Ascender 16.
Libr
ar
y:
Load y
our Log
os and Fr
ames in
to the s
ys
tem.
Log
os:
Con
figur
e Log
os and Fr
ames selections.
Con
fidence:
Con
figur
e the Con
fidence monit
or
.
Monit
oring:
Con
figur
e
the
oper
at
or
’s
monit
or
including
the
resolution
and
cho
ice
of
la
yout,
to
sho
w
input
or
output
pr
evie
w
combina
tions.
Blending:
Con
figur
e the blending.
Ser
vices:
Access
to
all
Analog
W
ay
main
tenance
ser
vices
(upda
te, e
tc.).
Con
tr
ol:
Access all c
on
tr
ol se
ttings.
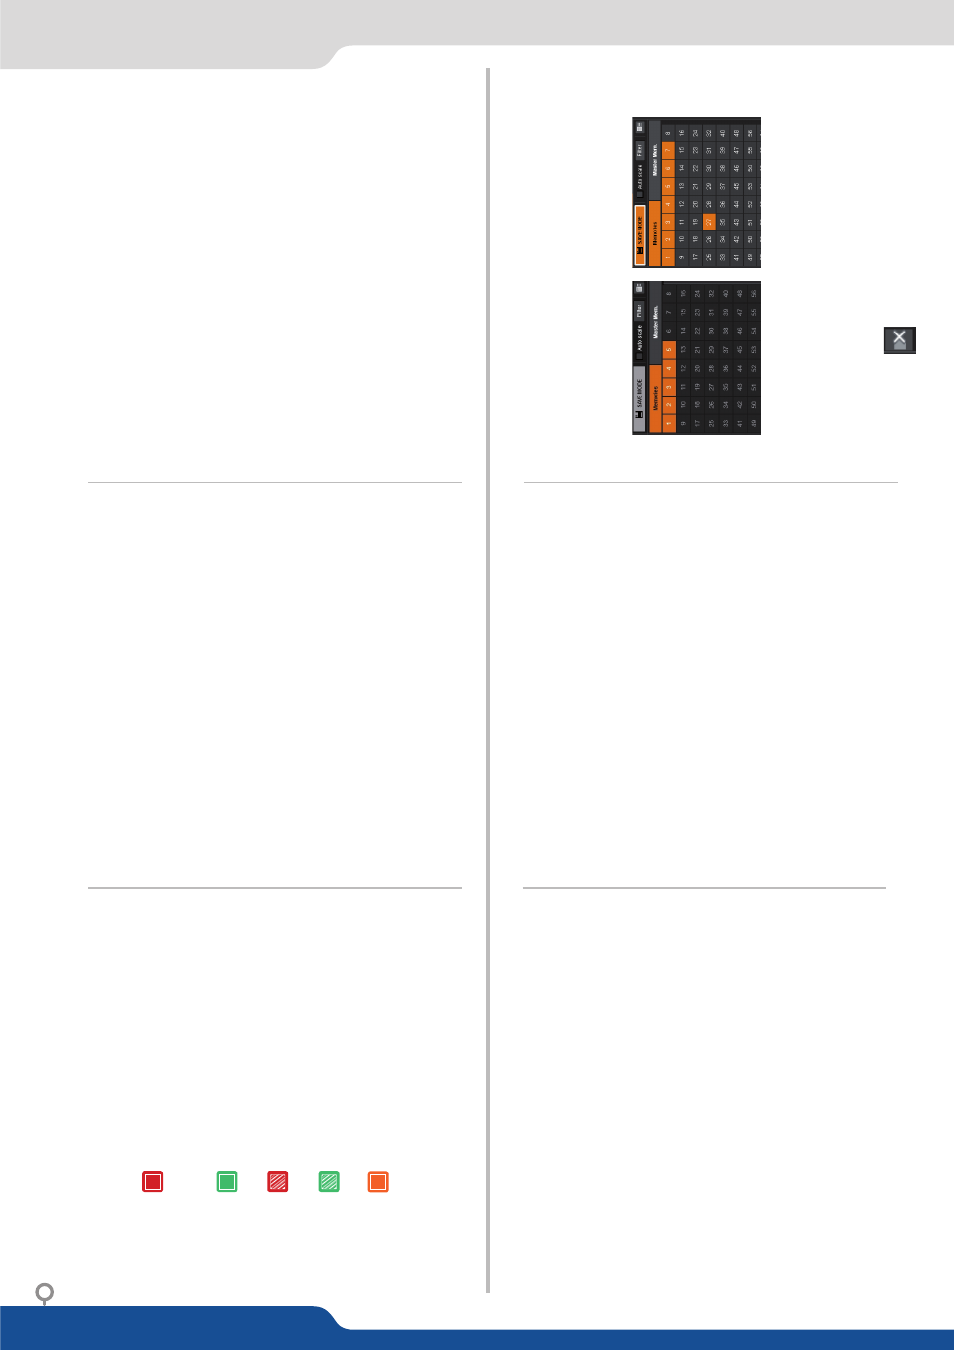
Once
you
build
a
pr
ese
t,
you
can
sa
ve
it
as
one
of
the
144
pr
ese
t
slots the
Ascender 16
off
er
s.
•
Click on
SA
VE MODE
then choose y
our pr
ese
t number
.
•
You
can
load
your
pr
ese
t
at
an
y
time
on
Pr
ogr
am
or
Pr
evie
w
by
clickin
g
on
the
pr
ese
t number
(with
the
Sa
ve
mode
butt
on
disabled),
or
simply
dr
ag
and
dr
op
the
pr
ese
t in
to
the
Pr
ogr
am
or Pr
evie
w windo
w
s.
•
To r
ese
t a pr
ese
t,
please click on the pr
ese
t number holding
SHIFT
on
y
our k
eyboar
d.
Then
in
to the windo
w
s belo
w click on
the r
ese
t butt
on
Once
you
r se
tup
is
comple
te,
click
on
the
EDIT
tab t
o s
tart building
your pr
ese
ts.
•
Resiz
e or r
eposition y
our la
yer b
y clicking and dr
ag
ging the la
yer
.
•
Load
and
place
all
your
la
yer
s with
your
mouse
and
use the t
ak
e
butt
on t
o send it t
o y
our pr
ogr
am
• Dr
ag sour
ces in
to la
yer
s t
o chang
e the sour
ce
Other
se
ttings
ar
e
av
ailable
for
la
yer
s,
please
re
fer
to
the
user
manual.
Oper
ation mode:
Choose
your
oper
ation
mode
using
the
se
tup
menu
(SETUP
>
Pr
ec
on
fig
>
scr
ee
ns)
t
o
dr
ag and
dr
op
your
unused
ou
tput
to
the select
ed mode.
Output f
orma
t/r
at
e:
Under
SETUP
>
OUTPUT
, click
on
the
select
ed
output
on
the
le
ft
to
ha
ve access t
o the se
tup.
Then
choose
the f
orma
t and
ra
te.
(Ra
te
choice
is
only
av
ailable
for
Monit
oring
/Pr
evie
w
output,
the
main
outputs
will
use
the
ra
te
de
fined
under
SETUP
>
Pr
ec
on
fig > In
ternal r
at
e, Fr
amelock, e
tc.
)
Output se
ttings:
Under
this
menu
you
ha
ve
access
to
the
HDCP
ON/OFF
fea
tur
e,
Op
tic
al SFP r
es
tart and t
es
t pa
ttern possibilities.
TIP:
Alw
ay
s
tr
y
to
use
na
tiv
e
resolution
of
your
scr
eens/
pr
oject
or
s t
o a
void additional sc
aling.
Click on
SETUP
> INPUT
> GENERAL
to ha
ve
an o
ver
vie
w of y
our
inputs.
Click
on
AUT
OSET ALL
to
launch
the
aut
oma
tic
de
tection
of
all
inputs once all sour
ces ar
e c
onnect
ed and turned on.
Individual input se
tting:
Click
on
the
le
ft
on
the
individual
input
se
tup
in
or
der
to
de
fine
your input
As
each
input
has
multiple
input
plugs,
you
mus
t
choose
one
plug
to
displa
y
as
this
input.
The
remaining
non-displa
yed
plugs
remain activ
e and c
an s
till be c
on
figur
ed.
Click
on
your
AC
TIVE PL
UG
in
or
der t
o
choose
the displa
yed
input. Click
on
the
SETU
P PL
UG
to
st
art se
tup
of
a plug
not
curr
en
tly
chosen as the activ
e plug. (Not necessarily displa
yed).
BUT
TON
C
OL
OR
US
AGE
OUTPUT
SETUP
INPUT
SETUP
Solid r
ed:
#1 = Sour
ce is on the Pr
ogr
am output
#2 = Fr
ee
ze enable
#3 = St
and-b
y butt
on
#4 = Pr
ese
t Selection
Solid gr
een:
Solid or
ang
e:
Blinking r
ed:
Blinking gr
een:
#1 = Sour
ce is on Pr
evie
w
#2 =
Function a
vailable f
or modific
ation
Con
te
xtual butt
on
La
yer/
sour
ce select
ed or is curr
en
tly activ
e
on the Pr
ogr
am output
La
ye
r/
sour
ce
sele
ct
ed or is not curr
en
tly
activ
e on the Pr
ogr
am output