Chapter 6 : remote control software, 1. connections, 2. software installation – Analog Way V-Scale C - VSL300 User Manual
Page 29: 3. communication setup
VSL range
PAGE 29
Chapter 6 : REMOTE CONTROL SOFTWARE
Your device is shipped with a Windows compatible Remote Control Software. This software allows you to control and make
all adjustments by a simple mouse click.
NOTE: Preferably use Windows NT, 2000 or XP for LAN operation.
NOTE: The latest Remote Control Software is available on our web
6-1. CONNECTIONS
c CONNECTING TO THE RS-232 PORT:
-Connect the serial port of your control device to the RS-232 port (DB9 Female connector) of the device with a
straight cable (DB9 Female / DB9 Male).
-Speed transmission: 9600 bauds, 8 data bits, 1 stop bit, no parity bit, no flow control.
-Pin-out:
PIN #
FUNCTIONS
2 TRANSMIT
DATA
(Tx)
3 RECEIVE
DATA
(Rx)
5 GROUND
(Gnd)
d CONNECTING TO THE LAN PORT (optional on the VSL241 only):
- Connect the LAN port (RJ45 connector) of the device to your network according to your installation.
6-2. SOFTWARE INSTALLATION
c Turn your computer ON and wait for Windows to completely start.
d Insert the CD-ROM into your drive: the ANALOG WAY home window will open automatically.
e Select the language of the CD-ROM menus, then click on "Install a Remote Control Software" and select the name
of your device.
IMPORTANT: If the Autorun is not enabled: From the Windows desktop, open My Computer and select the CD-
ROM drive. Select the Autorun folder, then select the autorun.exe file.
f Follow the Windows installation instructions.
6-3. COMMUNICATION SETUP
c Connect the RS-232 or RJ45 cable between the V-SCALE and the control device as indicated in the section 6-1.
d Then only power ON all of the devices.
e Click on the program files VSL in Start>program>ANALOGWAY>VSL to run the software.
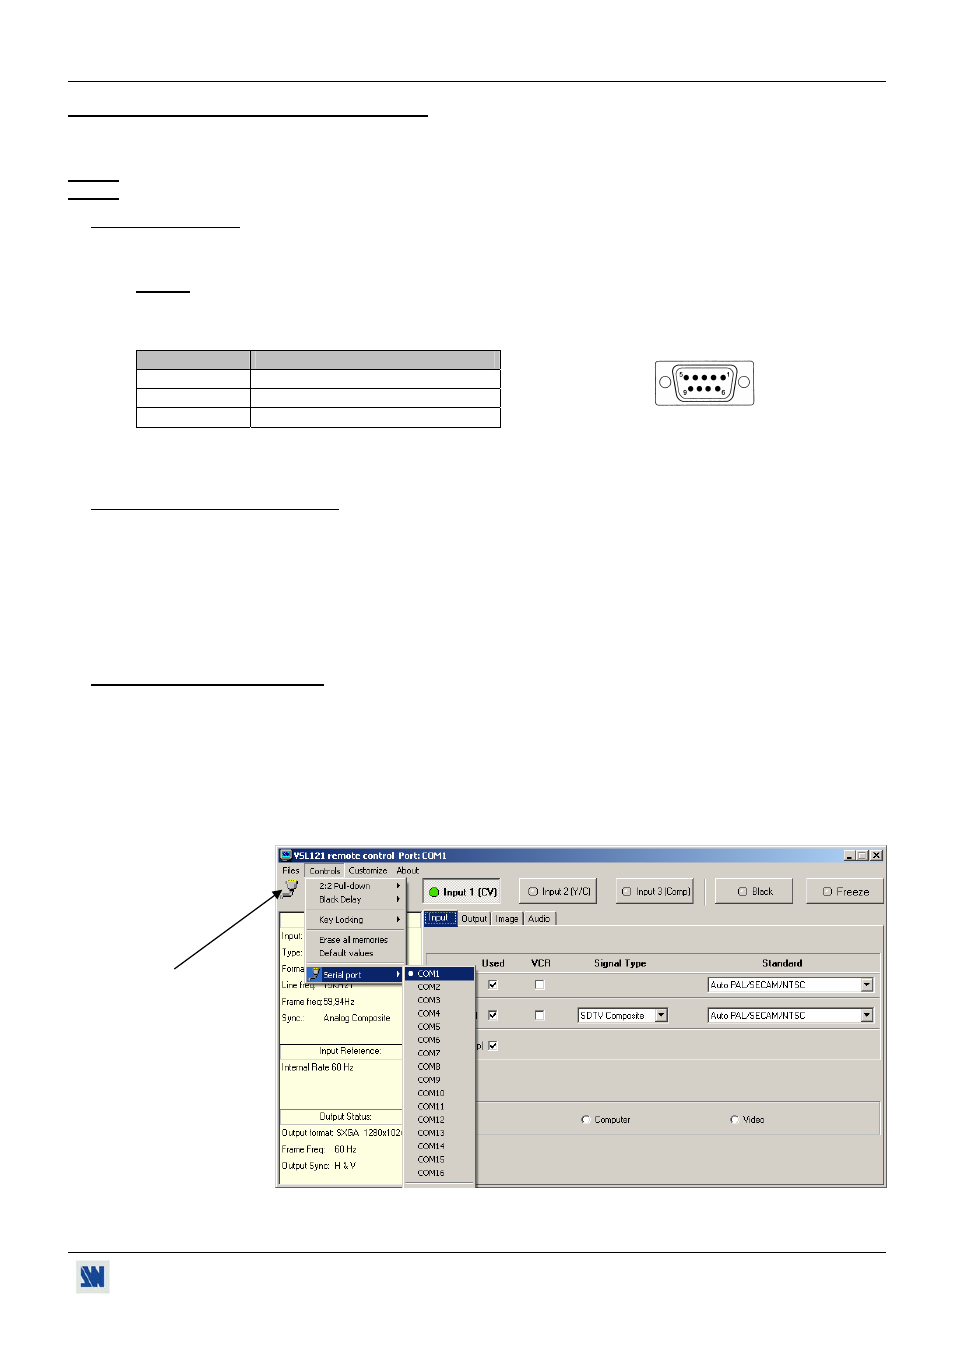
f Click on Controls menu and select RS232/LAN setup, then:
• CASE OF RS-232 PORT:
- With the front panel display, verify that the RS-232 port is activate (CONTROL > RS232/LAN port > RS232).
- With the Controls menu of the software, select RS232/LAN setup, then select the COM port number
corresponding to the connection of the device.
DB9 female (Rear panel of the device)
When the
communication
is established,
the message
"Device
connected" is
displayed.